I began this by making a Trello board to lay out how I want to get my work done over the weeks, similar to my last Western project, I’ve left the final week blank just in case I fall behind.
I then added a description and some videos onto some of the boards on the Trello board. I actually started this task on 21/11/19 but to keep everything in order with the planner I rounded it up to the next week.
Week Number & Date: Week 2 – 25/11/19 
List of Tasks planned for this week:
This week I plan to have this all done, but I’m not too worried if I don’t get these done since I’ve left the 4th week blank to do work which I haven’t done.
I like this work flow as it means my deadlines aren’t that strict.
On 3 of these I’ve posted Youtube videos which can help me out.
Current Position –
- What did I do this week?(Screenshots/Videos/Photos & annotations)
Music

For music, I began by looking for royalty free Synthwave music which I cound download for free and use in my project without any copyright restrictions, I found this Youtube channel which had many Royalty Free music on which was free to use, and he had a whole playlist full of Synthware music, and this would work perfectly in my game in my opinion.
But I wasn’t going to just leave it at this, I needed to look into other artists which I can use their music for free in my game.
Before I knew what Synthwave was as music, I made a few tunes which I thought were Synthwave from only looking at Synthwave pictures, and the music I made was very different to Synthwave.
I made the music in Mixcraft, by connecting my Piano to my PC, and then I recorded a Midi of a few random notes put together and then added a few other instruments into the song, and then some beats looping in the background and this is what I came up with:
https://drive.google.com/file/d/1KMW5XZMmfTxu7xbmoIAxypgPPePCErhE/view?usp=sharing
I think i’ll deal with music properly when I get my game working so I can pick music which would be perfect for my game, for the time being I’m going to listen to the above youtube playlist whilst I develop my game.

Sketches

I began this by doing quick sketches on the train of what I want my game to look like, and how I want it to be laid out like, of course I knew it was going to be 3D but doing this helped me try and determine what I want the camera to be like, but I can’t really 100% tell at this point if what I drew is going to be right as I usually come up with the perfect layout during the development of my game.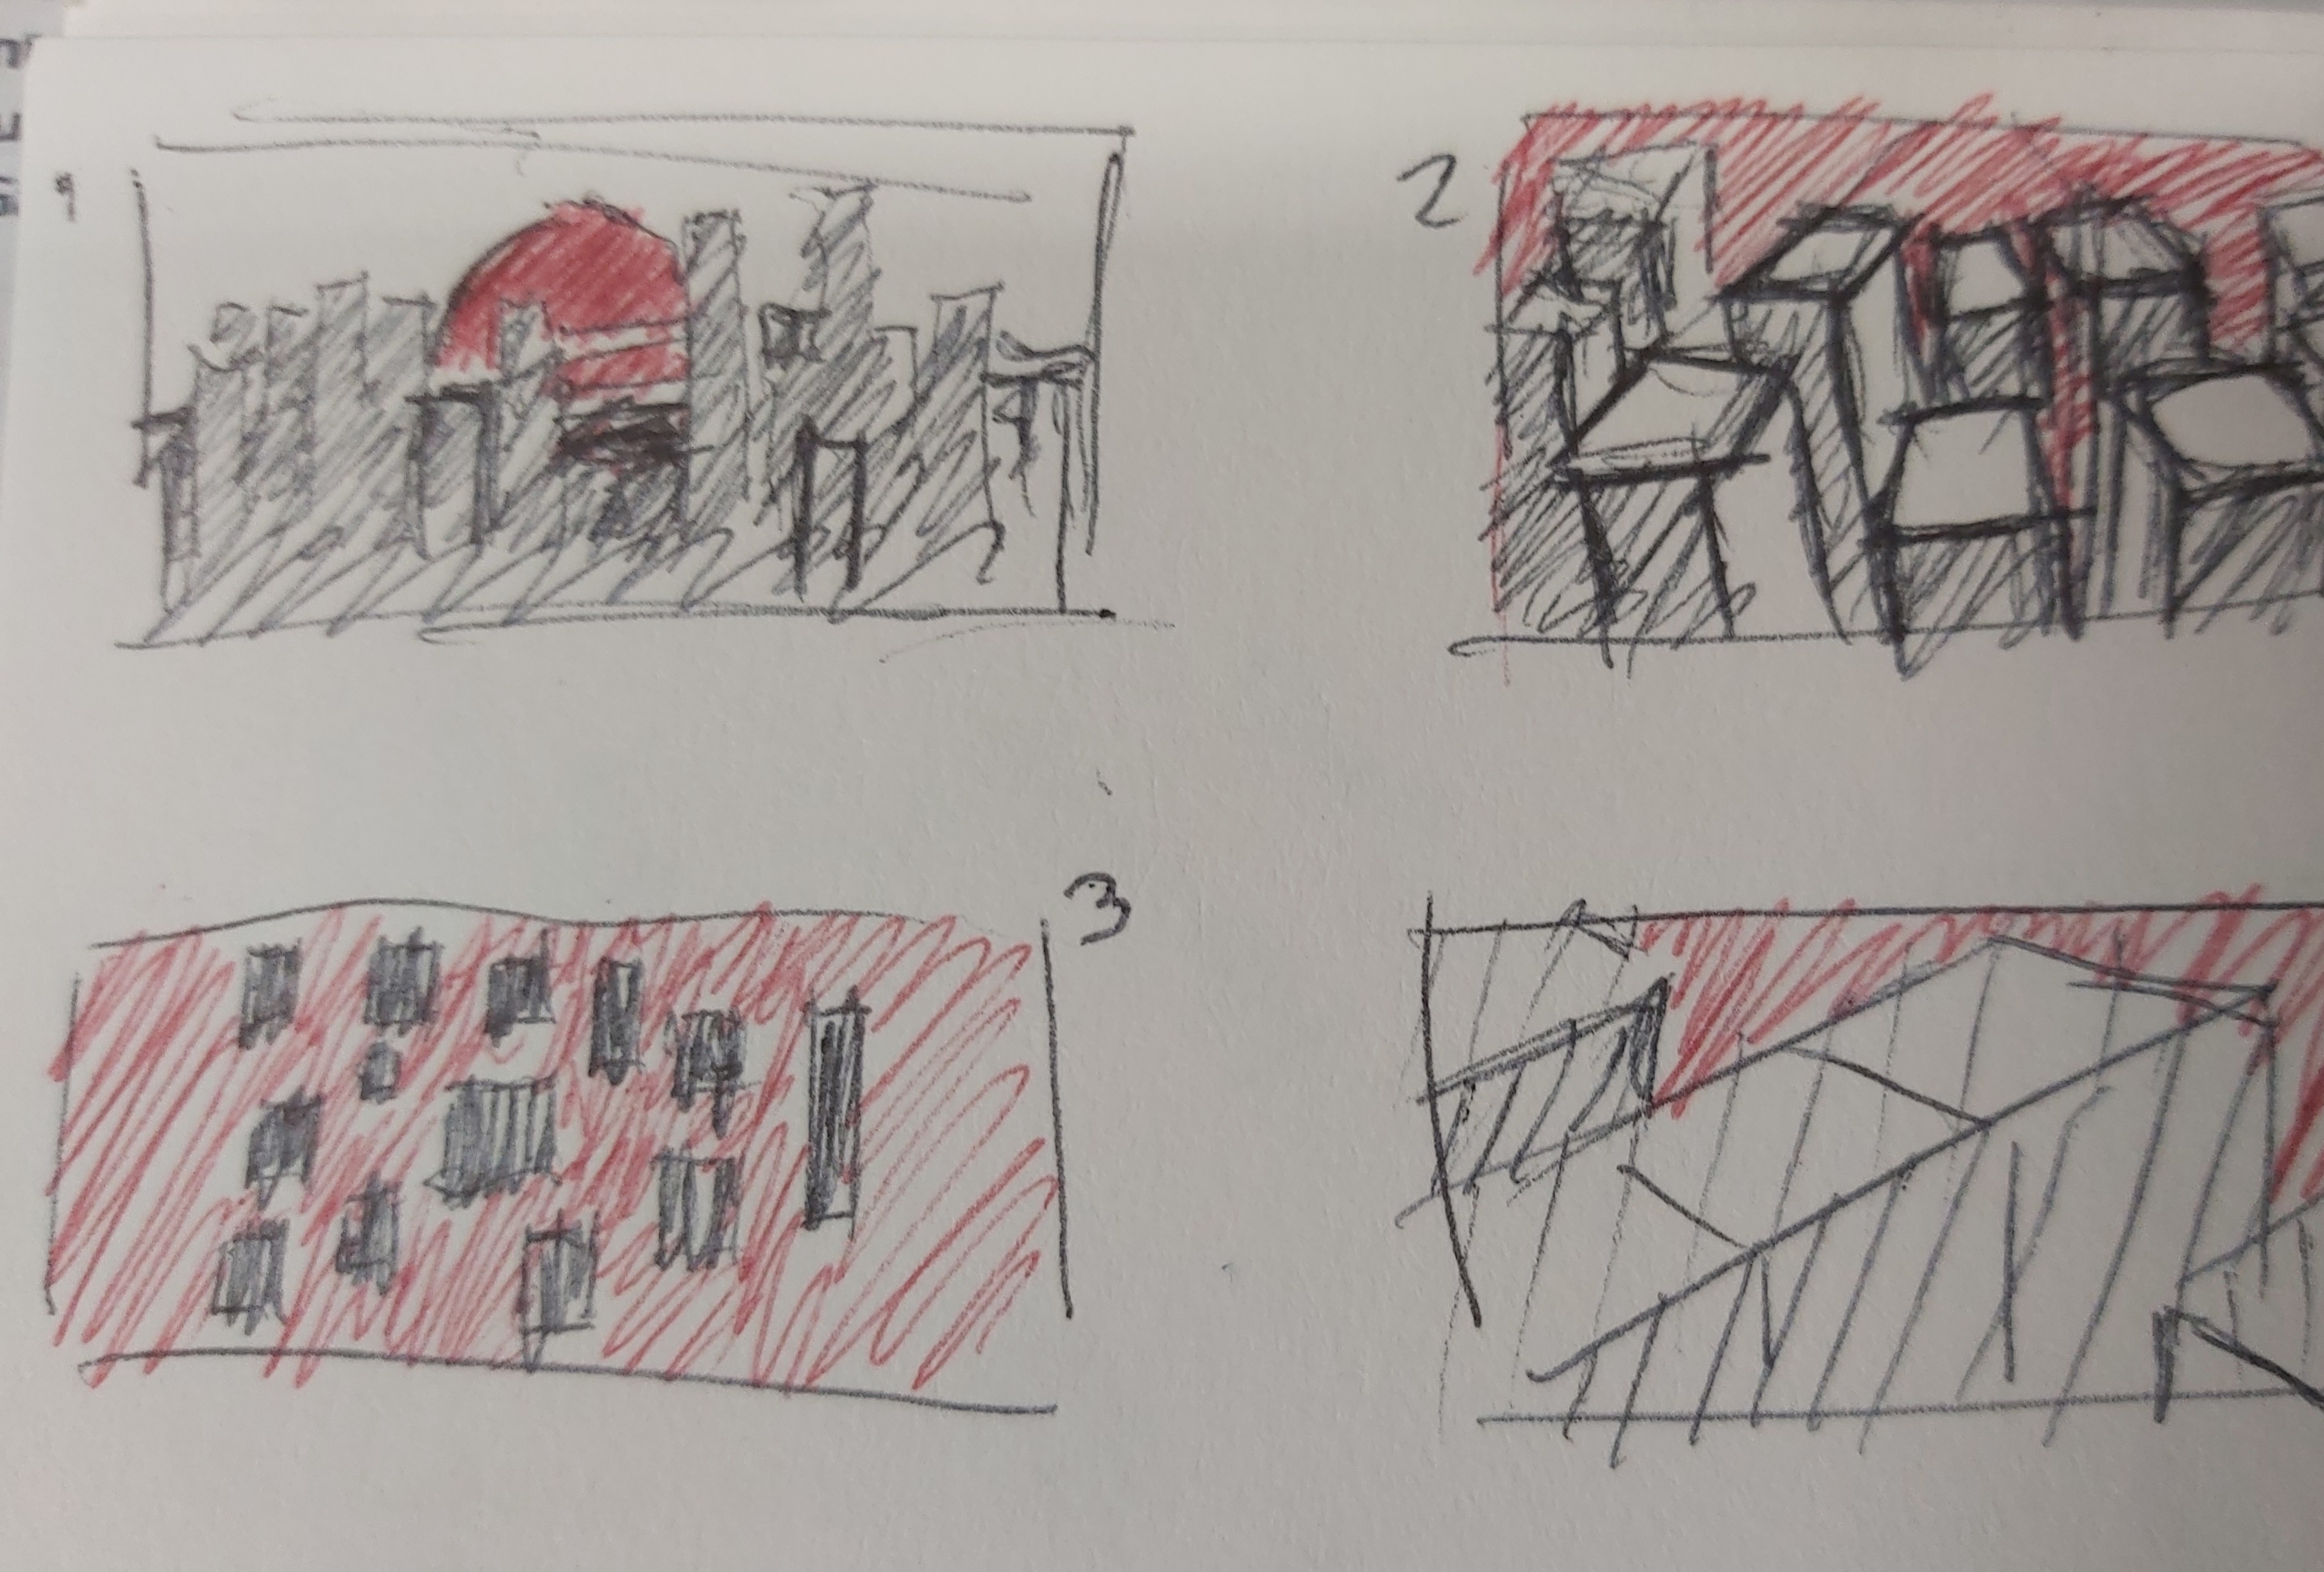
These sketches don’t accurately depict what I want my project to look like at all, they’re very rough sketches, that is all, and the red isn’t really accurate either since I know I won’t be using black and red as that isn’t really matching up with the colour pallets of Outrun which I have made, but the idea is that I wanted a city where the buildings are all different heights and the style is very dramatic and obvious, which is exactly what I want to go for with this outrun theme, I really like the first sketch that I done since it lays out a huge city with a gigantic sun in the background, and of course I’m going to have the outlines on the sun like all the other Outrun edits.
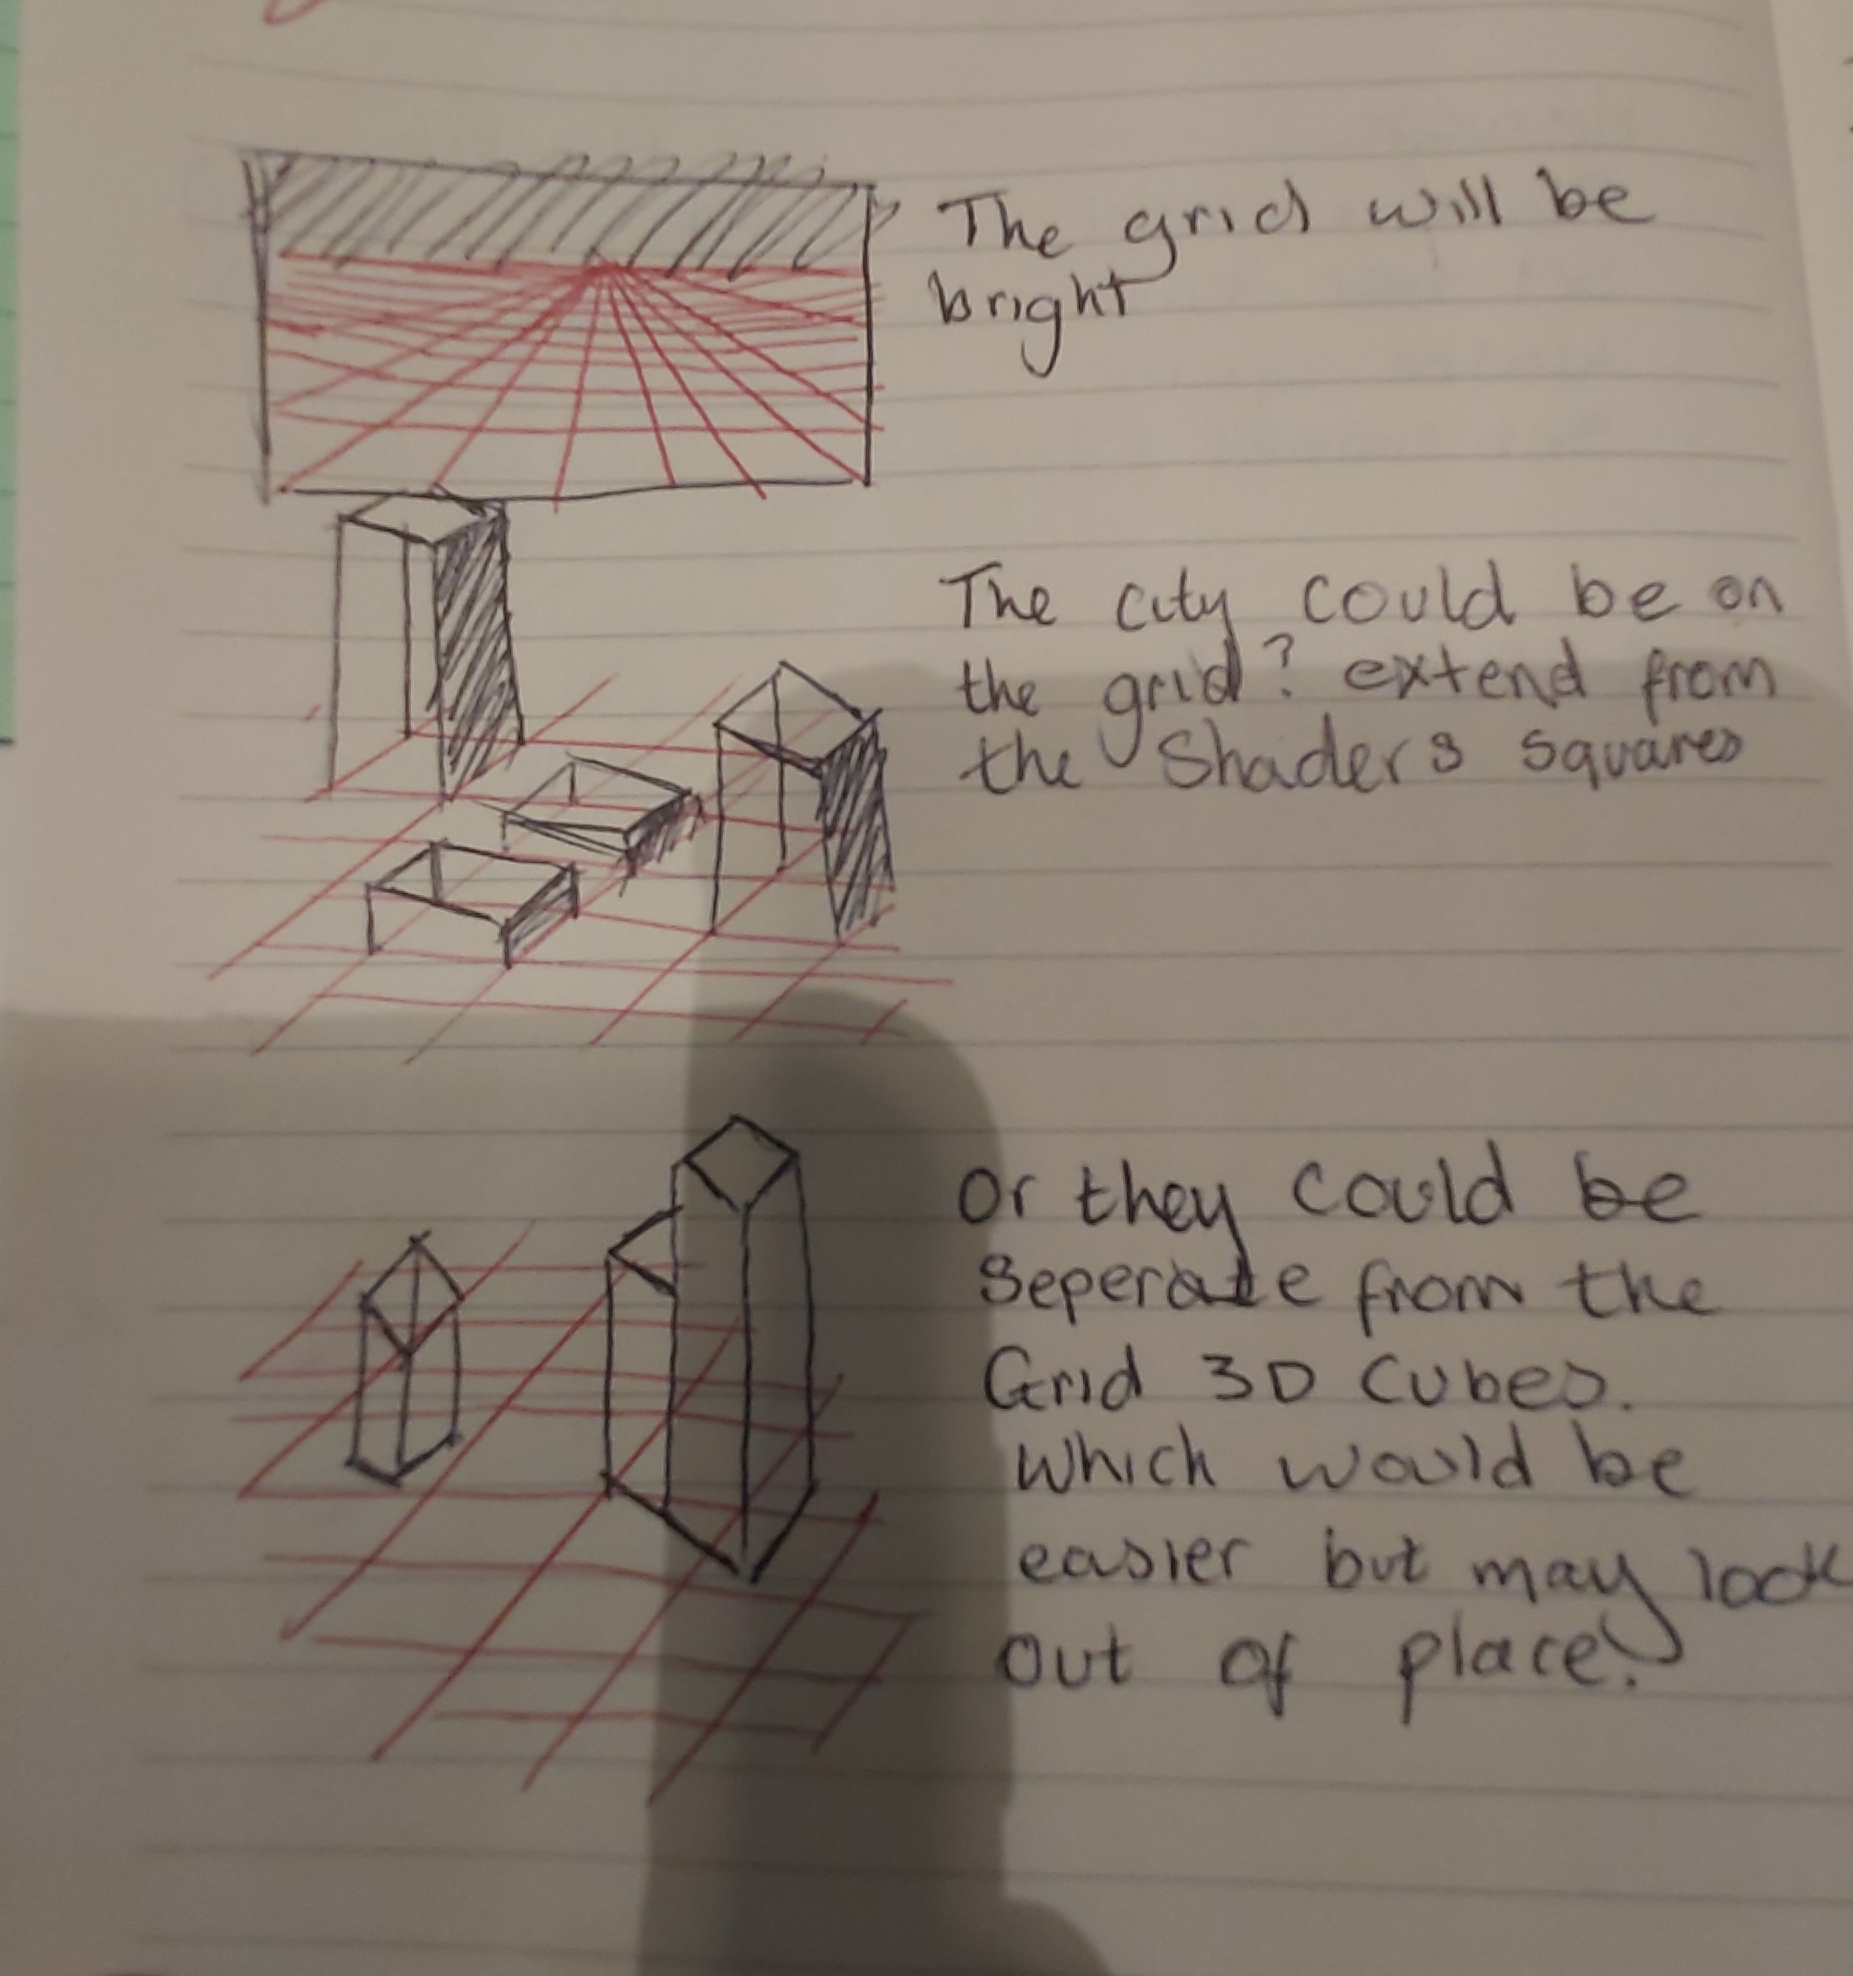
With my sketches I next plan to do some sketches of how I want the grids and the background to look like before I put the city over the top of it, since the player would see the background of the city when they get launched into the sky so it’s important to know how I’m going to do that.
I would also need to do some sketches of how I’m going to make the character, since I don’t want to model anything too high poly or realistic.
So then I began doing some very basic character sketches, but I still don’t know what I want to do with the character so I think at the start I will keep it simple making the character a cube or a triangle.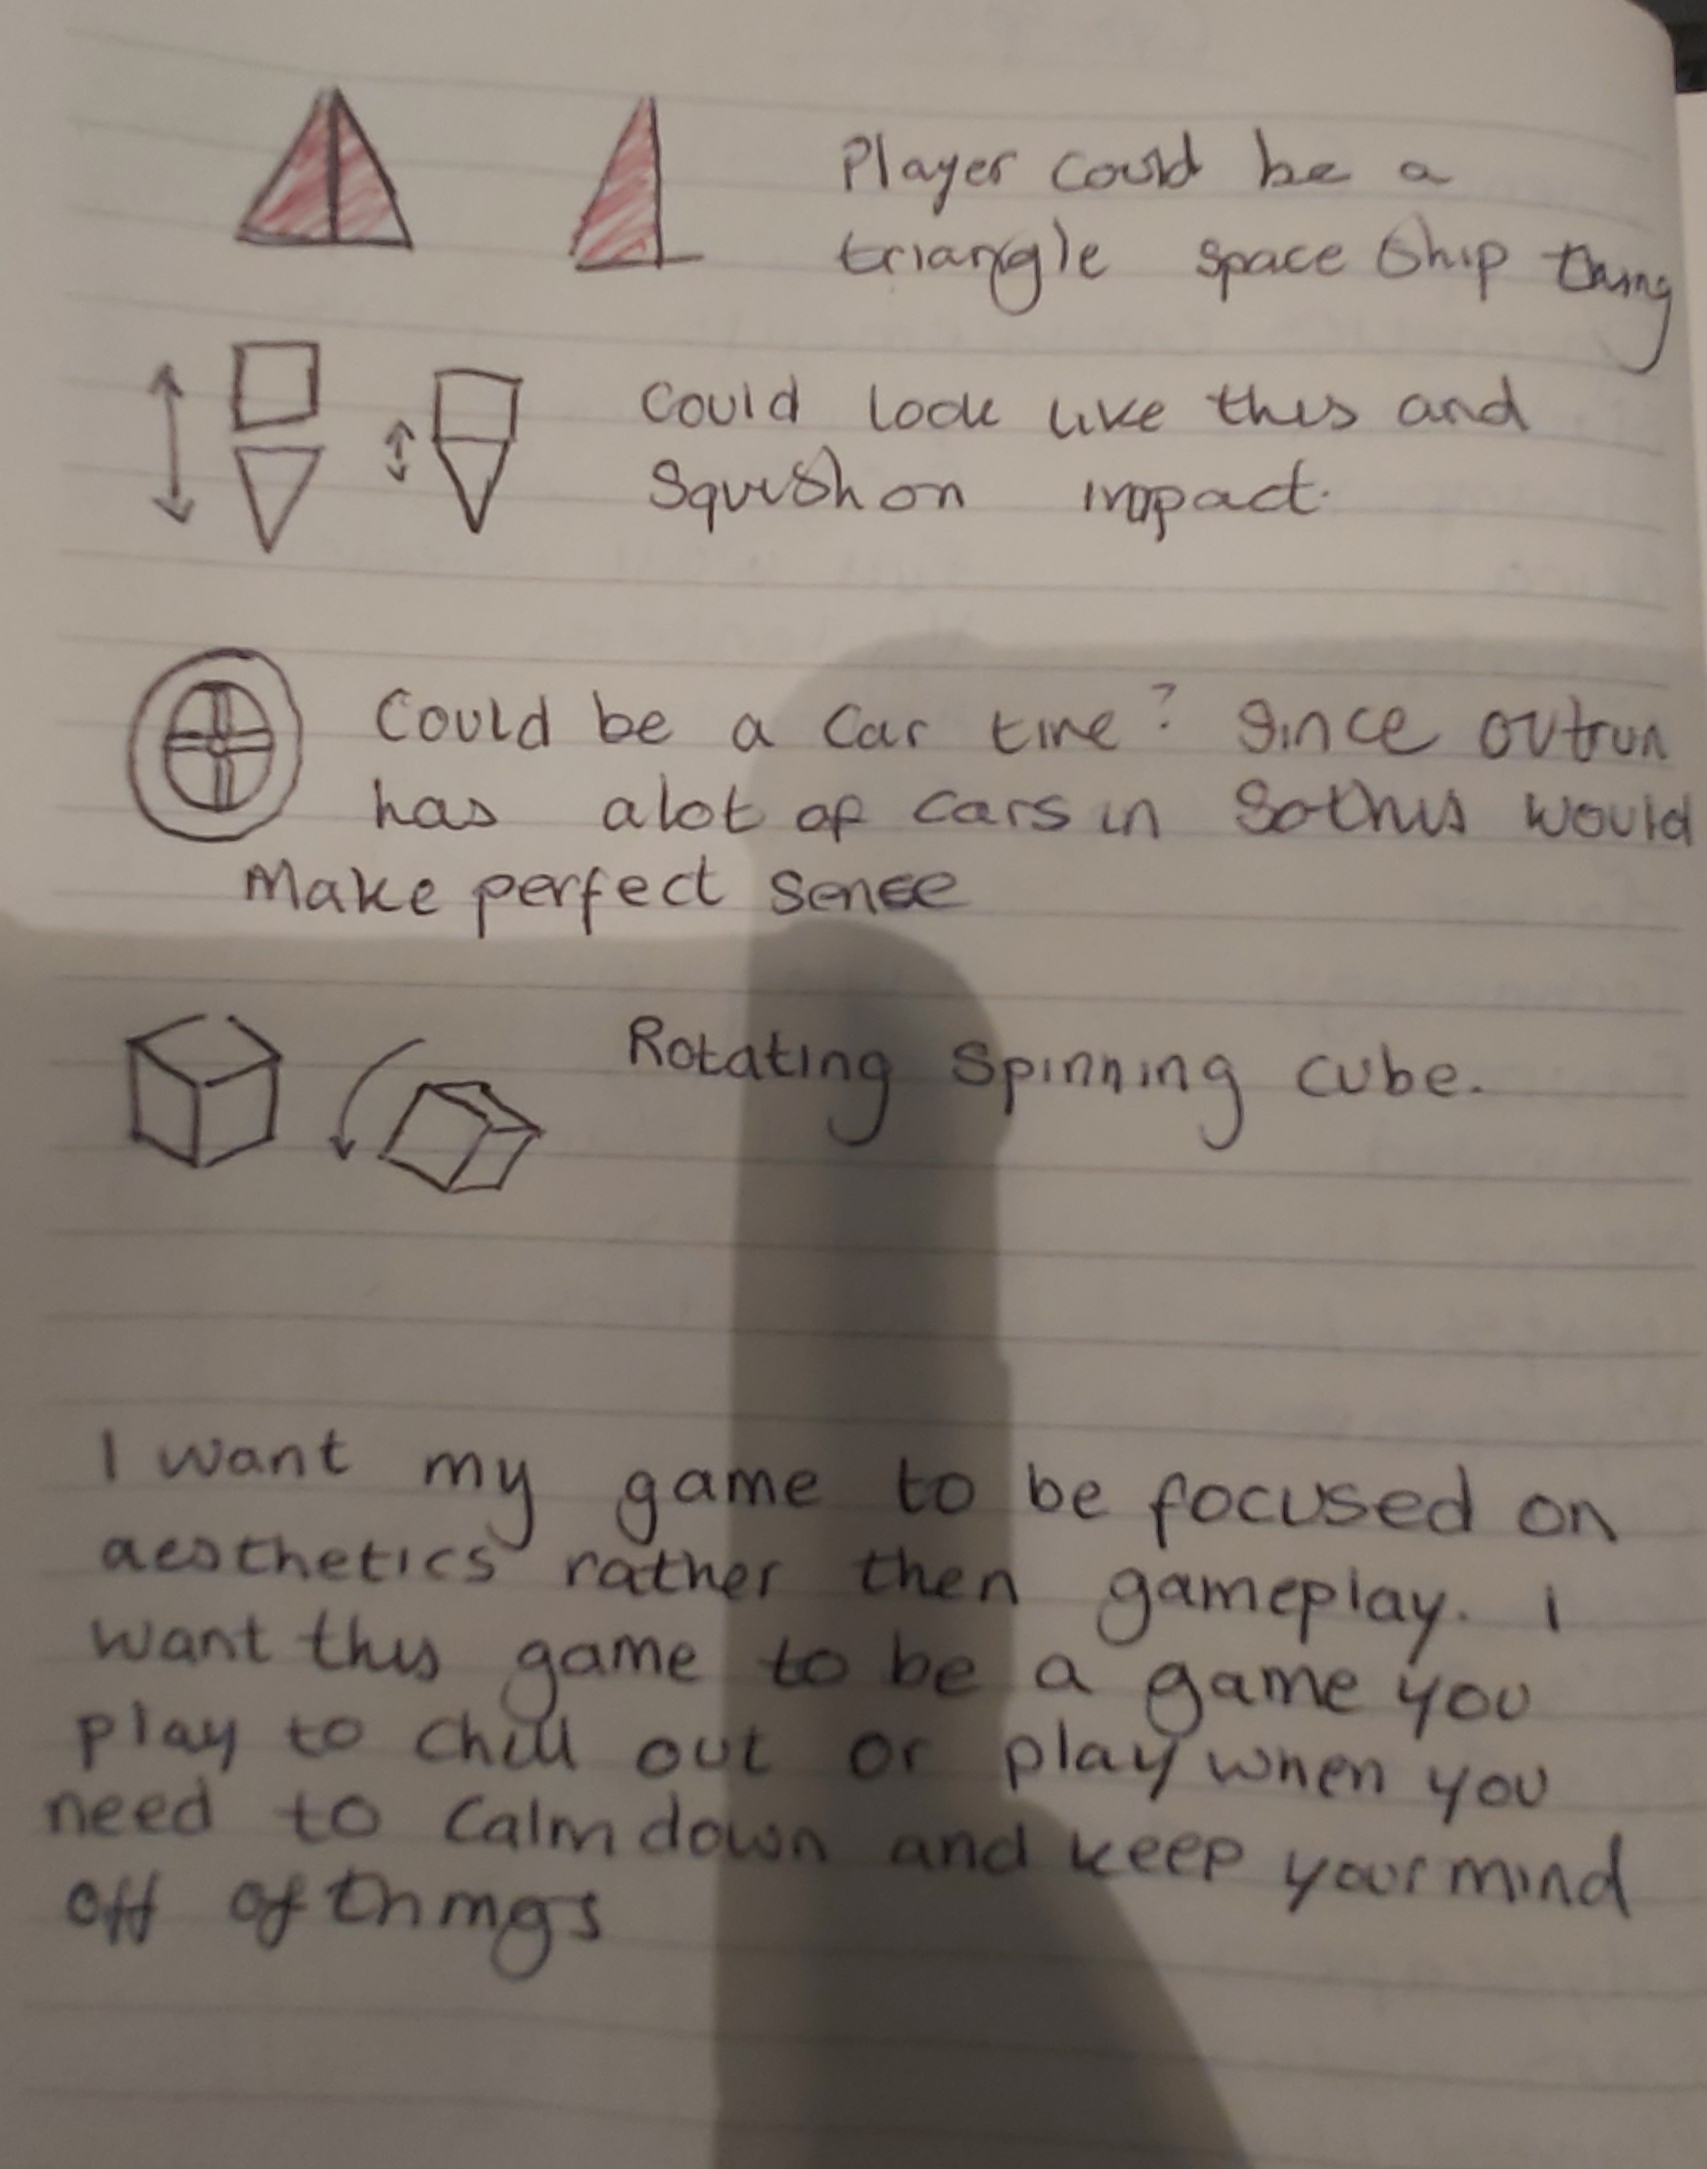

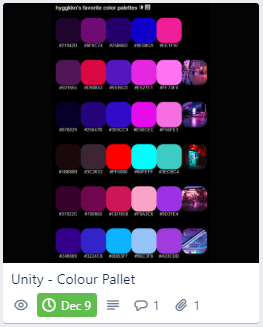
Colour Pallets
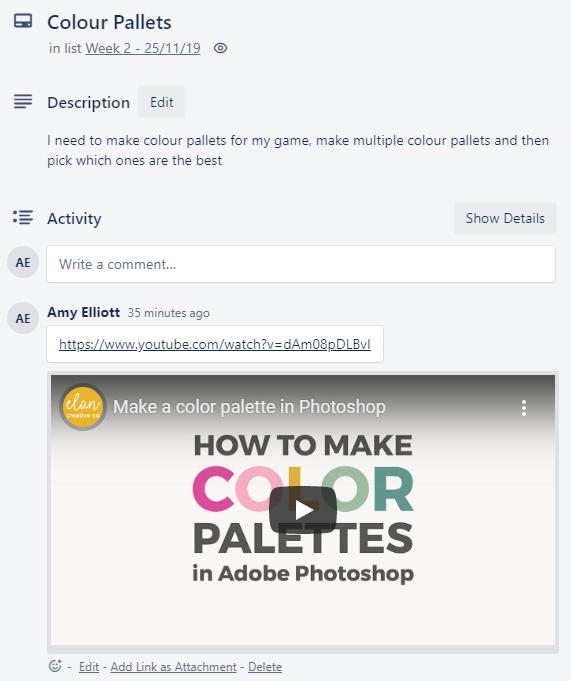
Finding a colour pallet is very important I feel, since you need to find something which is colourful and will draw the players attention, and a theme like Cyberpunk requires very specific, bright colours, so, I done some research on Outrun colour pallettes which I can use for my game, and I found a website called colorhunter.com, this website is very good in my opinion, it takes pictures and turns them into a colour pallet, and there is an outrun section on there.
There is pages full of perfect colour pallettes on there.
This saves me so much time as if I didn’t find this website, I would’ve had to find a picture and go into Photoshop and crystallize the picture, picking out the most prominent colours and making a pallet from that, I prefer using these instead as they look like very good colours to use together.
Now to pick out a colour scheme which I like the most was a hard task, I wanted to pick out a few of them, but I wanted to make sure the few I do pick out are very different from each other so when I try them all out in my game, I would have 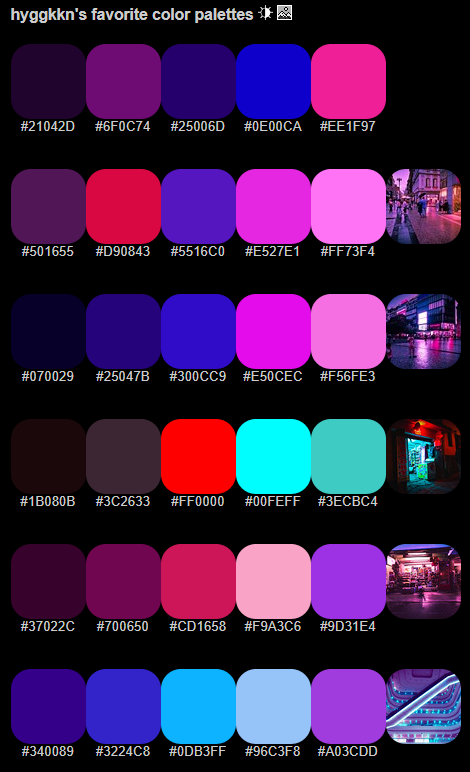 some very different results, so there wouldn’t be anything which looks the same.
I made an account on the website and I started going through all the colour palettes under Outrun, and I narrowed it down to a few colours palettes.
I tried to make these as different from each other as I can, and I’m happy with the few colour palettes which I’ve rounded it down to, there is few things I can do, I can either end up picking one of the colour palettes and be done with it or I can mix them all together, but in all honesty, I don’t think that would work too well since I want to limit myself on colours and not have too many in there at the same time, since, Outrun is based on retro times, and the games back then only had a few colours in them, I want to try and emulate that same effect and only have a few colours in my scene, to make everything else stand out more. – From here, I’ll just be applying different colours to my Unity scene when I start developing it and see which one I like the best, although right now I’m really liking the look of the 4th one. – Now I can tick this off as done!
Unity – Shaders
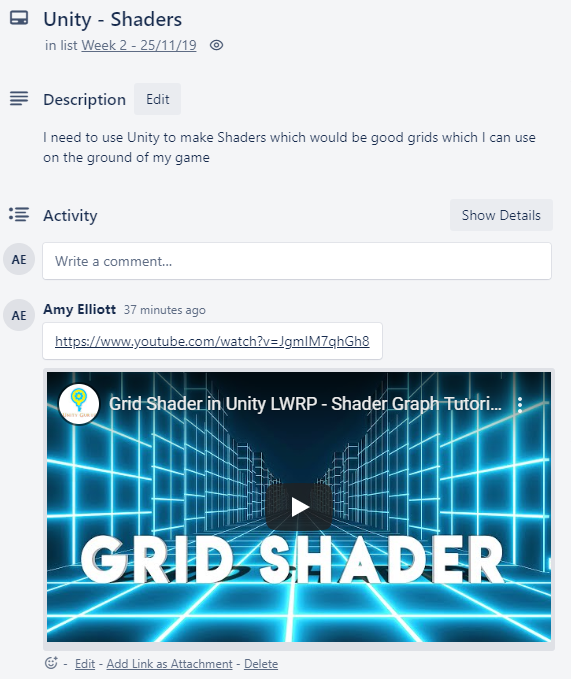
 I used the tutorial to help me make my own Grid in Unity, this is helpful because it has taught me how to use shaders, even though I’ve used shaders before to make some fire, this is useful because it’s more practice, and I feel like they are something really important to learn.
I applied this to my cube and this is the final result, I really like it.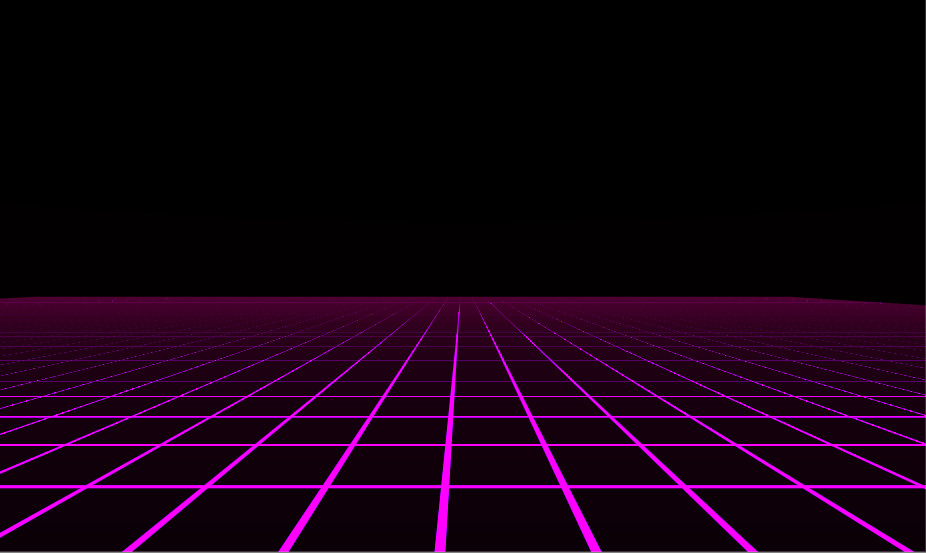
I made this shader by making a cube in my scene and then making it big enough, I then installed the Light Weight Render Pipeline packaged through Unity Package Manager, and then I inserted a LWRP renderer into my root folder, naming it LWRP.
From here I also added some Post Processing, this isn’t necessary, but it makes things look nice, I added some bloom.
I then created a PBR Graph which is found in the Shader section of Unity, this is very similar to making materials in Substance designer!
From here I added a Rectangle node, and set the X and Y values to 0.9, but I could also make this a Vector 1 and set the value to 0.9 and call it Line Width and plug it into the X and Y values, and from here, I inverted the colour of the rectangle by using a One Minus node, and plugging the rectangle into the input of that node and then attaching the output into the Albedo and Emission of the Master node.
I was running into problems with my shader not working here, and that was simply because I didn’t have the LWRP attached in my project settings, once that was added it was all fine.
From here I added a Fraction node attached to the Tiling and Offset node, which would tile my grid which is what I really need it to do, these tiling values would also be set by a Vector 2 node, since I would need both the X and Y value since they’re both in the tiling property, I would then make a Colour variable, and name this Colour, this would be the colour of the grid lines, I made this work by adding a multiply node between the master node and the One Minus, attaching it to both the Albedo and Emmision and making the B value of the multiply the One Minus node and then attaching the A value to the Grid colour, and that was all it was to get it working.

College PC Issues
By this time, I was done with my whole weeks work and it was only 2 days into the week, so I decided to do some of my next weeks work so I can work more of other stuff as well.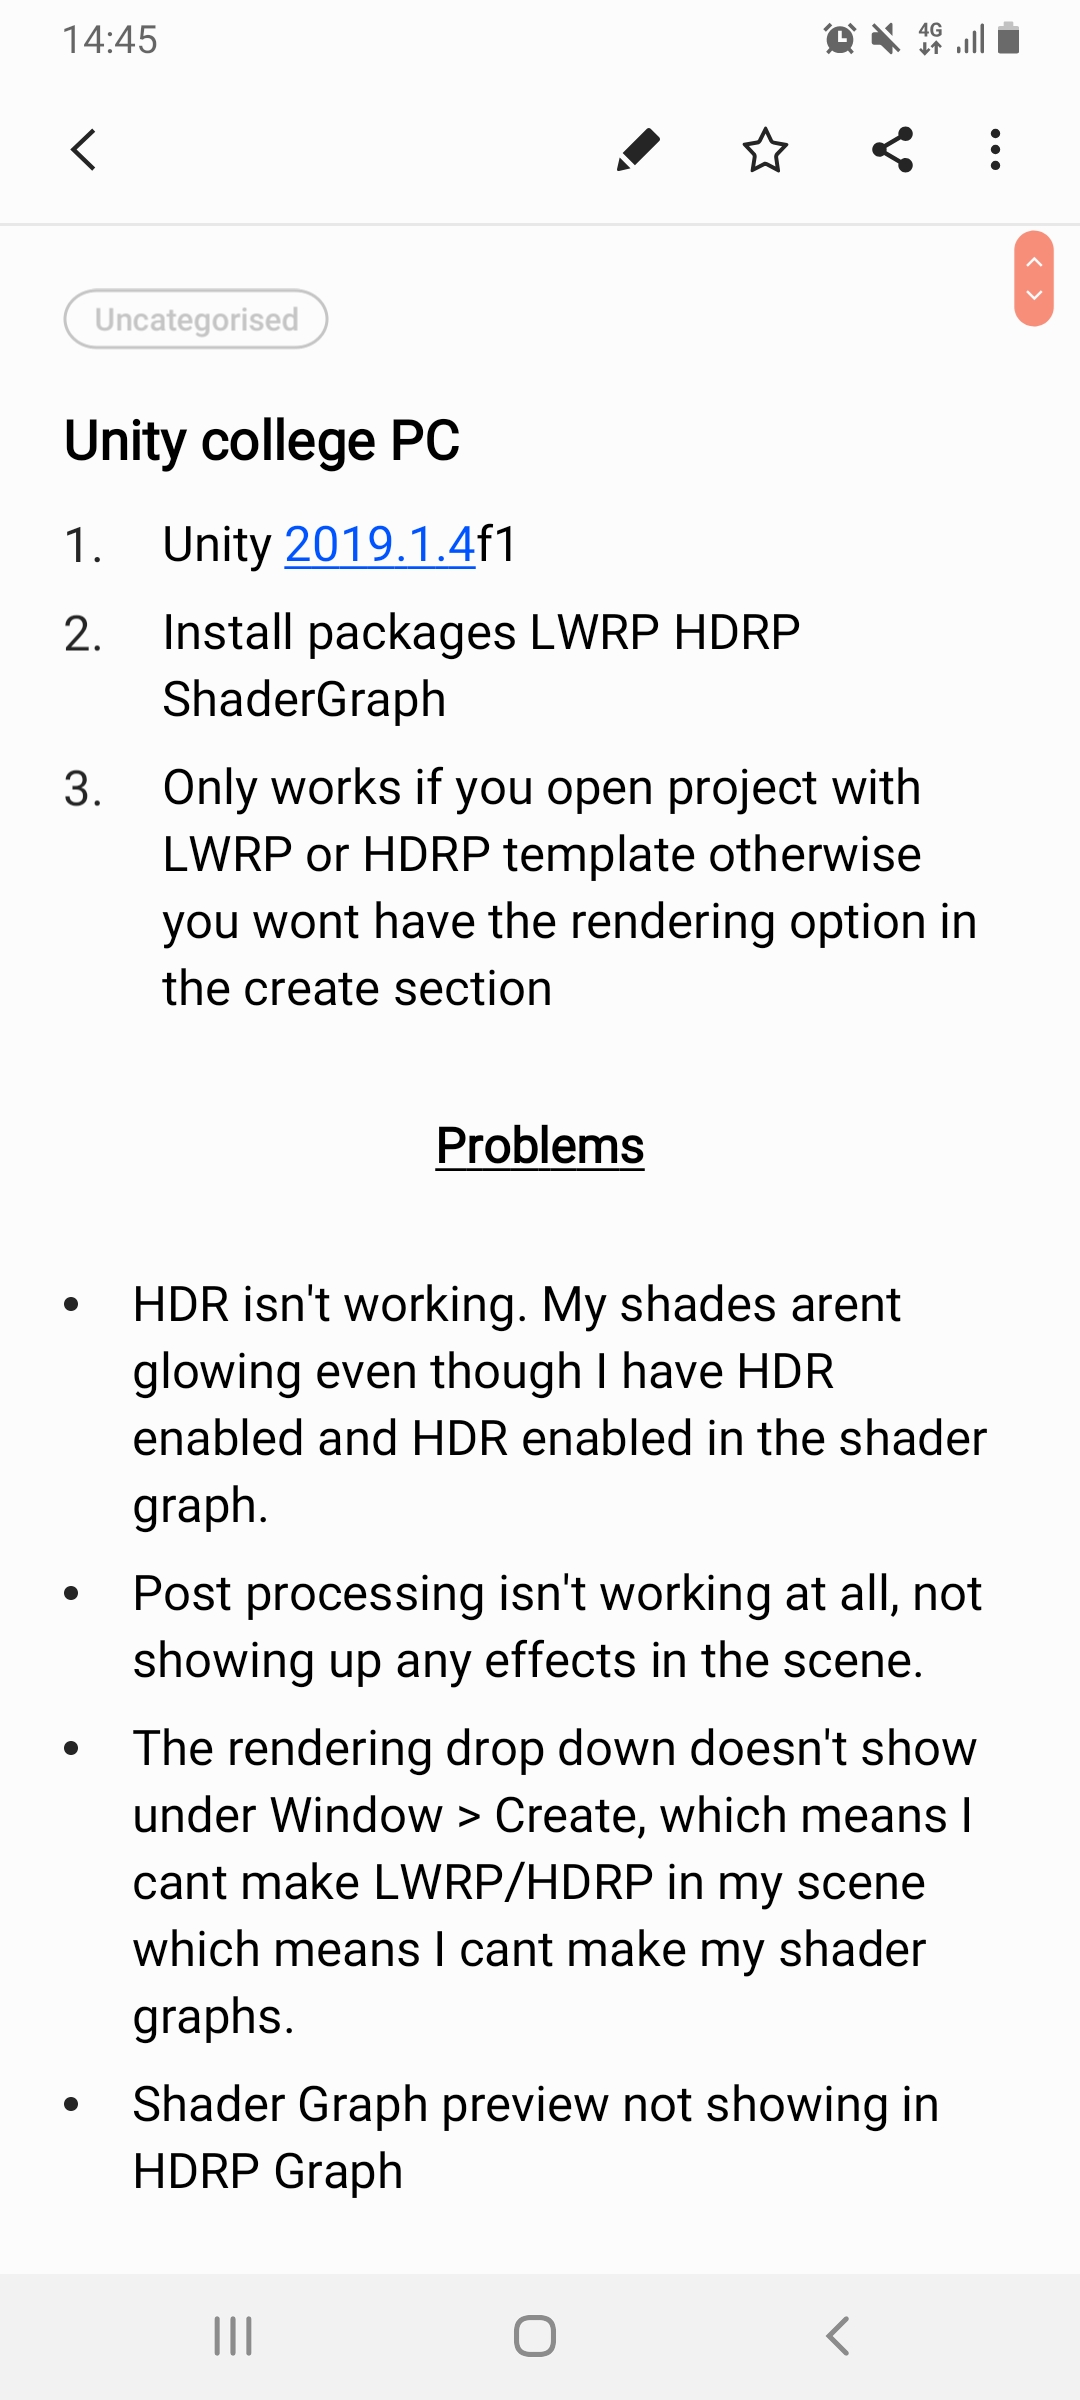 The college computers had a different version of Unity then the version that I was using at home, so I had to downgrade my project and fix everything, downgrading my project gave me quite a few problems, so in the end I had to quickly reproduce my grid shader in the older version of Unity which the college PCs had.
But, in the end, nothing was working, the shader graphs weren’t even opening on the college PCs.
I figured out the issue was that I didn’t have the LWRP or HDRP, Shader Graph or Post Processing package downloaded on the package manager, so I went ahead and downloaded that into my project and it started to work, except my post processing wasn’t working on my project.
I ended up writing down a list of my issues and trying to solve them one by one, and I eventually just started up a new project and used another computer, and everything ended up working, my grids (which I had to remake) were working and glowing and the post processing was working, so I uploaded this to GitLab so I can finally start the testing for the production for my game.
This is what my Grid Shader looks like at the moment.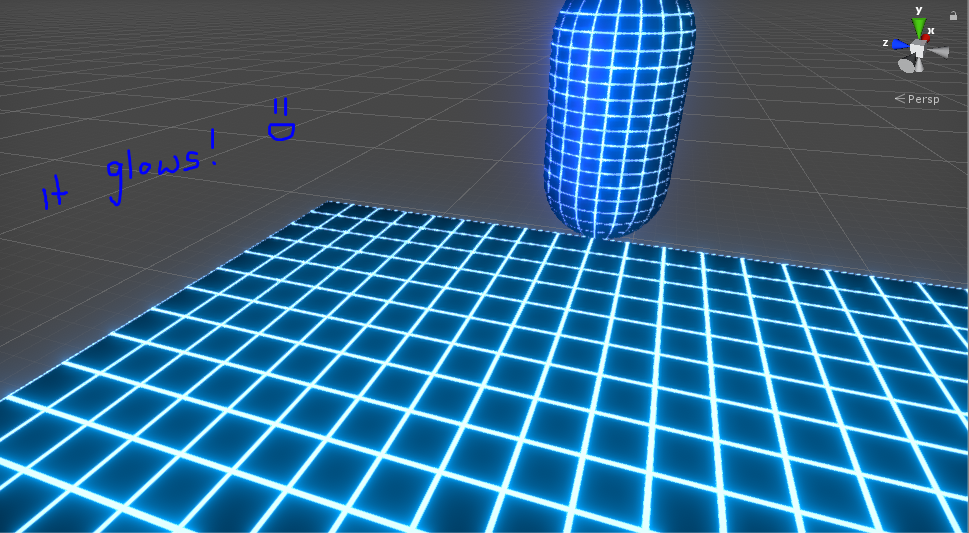
Unity – Audio Visualization
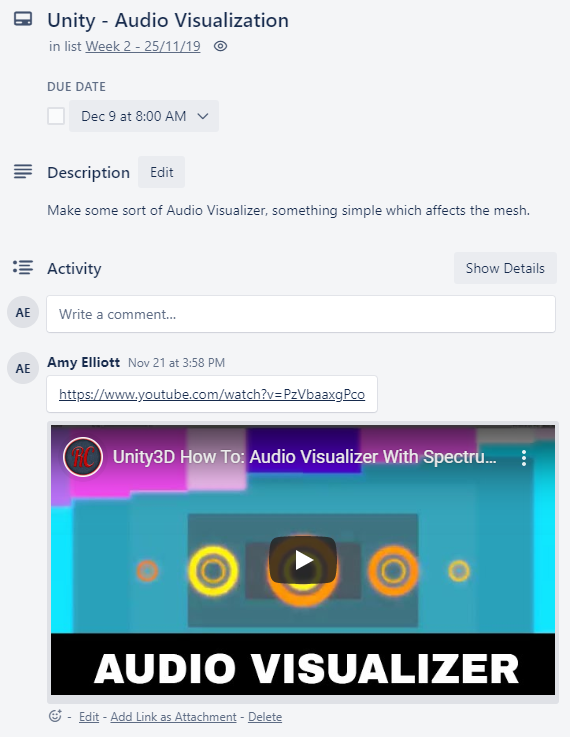
From here I began writing my own Audio Visualizer script in Unity, I began simple, I wanted to make some cube prefabs scale up and down with the music, and I wanted to instantiate a line of them.
I began by making a cube prefab, and then making an empty object in my scene called the Music Manager.
I made 3 scripts, a script called AudioSync, MusicPulsate and MusicScaler.
This is the script for AudioSync: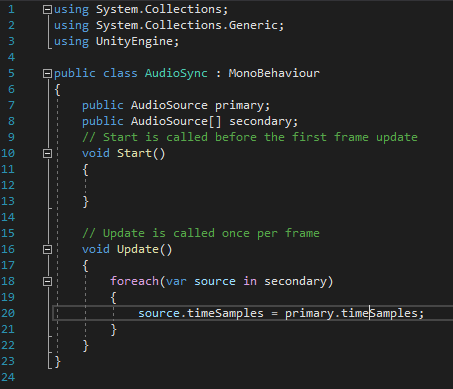 It’s very simple. all it does is, during every frame (hence why it’s in the update function) it runs a ForEach loop checking the source of the secondary variable which is an Array of audio sources, and then it checks if the timescale of the source is equal to our primary audio source’s time samples.
This is the script for MusicPulsate: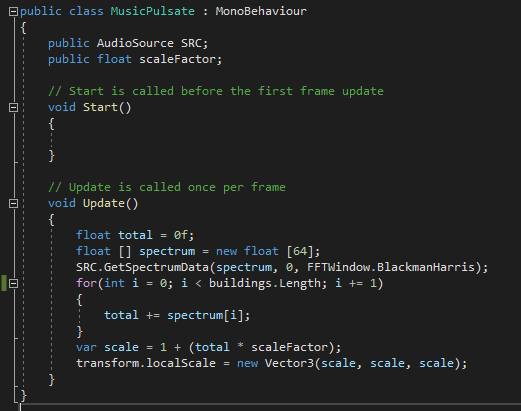 This script deals with the scaling of the prefabs to scale along with the beat of the song, in this script we make 64 array float values under the name spectrum, and we have a float called total which gets updated with each music pulsate to the current value of the transform of the prefabs, in the script we get the value of the
 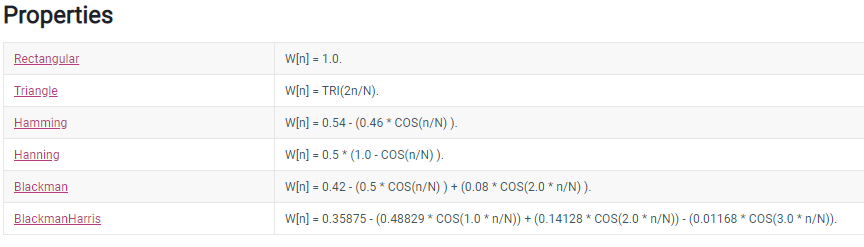 beat by getting the spectrum data of our audio source and then this requires 3 values in the brackets, which I put as spectrum (which is the array of floats) then 0, and then we grab the value of FFTWindow (which is a type of spectrum analysis) and then we use BlackmanHarris, which is a type of spectrum math – As seen on Unity Documentation.
From here we then run a for loop, so this goes through all of the buildings which we have in the array of buildings on our MusicManager, and then it increments the value and moves onto the next one, for each building in the building array, they increase in value from the total variable to the spectrum value.
And then from there the scale is changed for the prefab by using a transform.localscale and then transforming it.
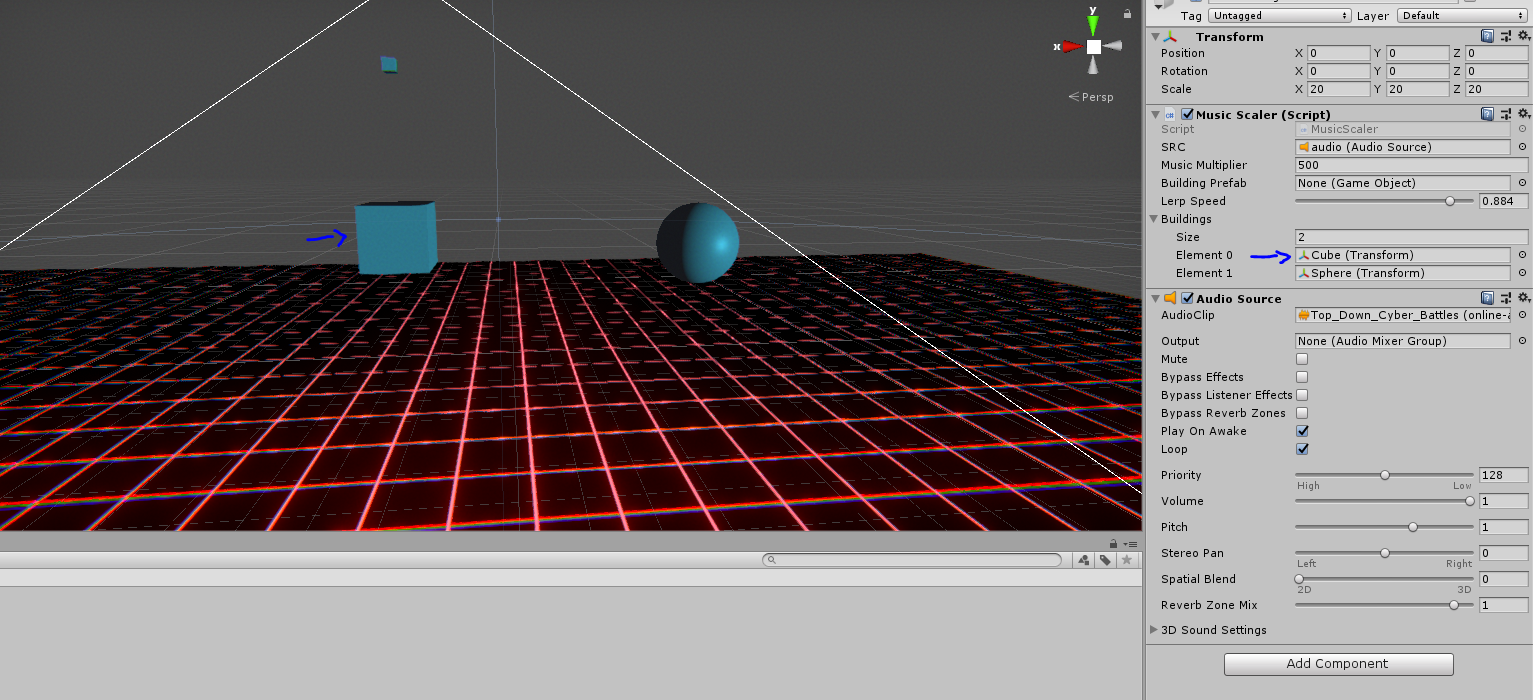
This is the script for MusicScaler: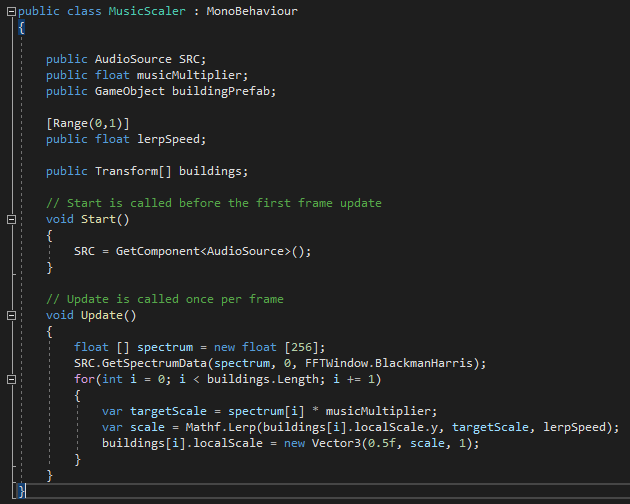 This is the only script which we would put on the Music Manager, since the other scripts are referenced but they don’t have to be in the scene on any objects.
This script, at the beginning of writing this instantiated 16 building prefabs which were all the same and then put them in a line – This is what I originally had.
This script here would get a prefab which I called barPrefab (You had to assign it in the editor) and then it would reserve an array of transforms called bars, from here, on the start function it would then make 16 of these bar transforms, and then it would run through all 16 transforms in the array and instantiate all 16 bars (spawn them into the map) then set these bars as the child of the MusicManager, and then it would set the bars in the position of a line and then the next line would add the new object to the array “bars”
But I didn’t like how this looked, I wanted to build my own city which moved with the music, so I changed the bars name to buildings made the array of transforms called Buildings, but I made it public, so I can make my own city and have it there without having to instantiate it, and then on the update function, rather then having the number of how many buildings i’m going to have, I just simply used Buildings.Length, and this simply checks the length of the array without me having to manually put it in every time I add another building.

Unity – City Building
Since I still had 5 days left until the next week… I decided to move onto the next task on my Week 3 plan, which is building the city for my game, figuring out how I want to do it.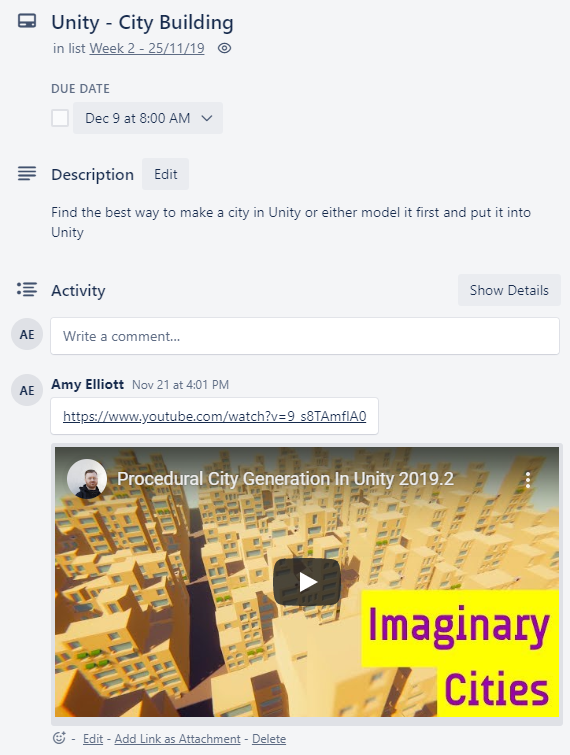 I figured, since the music beats along using 3D models of cities, I’ll have to build my city in Unity, making each building separate 3D models, I may have to make the buildings in Maya and move them to Unity or make them all in Unity, but first I have to plan out a concept of what I want my city to look like.
I found this website called the Fantasy Town Generator by donjon, which generates a picture of a city which you could use, and it’s all randomly generated with rivers and lots of customization aspects to it.
So I generated 10 cities:


These all looked good, but they also looked confusing, I could use these, but I wanted to see if I can find any other generator which generates something which is easier to 3D model.
And I found this Medieval Fantasy City Generator by watabou on Itch.io.
This was perfect, exactly what I needed and very clear.
")
")
")
")
")

")
")
")
")
")
Now I needed to pick one which I like the most, and I was struggling so I went to Google Forms to get other people opinions and made a voting form.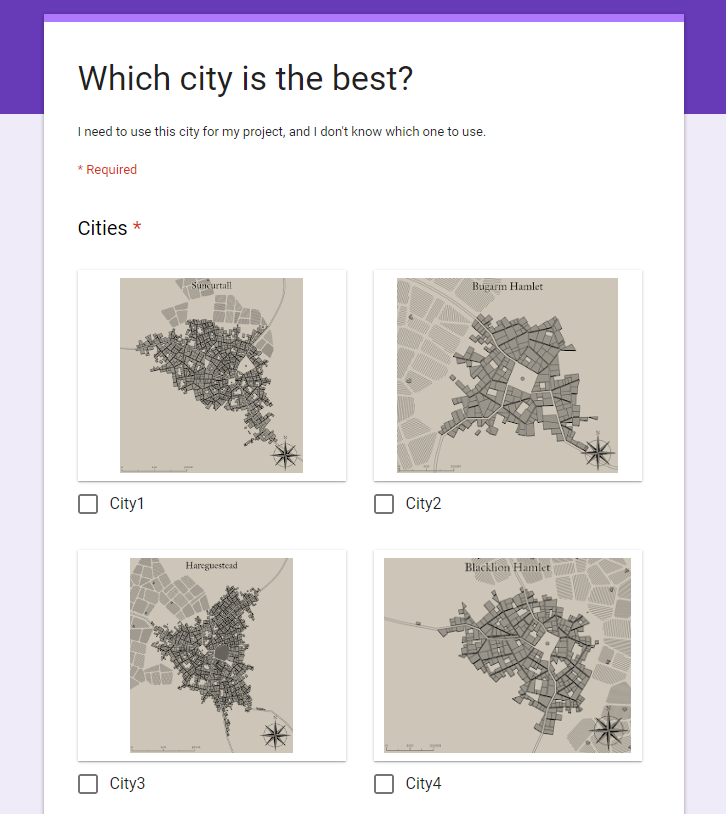
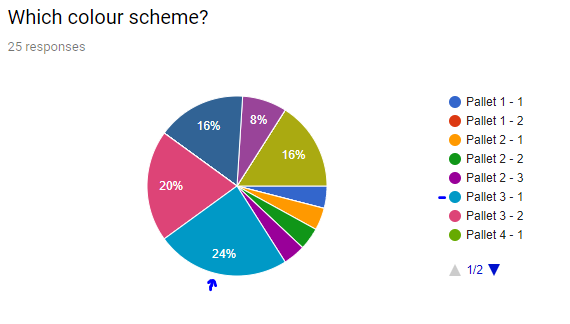
After lunch I looked at my responses and this is what I got: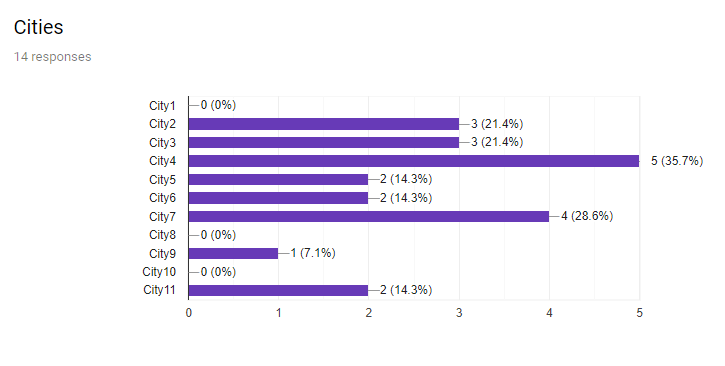
And this is the city which the responses picked: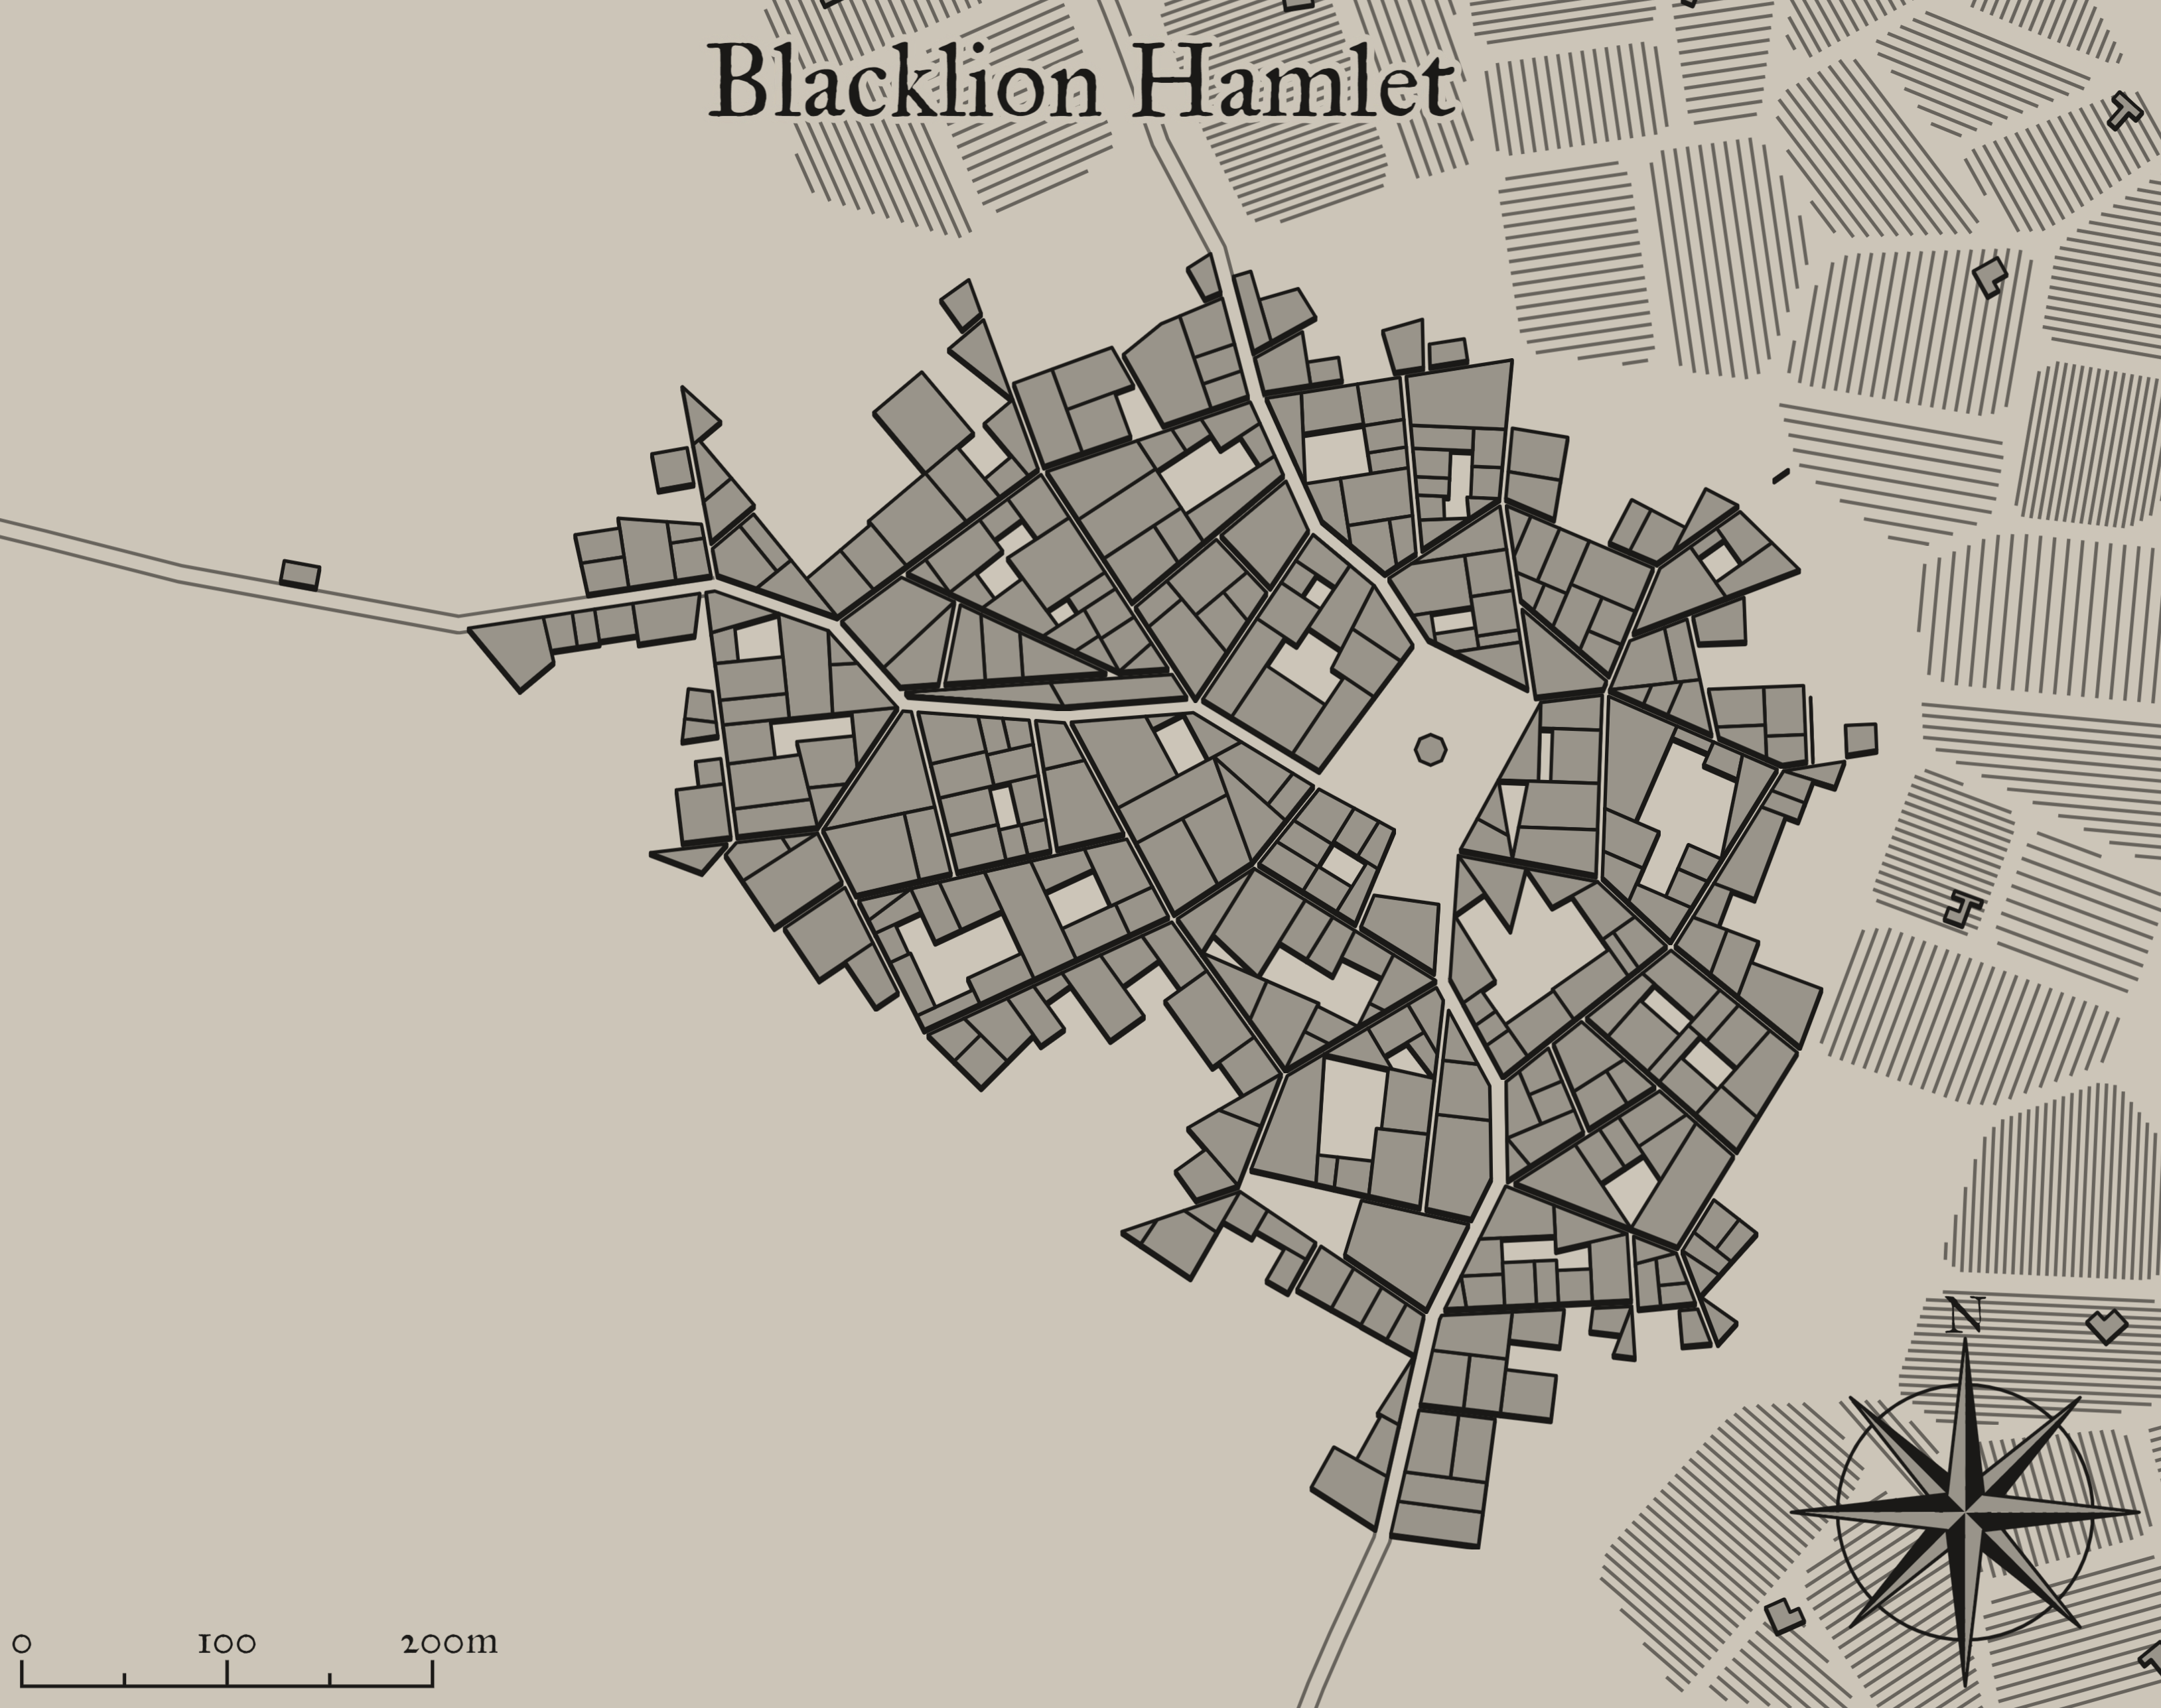
I quite like this one myself as well, so now from here, I began working on this in Maya.
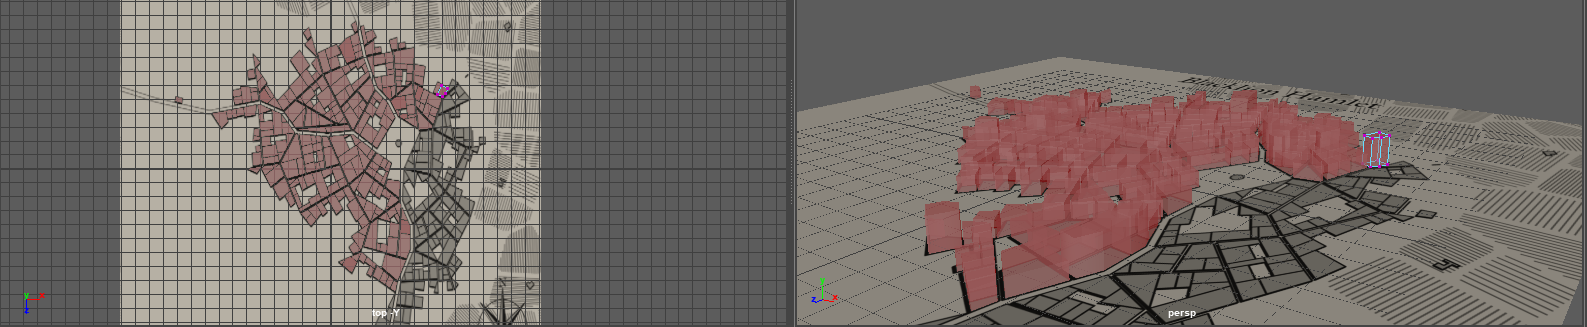
But this was the city once I was done 3D modelling it!


Unity – Bouncing City
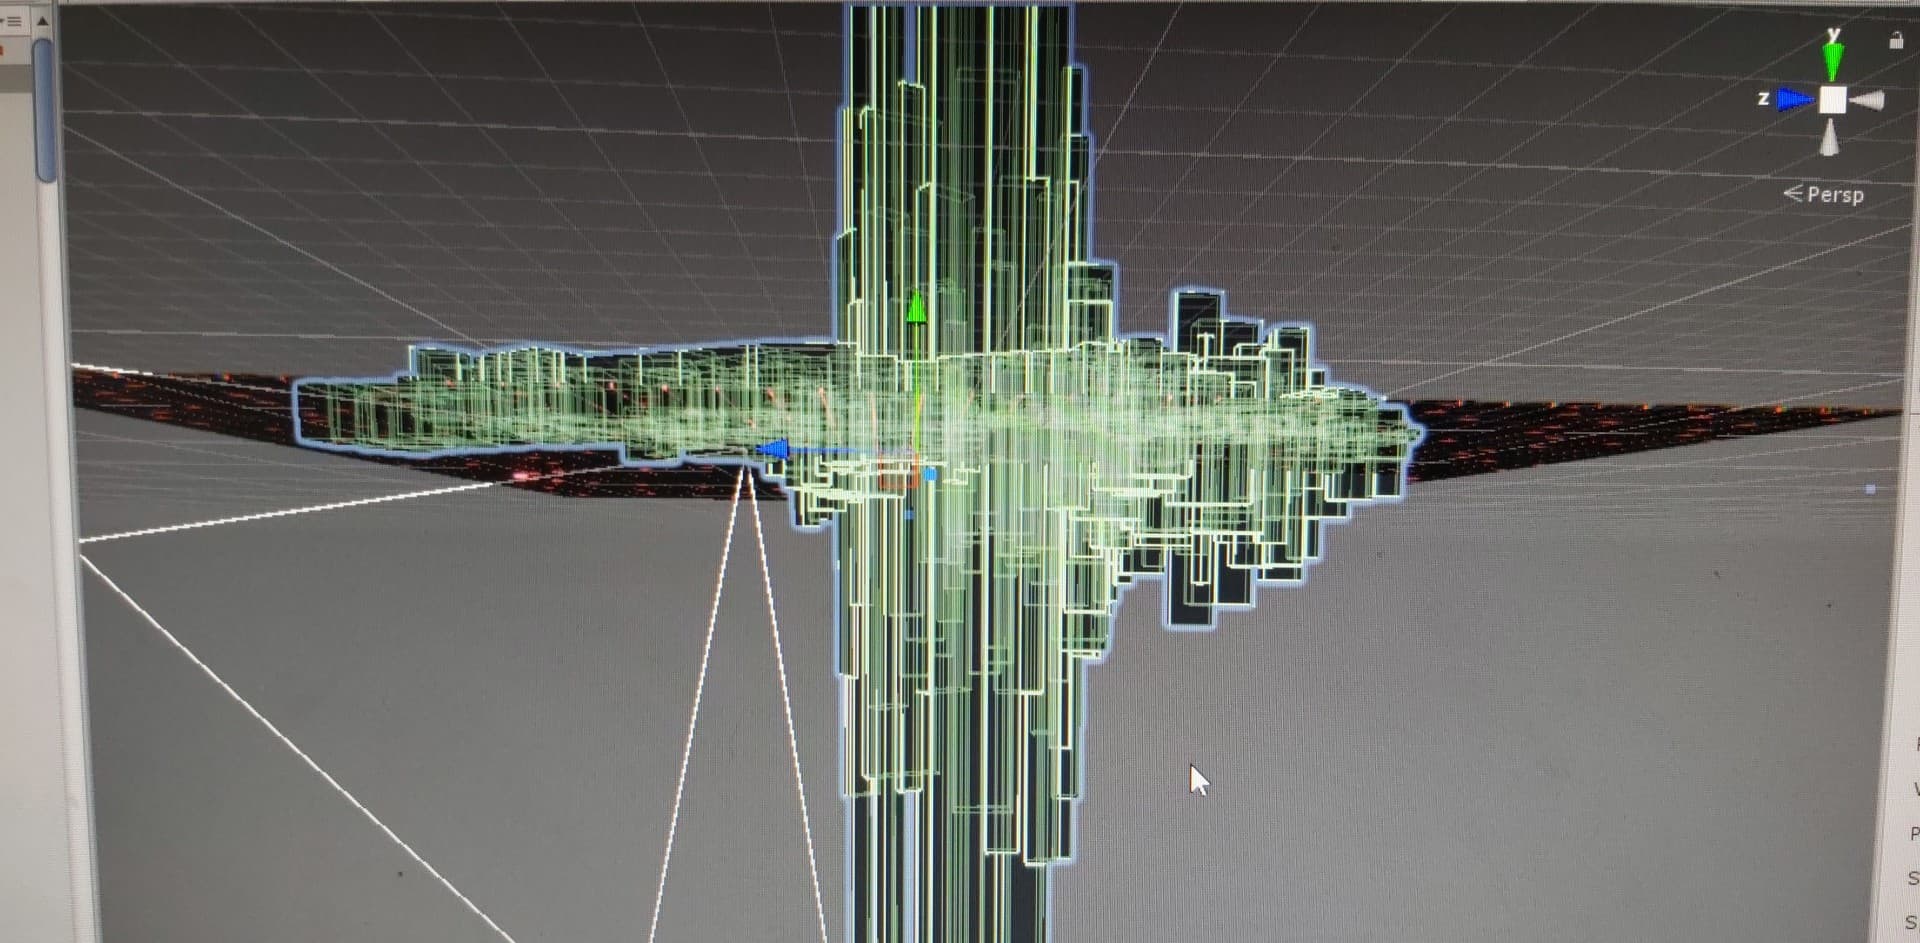
I was really proud once I was done with this, so I imported this into Unity and I applied every single building to the audio visualizer, and then I added a mesh collider to every building as well, and this was the outcome:

Unity – Jump pads
This wasn’t initially on my Trello board, so I decided to add it so then I can wait for the responses to come in for my form whilst doing this.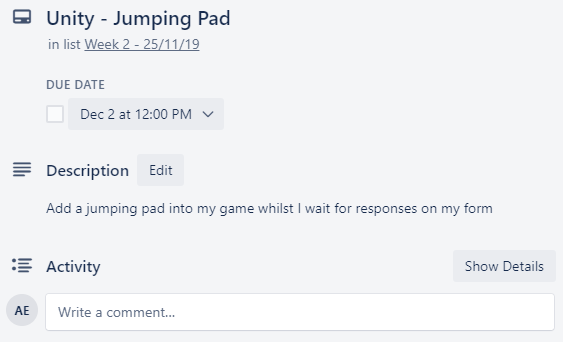
This was fairly easy, I just made a JumpingPad cube and added a Rigidbody and JumpPad script to it.
I set the mass of the Rigidbody to 100 so that the jump pad doesn’t fling off when the player jumps on it.
The jump pad script looks like this: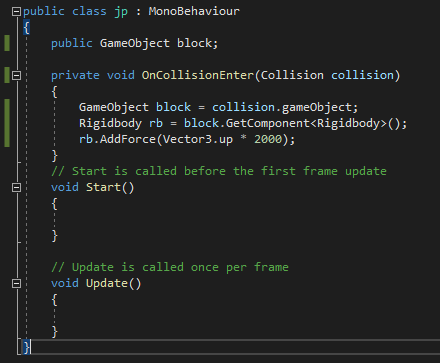
It works by getting the block of the jump pad and then adding force to the player when the player collides with it.
To make this work on the top of each city building, I just simply added this script to each building in the scene.

Planning for next week –
- How do I plan to catch up?
There is nothing I need to catch up on since I done everything on my Trello board, so I was thinking that I should just continue with development and see if there is anything which needs more working on.
Week Number & Date: Week 3 – 02/12/19
List of Tasks planned for this week: This week I had completed everything on my Week 3 checklist in my previous list, so I decided to set myself some tasks at the beginning of the 3rd week, relating to making the game comfortable to play for the player.
Current Position –
- What did I do this week?(Screenshots/Videos/Photos & annotations)
Maya – Change pivot point

 I decided to start with this one since it’s been bugging me for a while and I want to fix it, the city buildings scale from the pivot in the middle of the object which is what I don’t want them to do, so I’m going to change that so they scale from the bottom of the object instead.
I didn’t know how to do this at first so I used a Maya documentation blog to help me out on doing this.
I changed the pivot point by selecting all of my buildings and pressing D I then moved the point down using the move tool.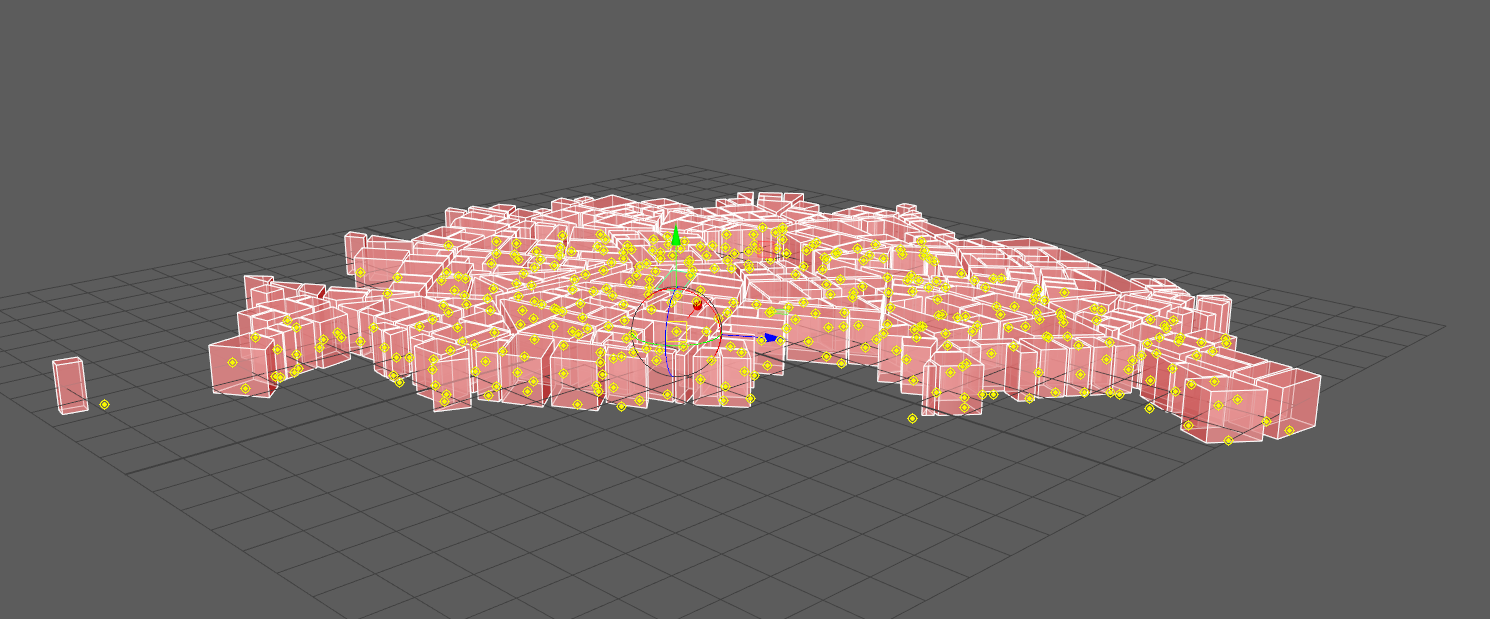
This now means that the objects scale from the bottom of the buildings, but not all of then were aligned to the middle of the buildings, so I began aligning them to where they needed to be.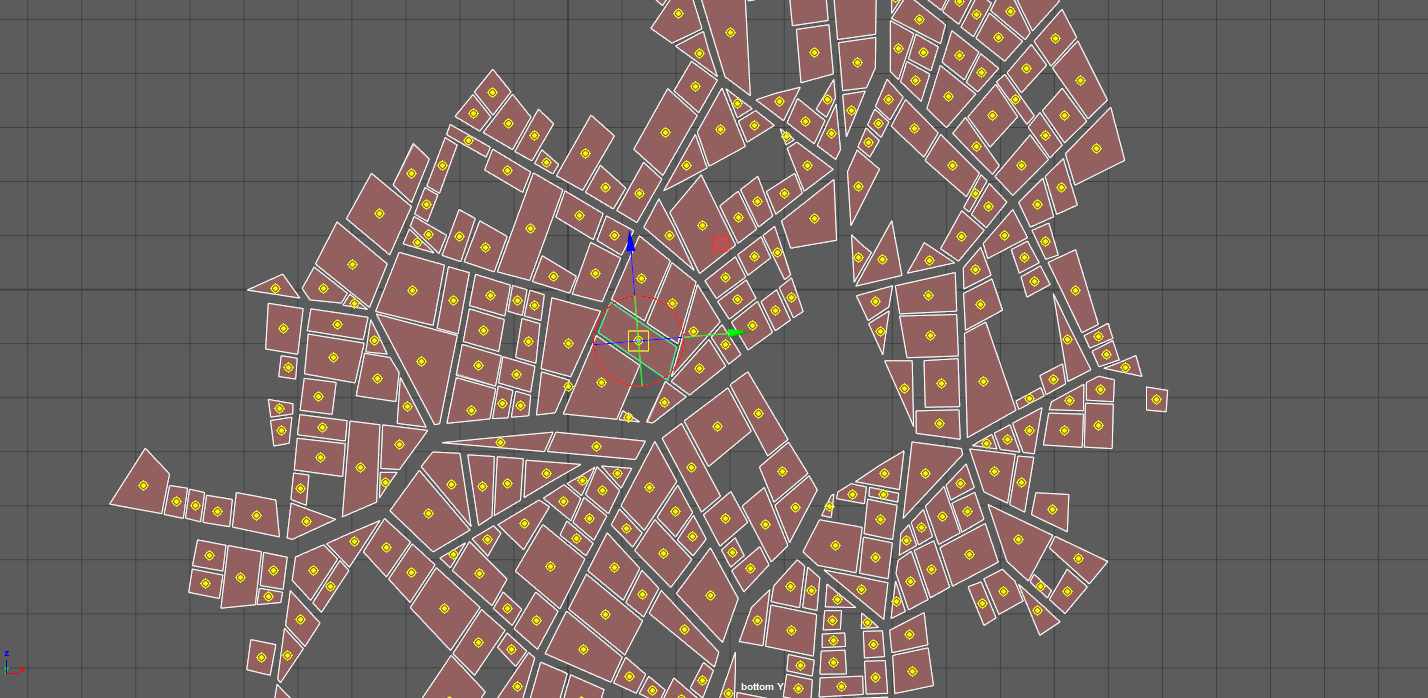
This is the result:
I then added this into Unity.
Unity – Fix Bouncing Bug
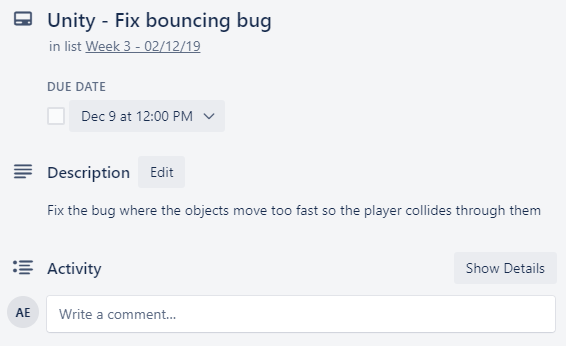
This bug wasn’t really a bug, it’s just where the buildings moved too fast and the player with a mass of 10 was trying to land on them to bounce themselves up, that wasn’t working, but it was an easy fix, all I had to do was lower the mass to 1 and then go into the project settings in Physics and change the gravity, this isn’t related to the bug but it makes the game play smoother and the character jump quicker.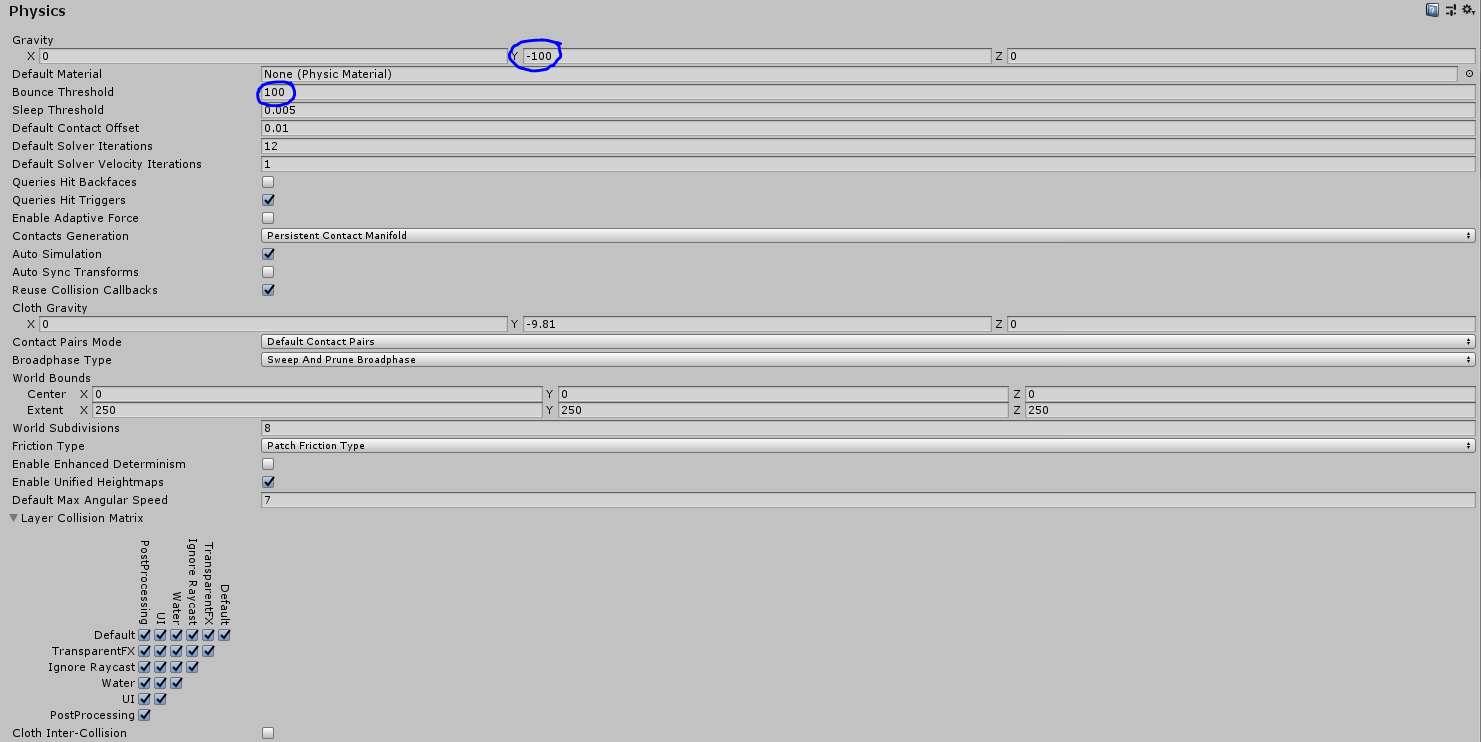
Unity – Camera Adjustment 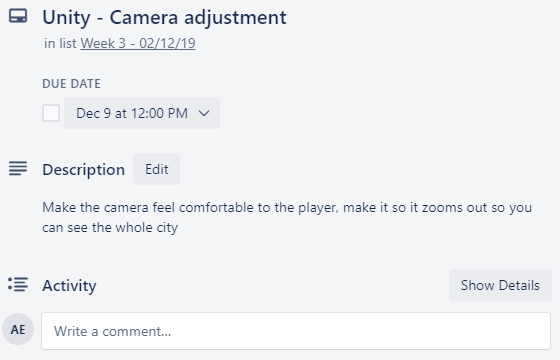
 This was first basically going to work so the player moved forward in whatever direction the camera is in, the camera is confusing since it moves really fast whenever the player moves and it makes controlling the character a lot harder.
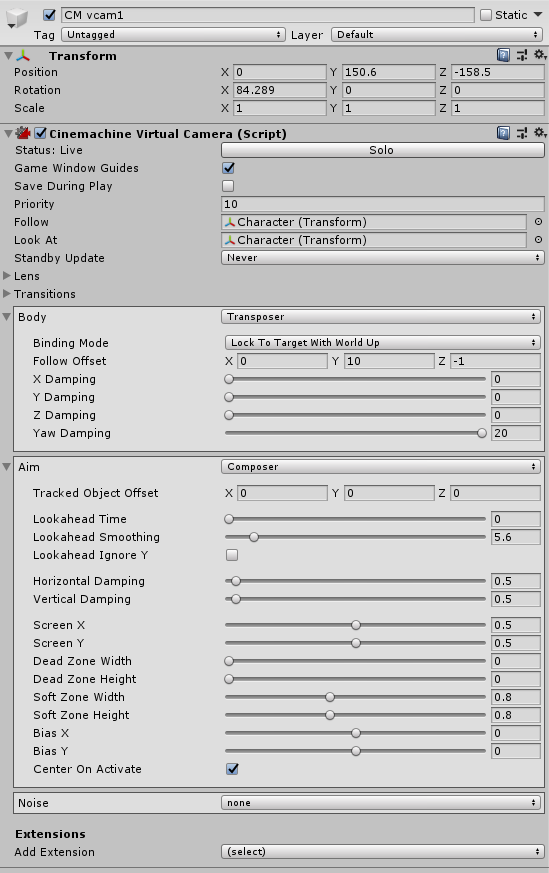
I originally started this by re-writing my character controller script so the player moves in whatever direction the camera is pointing in, but then I realized it would be much better if I just worked on the camera, so I kept the character controller script as it is,
I instead just stuck with adjusting the camera to work how I want it to and make it fun to control the player character, these are the settings on my Cinemachine Camera component to do what I need it to do.
Result:

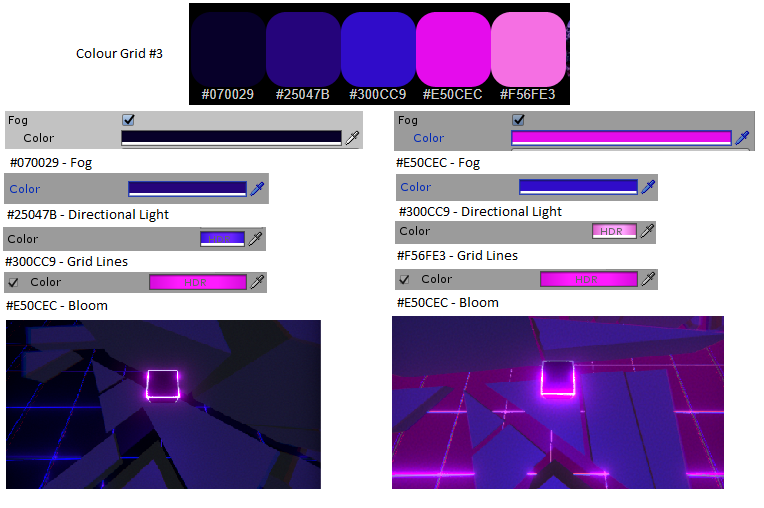
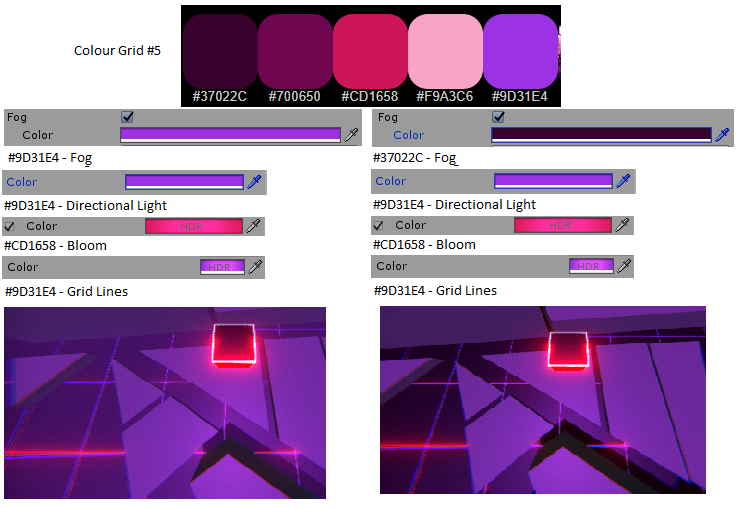
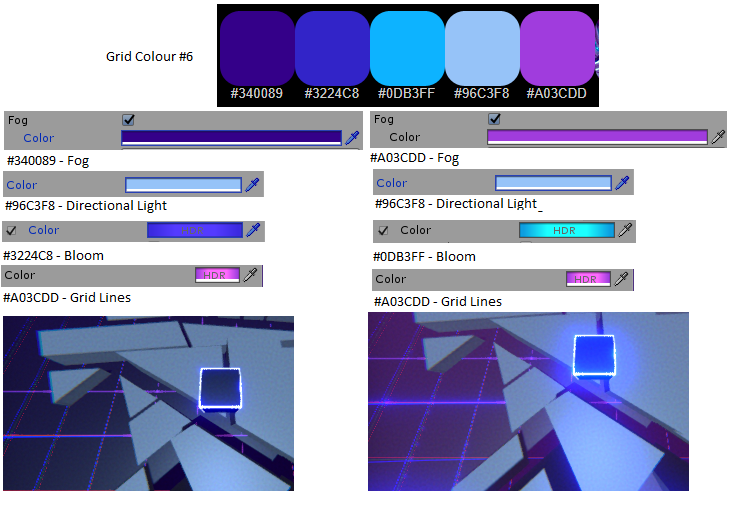
Unity – Colour Pallet
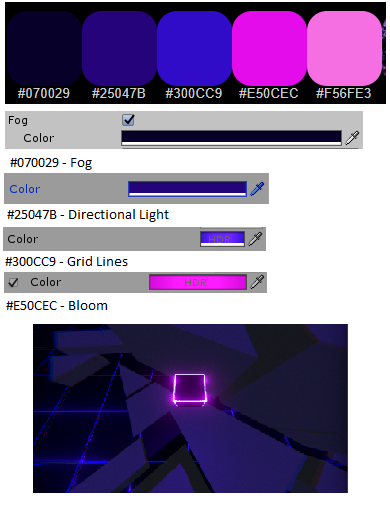
I done this by going pallet by pallet and then setting them all down and picking which one I like the best, this colour pallet will effect the grid colour, bloom colour, directional light colour and the fog colour.
Grid 1 – 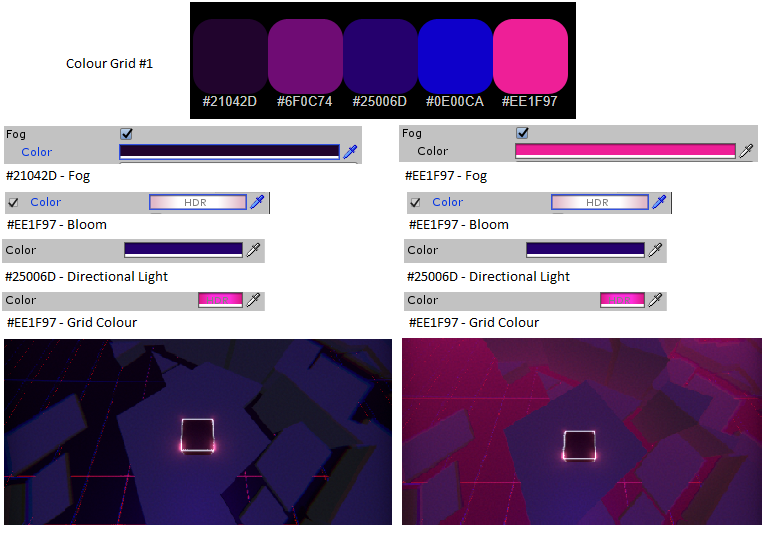
Grid 2 –
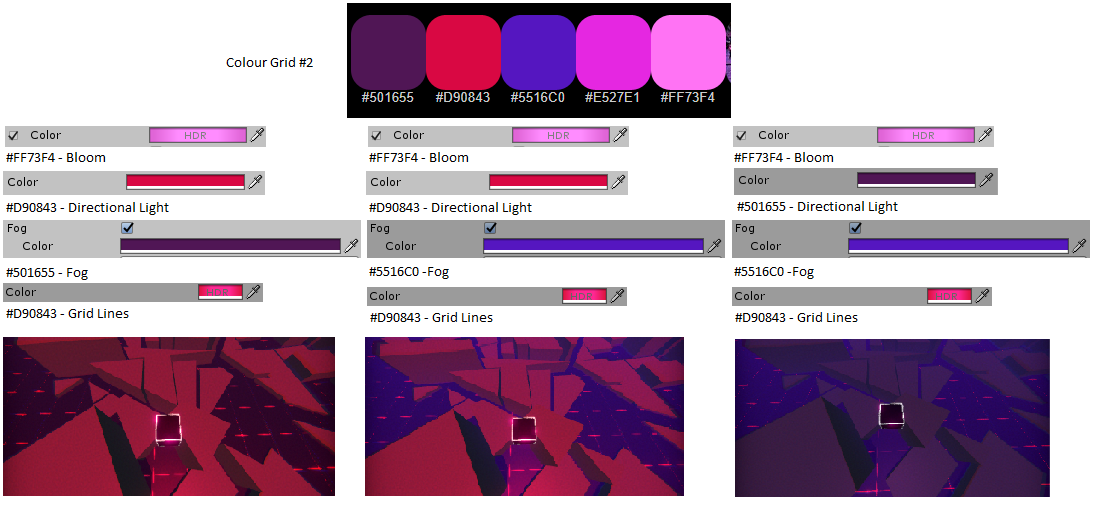
Grid 3 –
Grid 4 –

Grid 5 –
Grid 6 –
 Once I was done with making all of these, I made a google form which I asked different people to fill out. (https://forms.gle/GUYszZeAxEDdpZnB9)
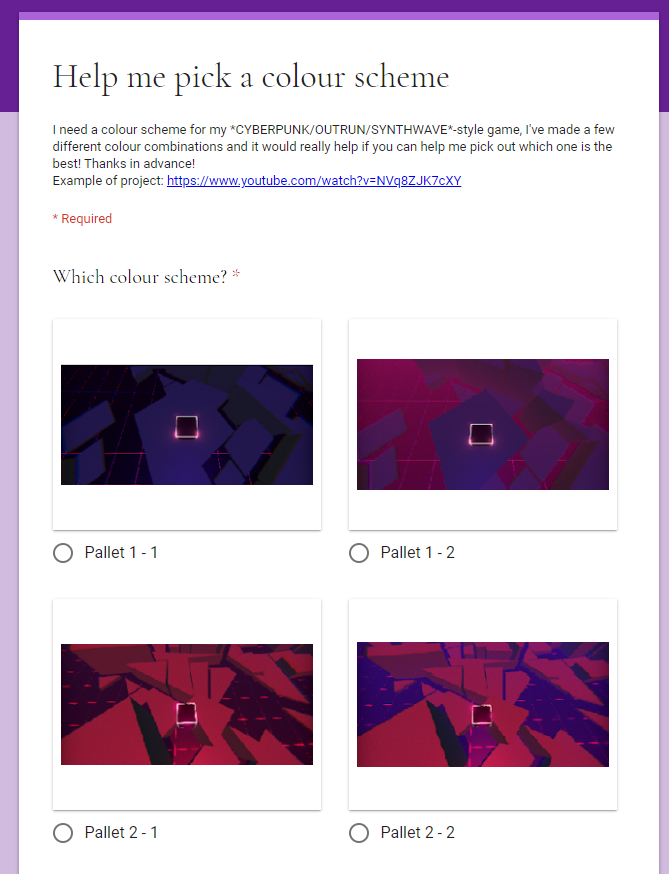
This is good because I don’t just want to pick my own favorite colours, but I want to get a general idea of what everyone likes as an average, so I can pick that one that more of the general audience likes.
I waited for the responses to come through.
The next morning I checked the responses for the colour scheme, and a lot of people like the 3rd colour scheme since the majority of them picked them with that colour scheme in.
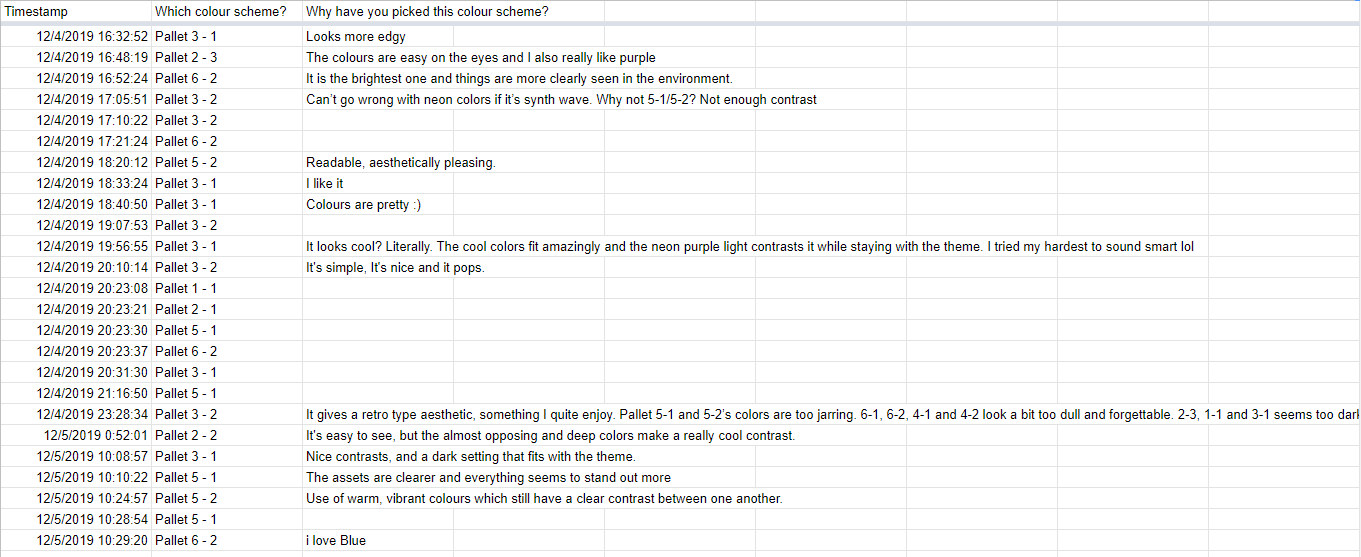
This is the final colour scheme: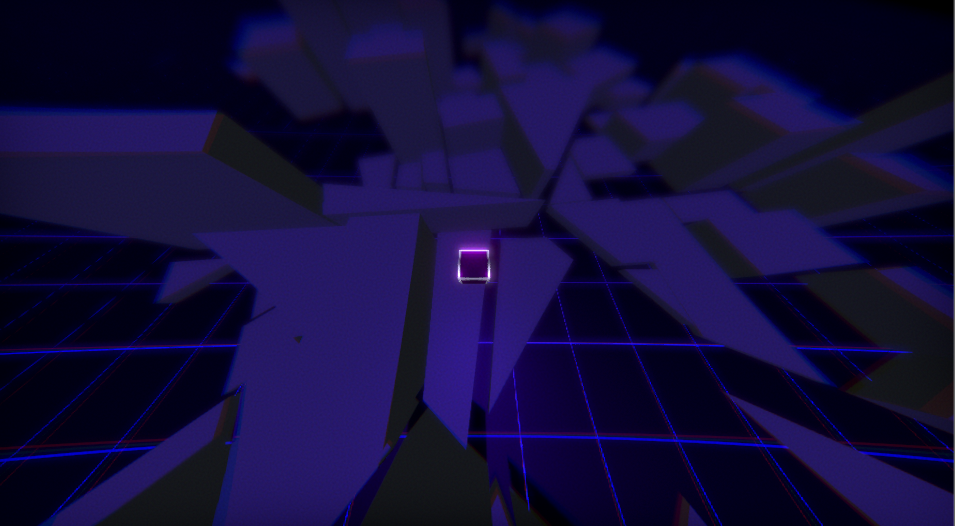
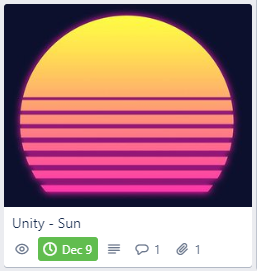
Unity – Sun
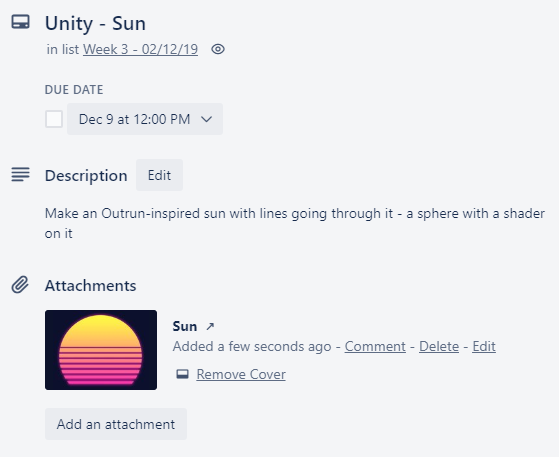
Right now I’m planning as I go along, and I have no idea how I’m going to make this sun work, I think the best way is to use a shader graph in unity and apply it as a material to a sphere 3d object but make the sun stay in one place.
This is the result of the shader graph I used.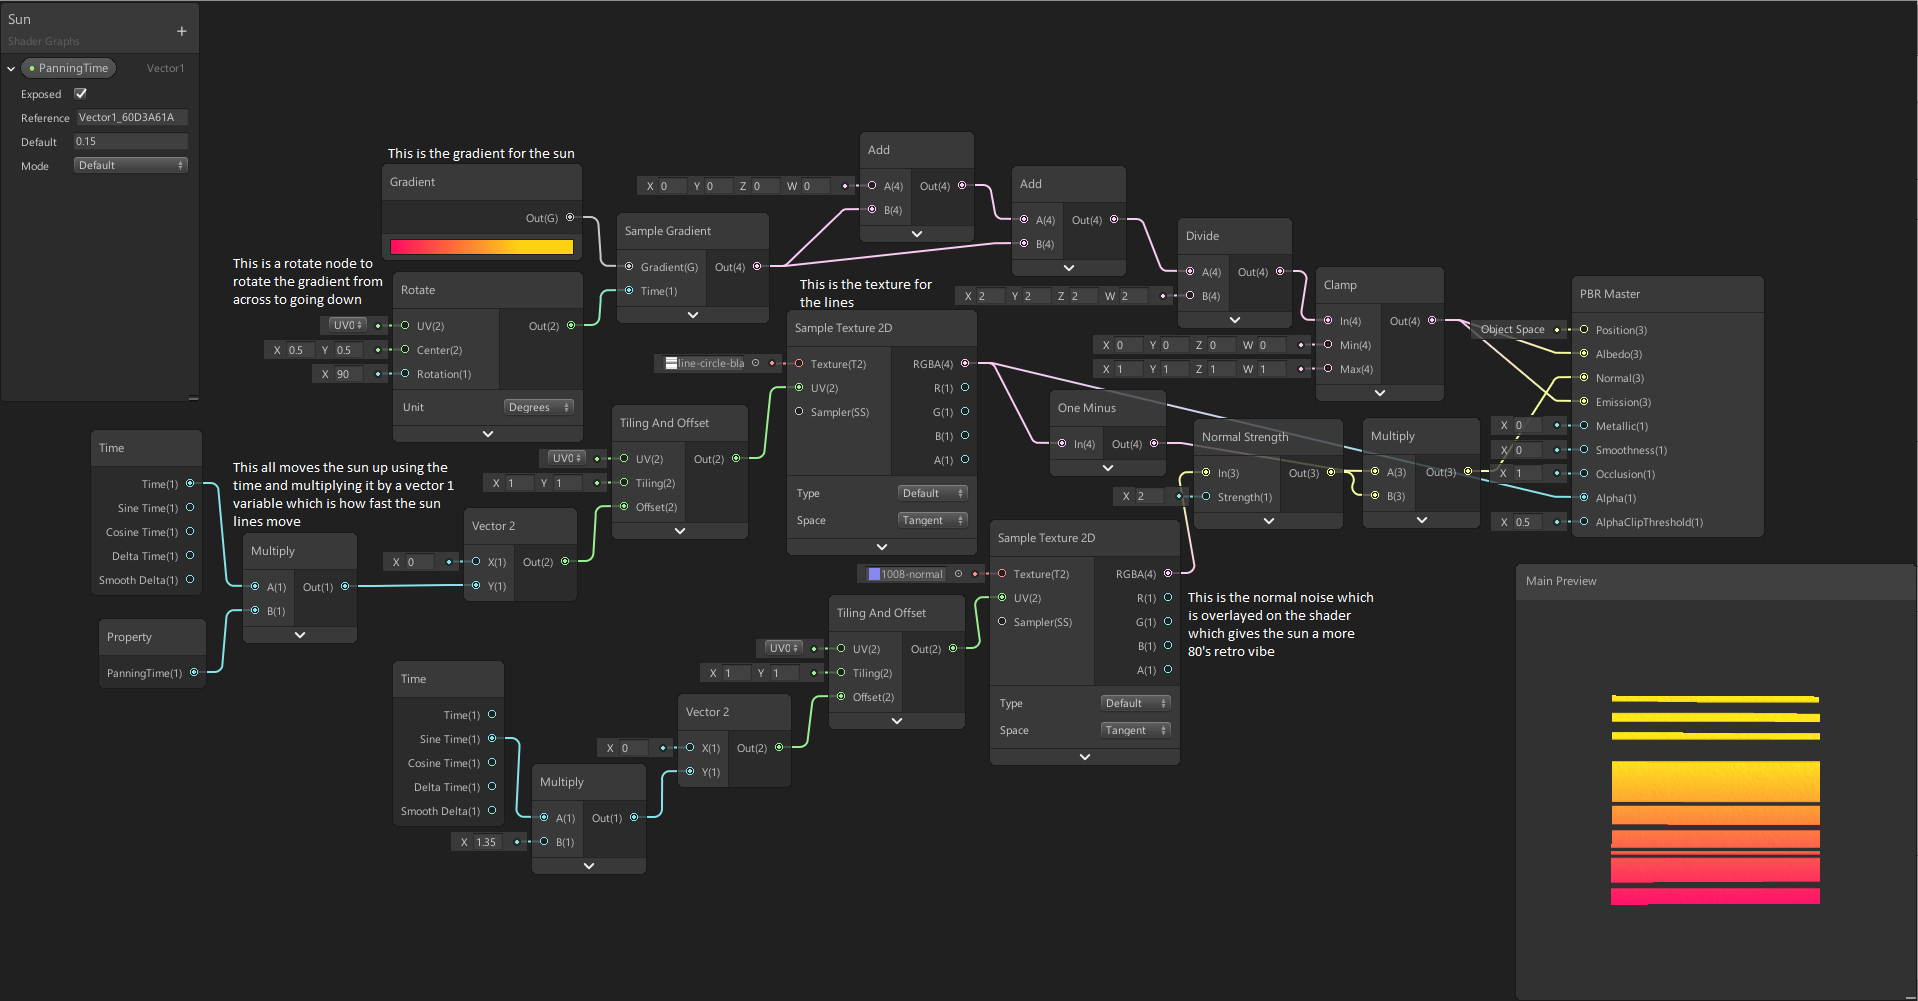
To make the sun show, I needed to get rid of the fog I had.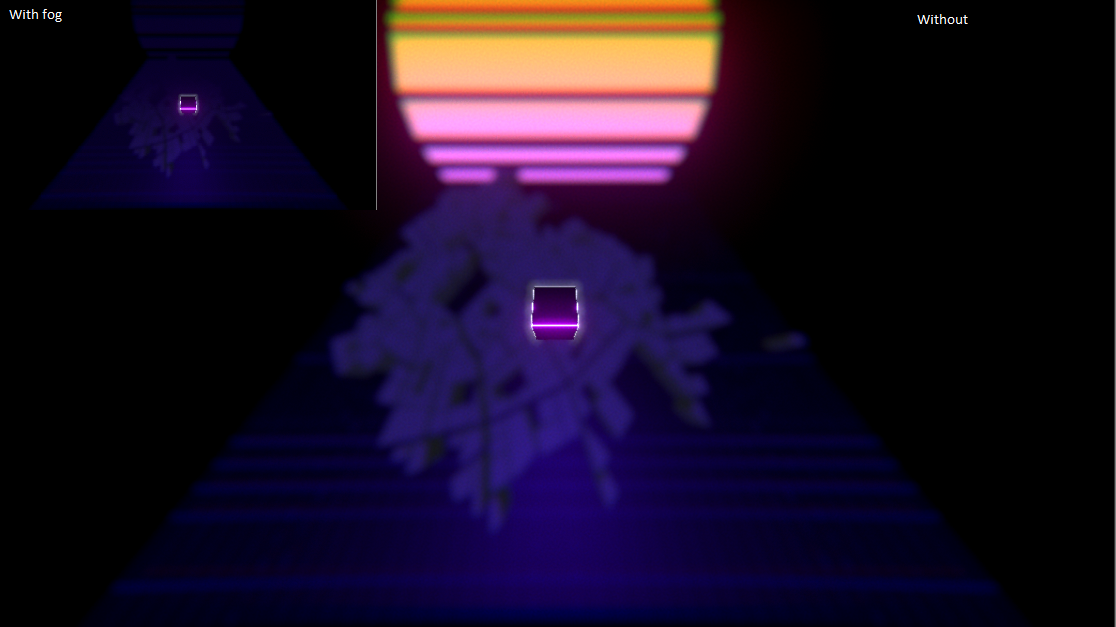
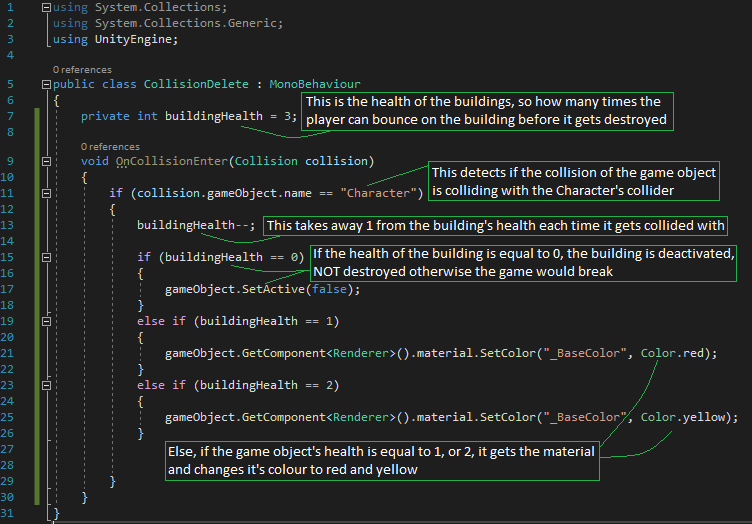
Unity – Collision Deletion
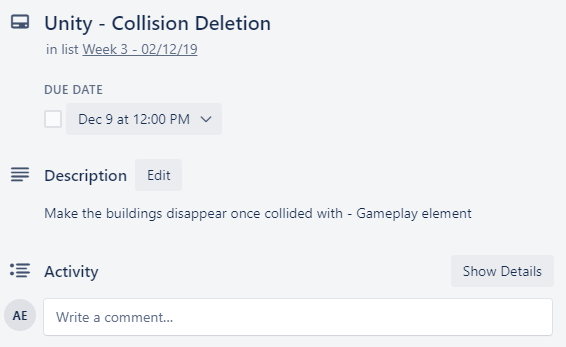
I wanted to add some basic game play into this and I decided that it would be fun if I make it so the buildings disappear once you step on it, the script below is what I made to make this work, with changing the colour of the material, I had to use _BaseColour instead of .material.color = Color.red since I was working in LWRP (Light Weight Render Pipeline)
Result:
I didn’t really like how these colours looked, I wanted to use colours on my colour pallet, or at least something close to that.
At first I was struggling with getting it working since I was using Color instead of Color32 for my RGB values.![]()
This wouldn’t work since color is only between values 0 and 1, whereas if I wanted values between 0-255 I would need to use Color32, I would use Color if I really wanted to, but I would have to divide my values by 100.
This is the result:

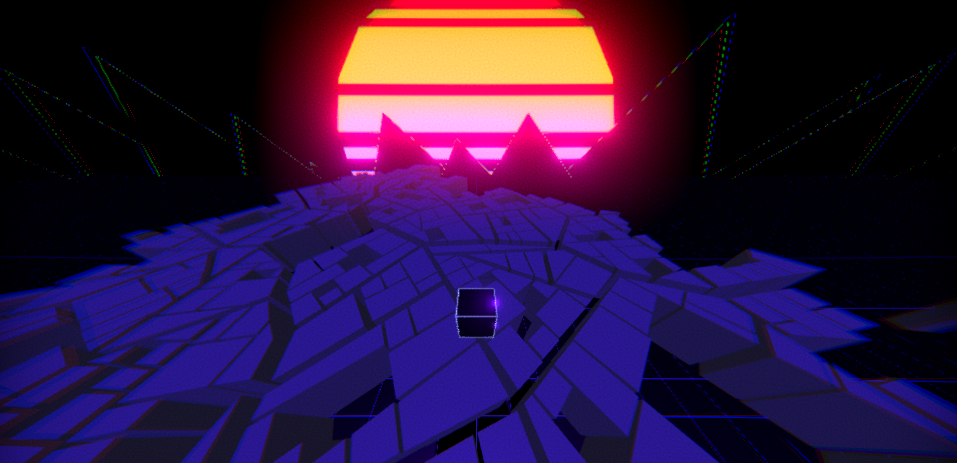
Unity – Mountains
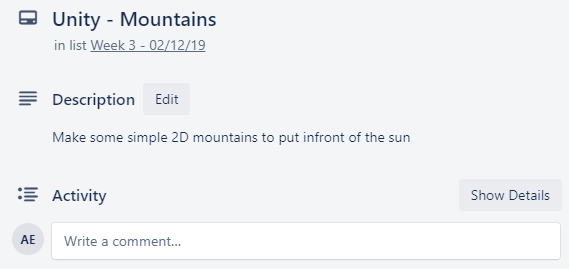
I didn’t want to make anything too detailed in my background, so I wanted to go with a simple 2D quad rotated to look like a mountain in the background, this was easy, I made a quad and I applied a new material to it which is derived from the grid shader graph, editing this materials properties so it’s just an outline around the quad, I then put the quad in the scene and rotated it to look like a mountain, putting it in front of the sun, I then made this quad a prefab and duplicated it, moving it all around, this is the result:

A quick change I made was adding this into my script so that the minimum size the buildings could be wasn’t below the ground, so I can actually see all the buildings when I begin playing.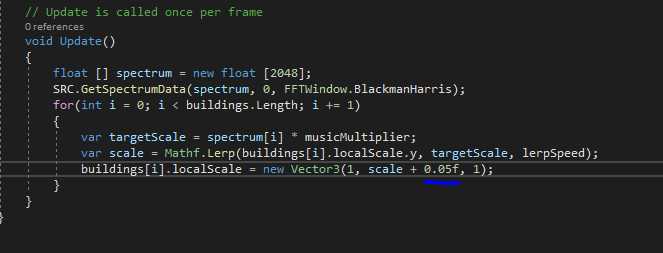
Planning for next week –
- How do I plan to catch up?
There isn’t anything I feel like I need to catch up on, this is because I’ve done more work then I initially had planned on my trello board, so I’m going to start my Task 5 Planning, production and practical skills for next week.
- Do I need to change anything about my work or planning?
I’ll need to change my Trello board and plan ahead, making plans for my planning and production for Task 5.
