
Week Number & Date: Week 6 – 17/10/2019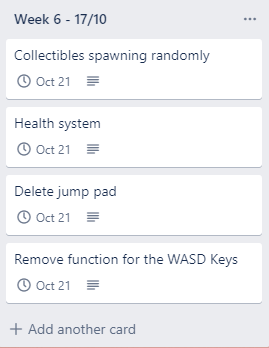
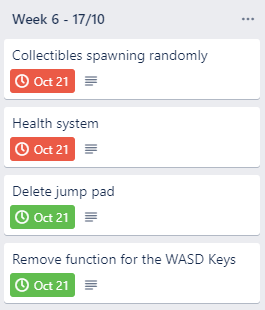
List of Tasks planned for this week: The image to the right is what I have planned to have complete by this week, it is quite a lot to complete in 4 days, but I can try, and if I don’t complete it, I always have that final week available so I can do it in week 7.
Current Position –
What did I do this week and why did I do it? (Screenshots/Videos/Photos)
Delete Jump Pad
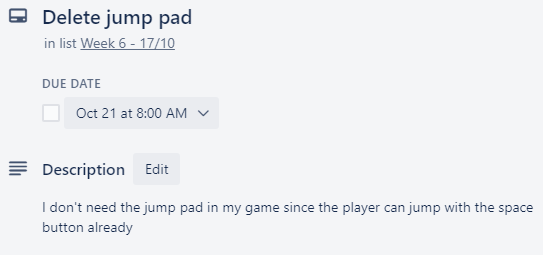
So I decided that, in my game, there is going to be obstacles, which the player would need to jump over, and there wouldn’t be a jump pad ready for them there to jump on all the time, removing the jump pad would make the game more of a challenge since the player would need to manually jump instead of just jump when they see a jump pad, this is such a small detail in my game though that I don’t think it’s worth documenting too much on.
The pros of removing the jump pad would be that we would be presented with a more challenging game, the player has to watch the ground for obstacles rather then relying on the jump pad when they see it.
The cons of removing the jump pad is it means controls are the arrow keys and space bar, you have the extra button which you need to jump, 3 buttons isn’t really much in a game, but it would’ve been better with less buttons.
If I had more time for development, I feel like I could’ve done more with the jump pads, I could’ve maybe used them for a player to jump to another train which is next to the current train in the scene, or I could’ve used them to collect very high coins, but at the moment I don’t see any benefits of keeping the jump pads in the game, perhaps, if I have any spare time during week 9, I can find something to use the jump pads on!
Remove functions for the WASD Keys
 Since I want the player to move only between 3 different lanes which are set on the top of the floor tile, I feel like using the arrow keys would feel a lot better for this instead of the WASD keys. I still have the WASD keys controlling free movement unlike the arrow keys, I knew a lot of people like to use the WASD keys, so I decided that it would be better if I added the snapping to the A & D keys as well as the arrow keys.
I was also thinking of using the up arrow and the W arrow as well as the space bar to jump, this will ensure that whoever is playing can play in the gameplay style which they feel the most comfortable playing in.
I decided to start with stopping the use of the free movement, so in my Event Graph for my player, I knew I had to get rid of the blueprint function which allows the player to move from side to side, so I found the section which controlled that, and deleted it. (circled)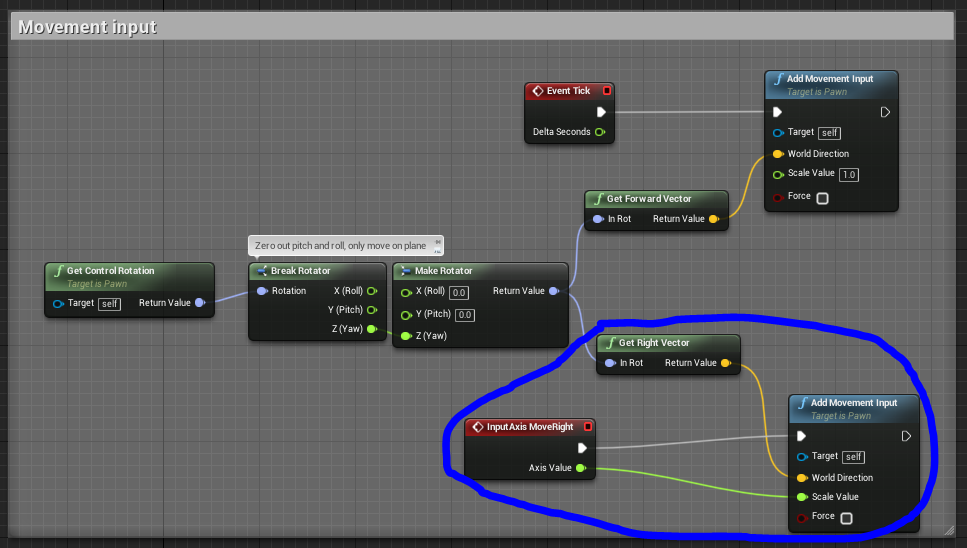
Once I done this, I copied my function for the snapping movement and replaced the Left and Right arrow keys node with the A and D arrow keys.
After I done that, I began working on getting the jump working with the space, up arrow and W key.
This is what I ended up with.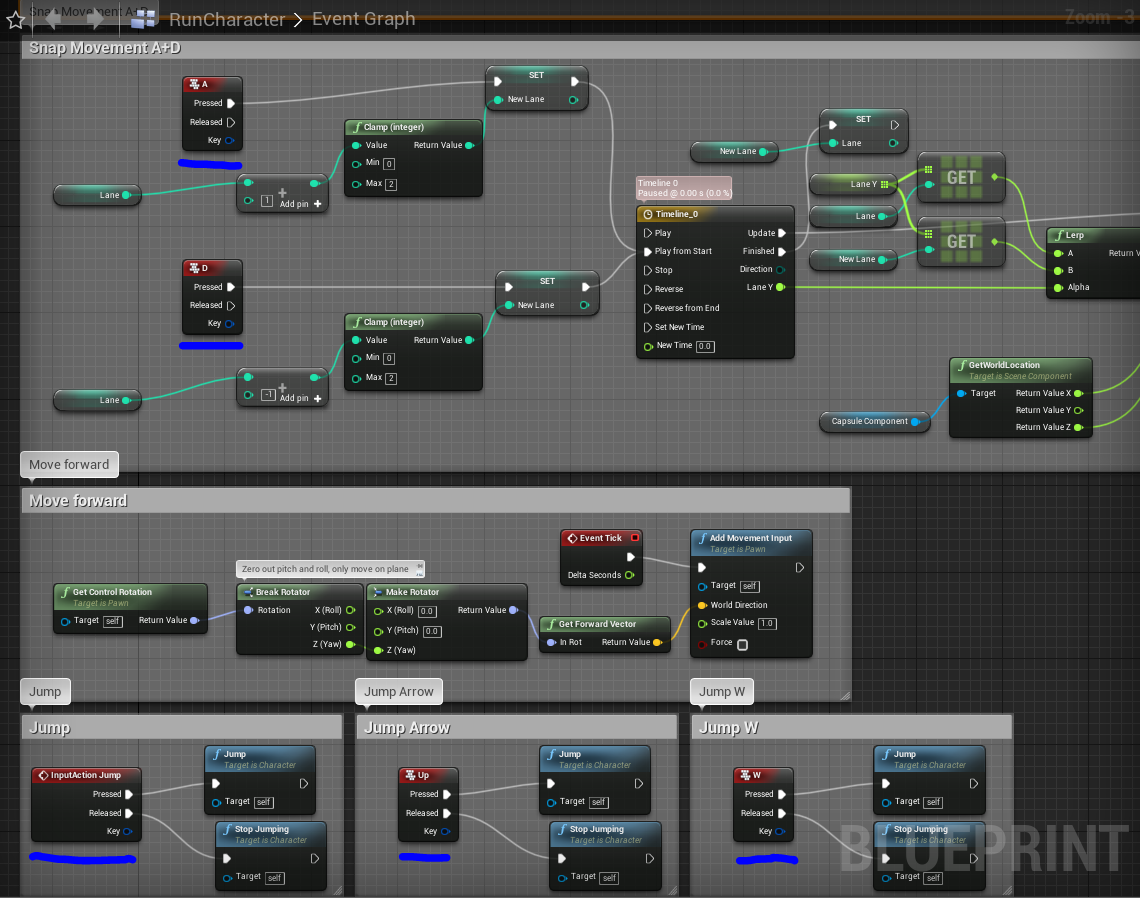
It didn’t take me long to realize that this blueprint was very inefficient, due to the repeated code in the blueprint, I knew this needed to make this more flexible and modular, so I quickly fixed this so it was neater and more efficient.
This is what I done with the blueprint of the jump function.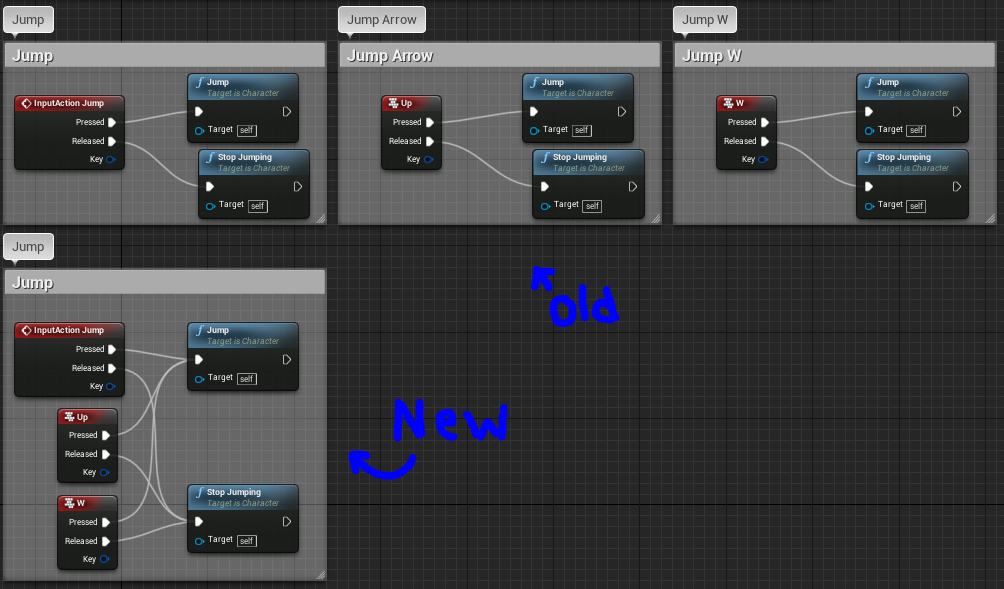 The New blueprint jump function works exactly the same as the old one which is split up into 3, the new one requires less nodes and has no repetition, since code repetition hurts efficiency .
I done the same for the snapping function, adding the nodes onto the same part of the snap part instead of duplicating the whole section and pasting it, and changing out the keys.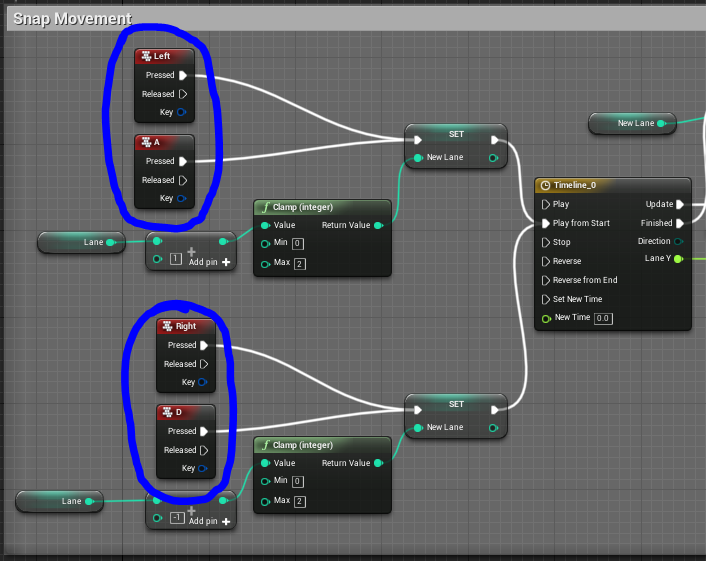
The pros of doing this is that overall, the blueprints are a lot cleaner, and easier to read, and there is overall, less nodes, less code for Unreal to run, whereas if there was multiple copies of my snap movement (for example) – It would have to run the whole code for the snap movement again if you decided to use the A and D keys instead of the Arrow keys.
I can’t think of any cons of doing this other then trying to figure out how to fit all the nodes into the function.
- What did I find difficult or easy?
I found that removing the function for the WASD keys and removing the jump pad was easy, since this is pretty much just deleting a component.
I think that making the blueprints more efficient worked well as well.
I didn’t find anything complicated this week.
- What tasks didn’t I complete from this week?
 This week, I didn’t manage to get my health system or randomly generated obstacles done, due to a very busy weekend.
I was planning to have everything finished by October 21st, but I fell behind, luckily, these tasks wouldn’t take too long to complete, so I’m not worried about falling behind on these two.
Planning for next week –
- How do I plan to catch up?
I plan to catch up by completing my health system and collectibles spawning at the beginning of Week 7, doing this in week 7 doesn’t worry me since I feel like both tasks would be easy and quick to complete, and I would hopefully still have time to complete the rest of my Week 7 plans.
- Do I need to change anything about my work or planning?
I don’t think I need to change anything, considering I don’t have work this Friday, so I’m able to use that day, along with the half term time which I have off to complete my work to the highest standard.
Week Number & Date: Week 7 – 21/10/2019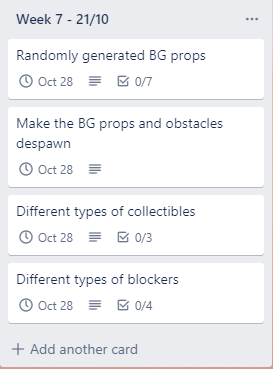
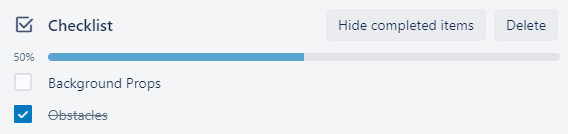
List of Tasks planned for this week: The image to the right is what I plan to have completed by the end of this week.
And, from falling behind last week, I also have to catch up on these two tasks: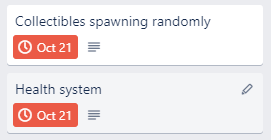
Current Position –
What did I do this week and why did I do it? (Screenshots/Videos/Photos)
Health System – 22/10/19
 To get this working, I had to first get a basic instant death to work in my game.
To begin, I added a box collider to my blocker in the viewport, this collider would act as a trigger, so when the player collides with it, it is a game over.
I decided going for an instant death in my game would be better then having a certain amount of health since it would make the game more challenging.
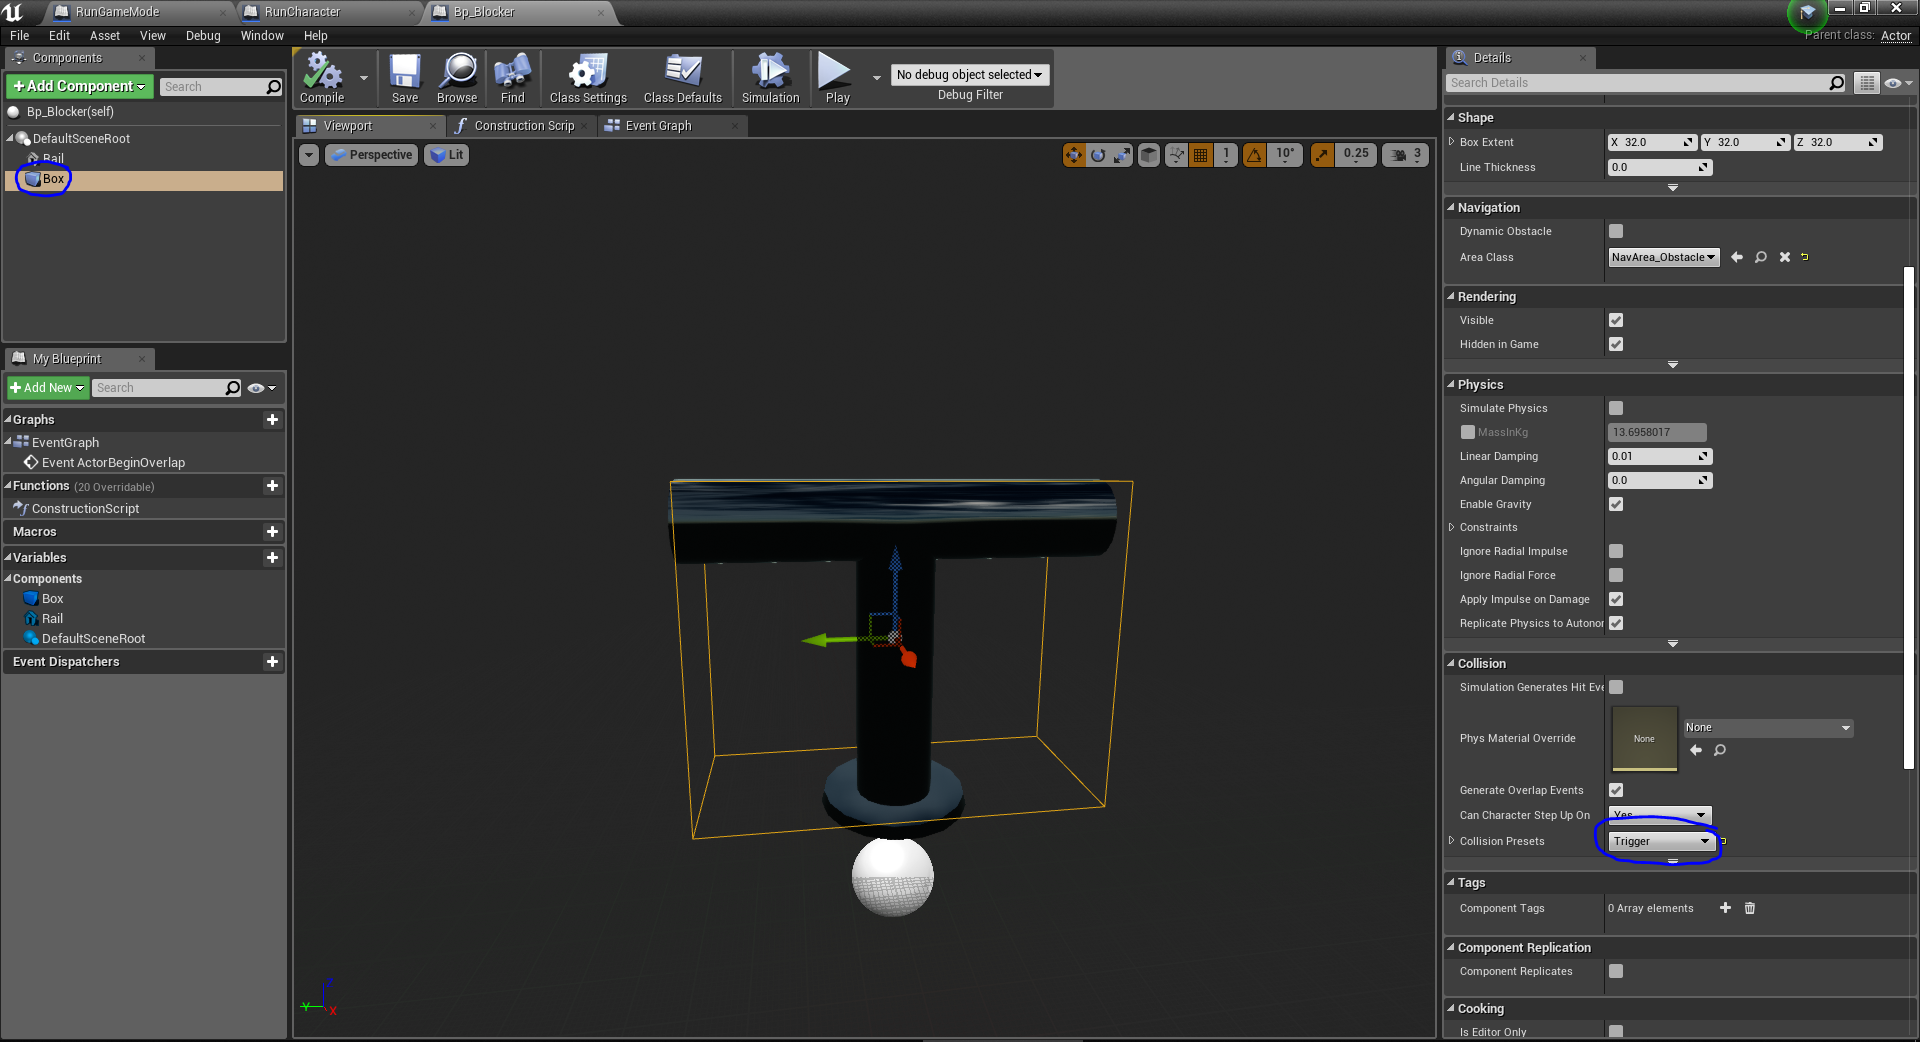
This is the only blocker I have in the game so far, but I would do exactly the same for every single blocker which I make for the game.
In the Event Graph of the blocker, I made a very simple blueprint, and what this blueprint does is it checks whether the player is collided with the box collider, and if it is, it restarts the level again, in the future, this would change so when you collide with something, an animation would play of the character tripping over, along with a sound effect, and then a death screen would pop up, prompting the player to restart the level or go back to the menu, there would also be a score system here.
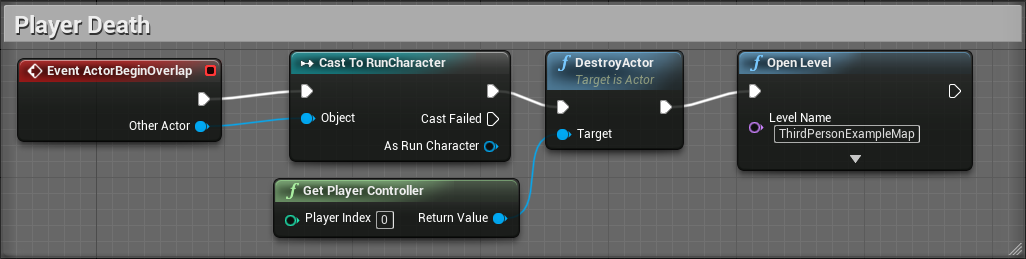
So, from Event ActorBeginOverlap, it would run this script every time the box collider has been overlapped, and from there, we cast to RunCharacter, what this does is it gets the player character, and check whether it is the player character which is collided with the object or if it’s something else, if it was something else, nothing would happen, it’s very important that we make it clear that we only want to trigger this event when the player has triggered it.
After that, we use the node Destroy Actor, and set the target to the Get Player Controller, this ensures that the player can’t keep playing after they collide with a blocker.
Originally, after this I had a delay, but I didn’t think that was necessary, and it looked as if the game froze.
After this, the Level is opened again, at first I had the level name as MyProject, and I was getting this error up: That was when I realized that my level name wasn’t MyProject, but it was ThirdPersonExampleMap.
That was a very easy fix, and this is the (Unfinished) result.
As you can tell, every time the player character collides with the blocker, the level resets.
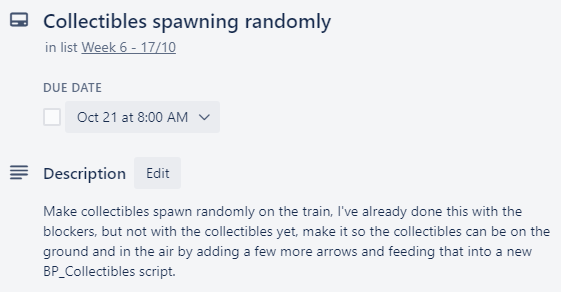
Collectibles Spawning Randomly
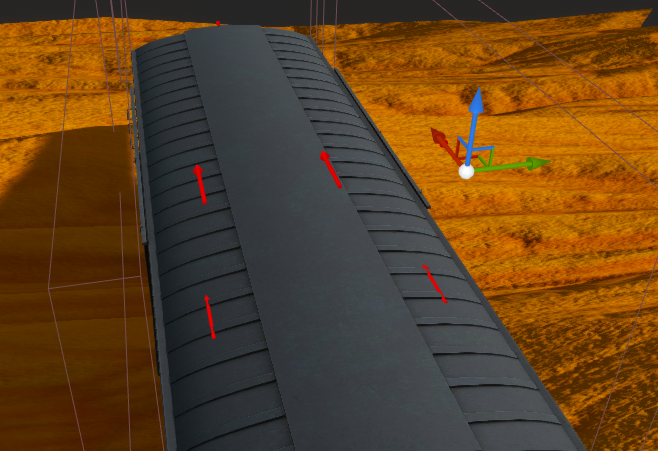
To begin with this, I looked at the blueprint script for my floor tile, which is where my obstacles are randomly spawning from, to see what I can copy to make things work quicker.
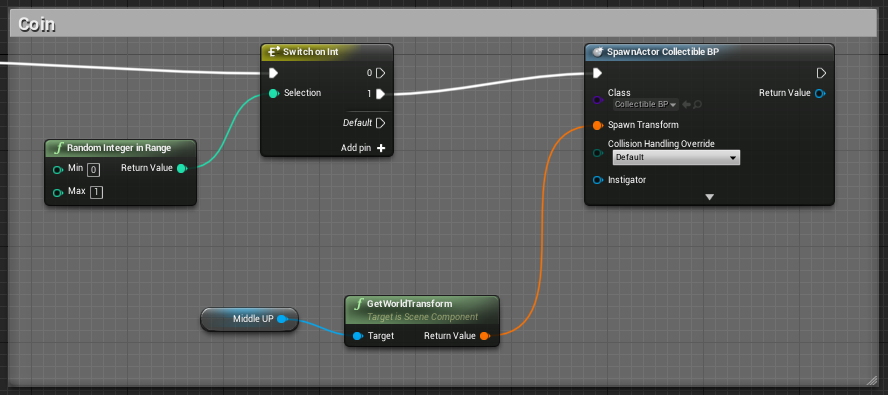
My spawning obstacles randomly works by generating a random integer between 0 and 1, and if it’s one, it runs SpawnActor and I have the class BP_Blocker selected, so that is what it would randomly spawn, and then it would get the transform position of one of the arrows, so it can be any arrow which is inserted into the floor tile.
So for this, I know I would need to keep to the left right and middle arrows, but also have upper left, upper middle and upper right arrows as well, so the player would have to jump for the coins.
 This is what the blueprint looked like, but I quickly noticed a problem.
All the blueprints connected together like this means that this coin can only spawn after a bridge has been spawned, and even after that, it only has a 50% chance of spawning, which left it really rare that a coin would spawn.
The reason I know this is because I tried connecting the coin to the spawn obstacles node, and then they spawned lots.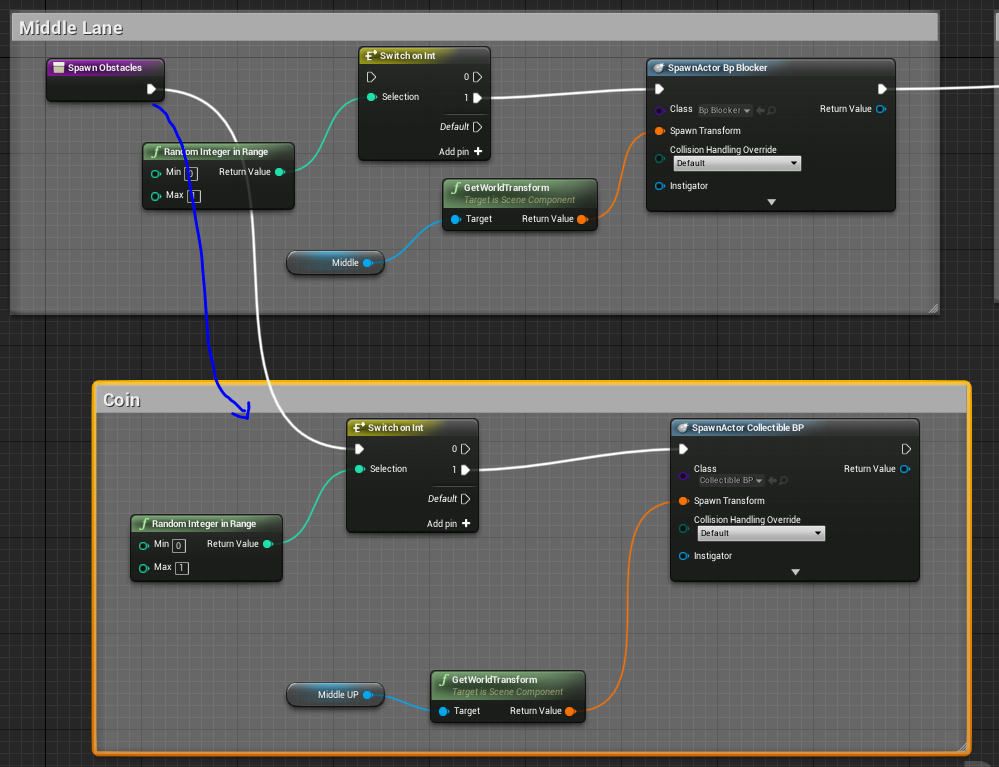
To fix this, I realized I can just plug the collectibles directly into the lanes like I have been doing with the blockers, this helps a lot since it helps shorten the blueprint.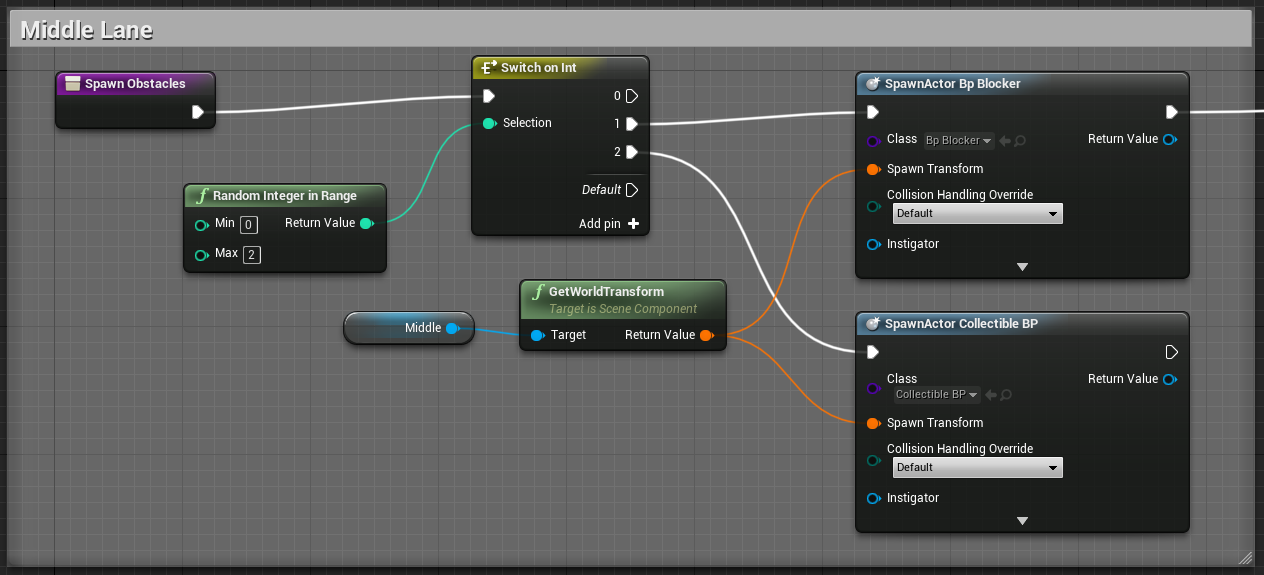 Attaching the bridge to the same function made it a lot more common for the bridge to spawn, and I didn’t like that since I felt like it looked odd.
I added the extra node (above) to all three lanes, and I think it looks nice.
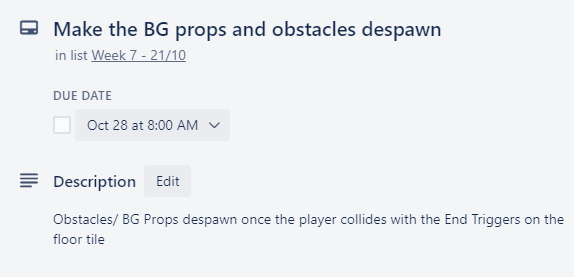
Since I’ve now got all my Week 6 tasks completed, I’m going to begin my Week 7 tasks, starting with what I think is really important, which is despawning/destroying the obstacles which the player has already ran past, I would do this so that the obstacles don’t build up over time and slow down the game.
Despawning/Destroying Obstacles.
Since my floor tiles already despawn, I’m going to reference the blueprint 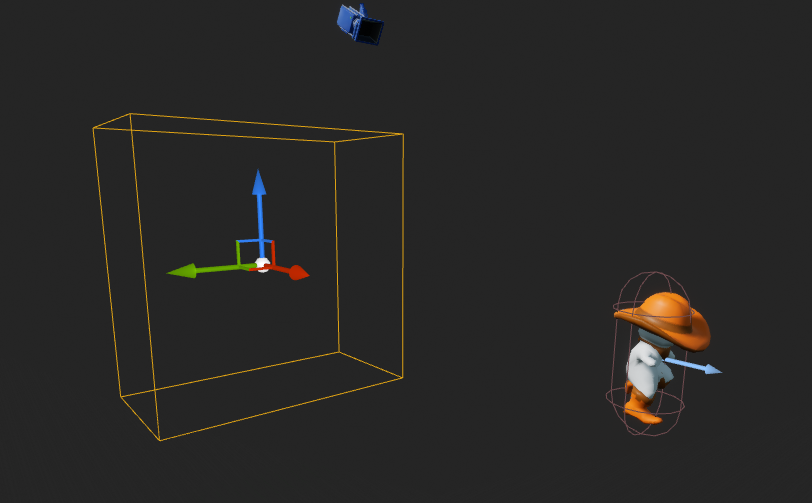 script I used for that.
I began by adding a big collider (set to trigger) to my player character, this collider would detect whenever something is colliding with it and then destroy that object, I started off by doing this to the coin.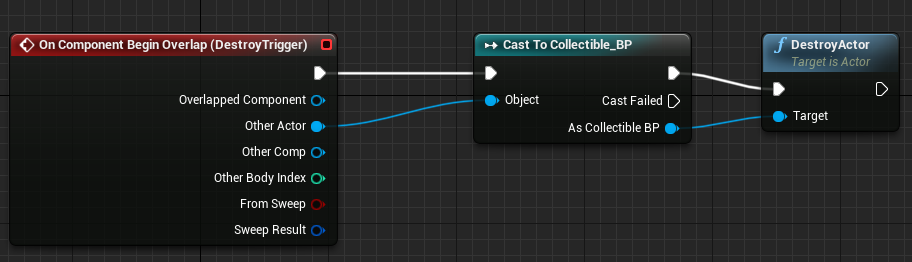 This destroys the actor (coin) since it’s casted to Collectible_BP, but this only works with one thing since I don’t know how to cast to multiple objects.

So now I wanted to make it so that trigger destroys EVERYTHING, but I couldn’t find a solution to cast multiple objects at the same time.
The above GIF would only destroy the coins but not the barriers.
I was struggling with finding a solution to this, and I asked for Colin’s help.
I figured out in the end that there is a node which is very similar to an IF statement, called a sequence, so I used that, and it ended up working, at first.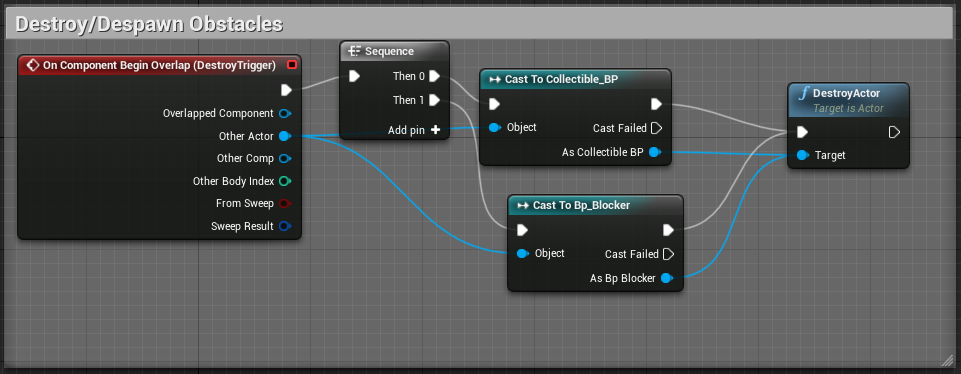 But then once I finished playing, an error popped up, this was the error:
 I soon figured out the error for this, every time the script for despawning obstacles ran, it was checking for the Blocker AND the Collectible, trying to destroy something which potentially isn’t there when it does find something to destroy, this was a very easy fix, I just had to add a separate DestroyActor for each cast.
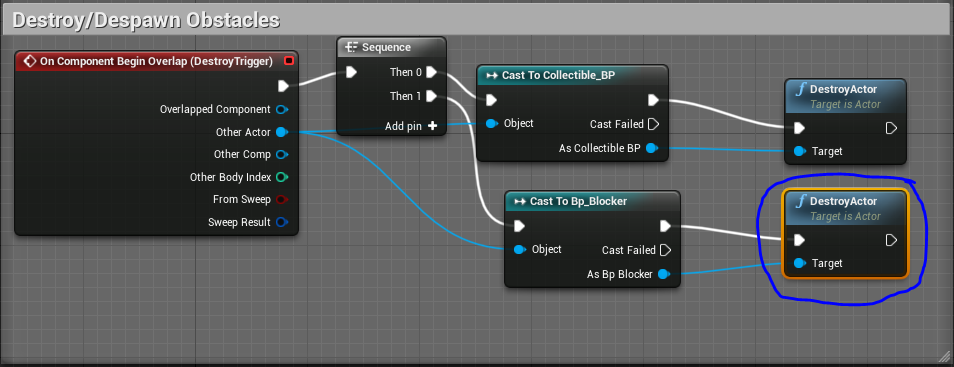

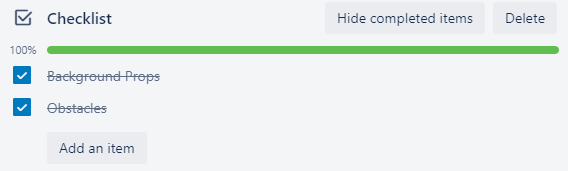
 Now to complete this, I just need to have the background props to actually despawn.
Randomly generated background props
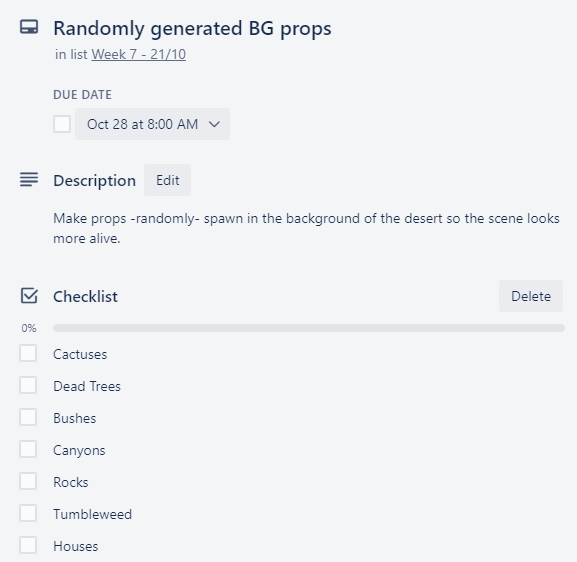
I began this by installing this asset pack which I’ve really liked the look of, it has many cactuses and dead plants which would be perfect for a desert.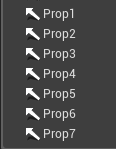 After I done that, I attempted the same spawning function which I have in my floor tiles, but I knew this was really inefficient and wouldn’t be truly random, so, I tried something else.
I began by using arrow components and making different points in the level which I want the props to spawn at, I made the mistake of scaling these up, since my model was so tiny, but I left this as 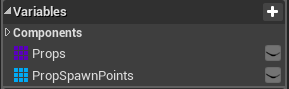 it is for now so I can work out how to get this working.
I made 2 components, a Props array of an actor class which would list all the different props which would spawn and a Prop Spawn Points array of an  Arrow component class which would go through a list of the different arrows
I would put all the different prop actor blueprints into the Props array, at the moment I only have one which is the cactus, but I will start to have more later on, at the moment I’m just testing everything works.
After that I made a function, called Spawn Props, this was originally going to run the same blueprint scripts as the Spawn Objects function, but in the end I chose to do something different.
This is the function: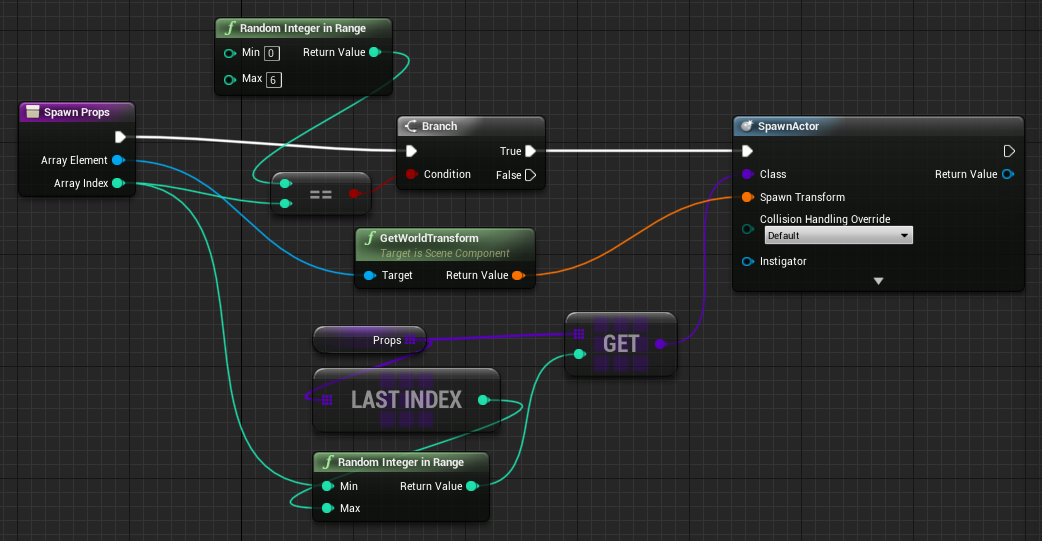
I began by attaching the spawn props function to a branch which can return 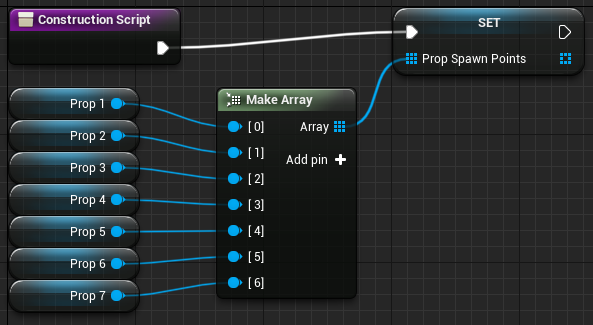 true or false, and the condition of that is if it is equal to the random integer in range, which is between 0 and 6, we have 7 arrow components so that is what it’s picking out of. I set the arrays of the spawn points in my construction script.
From the random integer in range, we set the minimum and maximum to the array index (so between 0 and 6) and the last index if we were to add anymore, the last index is linked to the array of the props, so it would go through each array of the Prop Spawn Points and reference the different props which it can randomly pick out. The return value of the random integer is attached to a get node, whos array value is set to the props array, so it would get a random prop, and then this is attached to the class of the Spawn Actor node.
The array element is attached to Get World Transform and then the return value is set to the spawn transform of the Spawn Actor node, so the props know where the spawn in.
And then after this I needed to reference the function so it would work, and this is how I done that.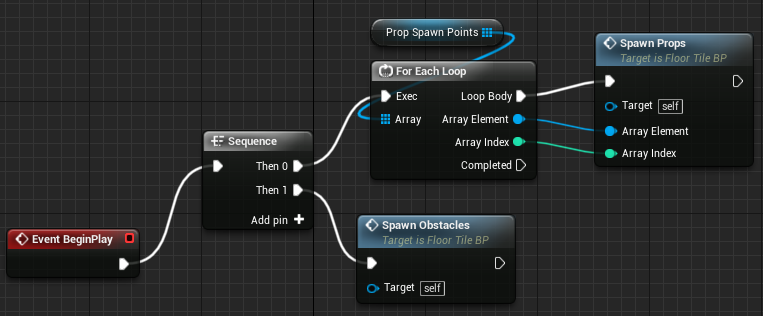 On my event graph, on Event BeginPlay, I used a sequence, so I can run 2 functions at the came time, to get my spawn props to work, I attached a For Each Loop, this is so it would always loop through the function and not run just once, and the array of that for each loop is attached to my prop spawn points, and then finally the loop body, array element and array index is hooked up to the Spawn Props function.
This is the randomly spawning background props in action: Now I just need to add the different meshes.
That’s very easy, I just make a blueprint actor and replace the meshes.
This is my result after adding the different background props.
Despawning/Destroying Background Props.
 For this, I done exactly the same as I done above for the obstacles but this time I applied it to my props, this looks very inefficient, and I’m sure there is a much quicker way to do this with using less nodes, but it works for now.
I had to cast to every single background prop which I had and then I had to destroy it.
I had to also resize the collider behind my player so all the background props will trigger the trigger and not be outside of it.
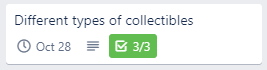
Different types of collectibles
 To begin this, I wanted to get the function of the gold coin working, adding points everytime you collect it and the gold coin being destroyed when the player is collided with it.
This was very simple to do, I just needed to add a Destroy Actor on the end of my begin overlap node.
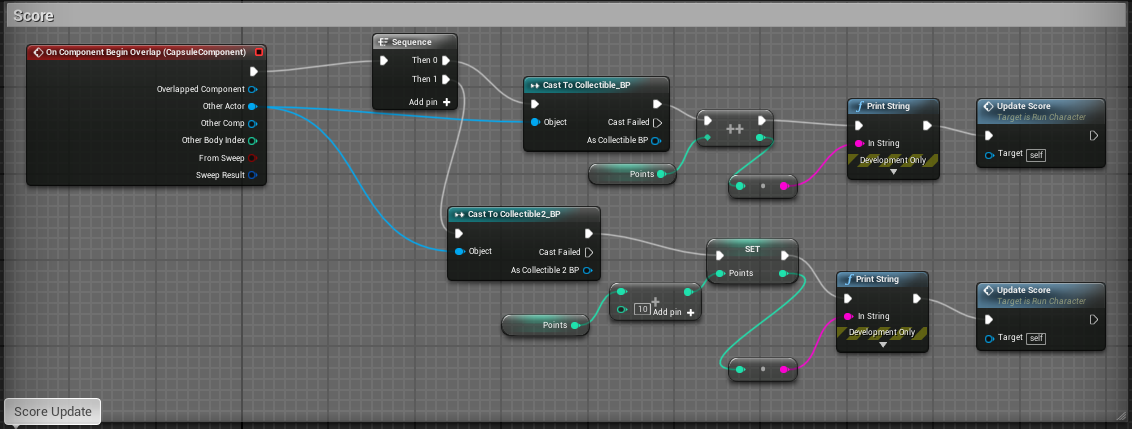
Now to start a score system, I simply added a few nodes which would increment the value of Points and then print it out to the string, but this wasn’t working for some reason, even though it should work.
After some online research I found out the problem I’m having is that I’m trying to run this function every time that the coin is collected, and I should instead run it inside the player character blueprint and just cast the player character in the collectibles blueprint.
This is how I changed it so it would cast to the player character, before it runs the blueprint of the coin. The player character is where all of the collectible functionality is happening, this is for the coin and the bag of gold, they both are worth different values, the bag of gold is worth 10 gold and the coin worth just 1 gold.
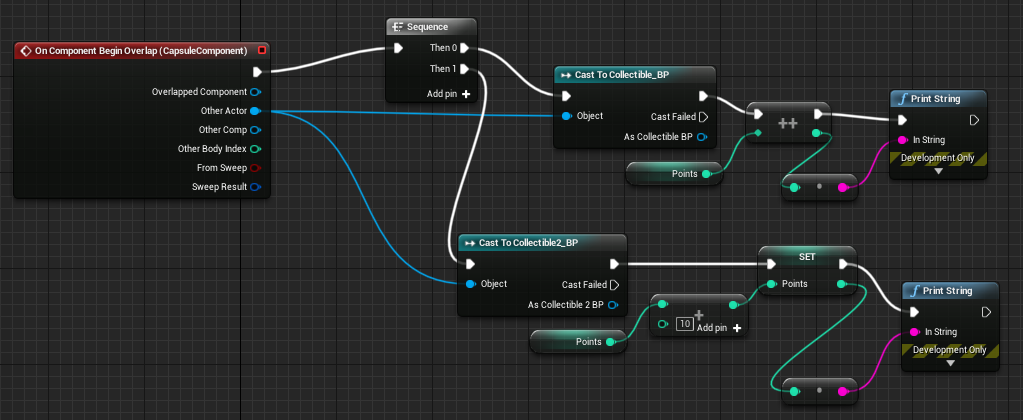
I’ve just done the bag of gold and the coin first since they just have basic functions, the bottle will do something completely different.
This works by printing the score to the console.
I decided to move onto putting different collectibles into the game, the first 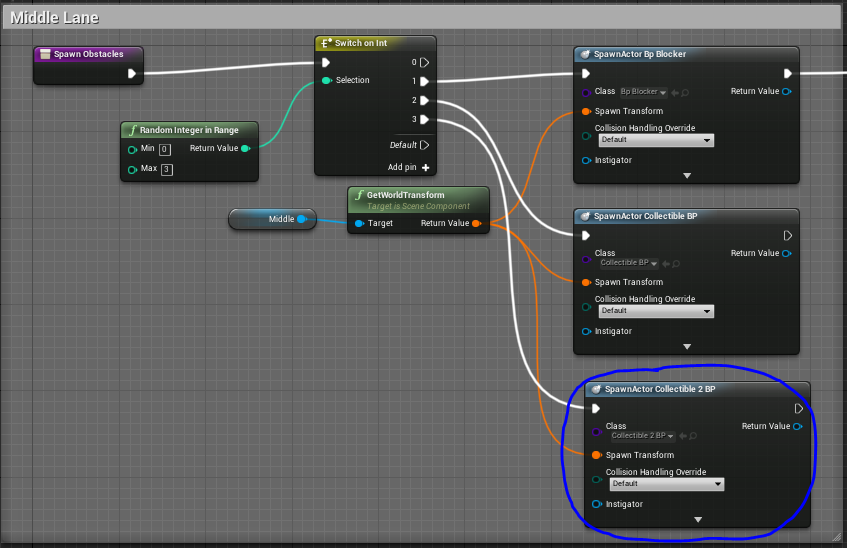 one I inserted was this Bag of gold 3D model, I done this by duplicating my collectible blueprint, and simply replacing the model of it, it began out as far too small, so I had to resize it so it was just right, and then it was too big, but that didn’t bother me for now, I added the bag of gold into my collectible function in my floor tiles blueprint, this all worked just fine, so I just need to do this for all my other collectibles.
 Different Types of obstacles
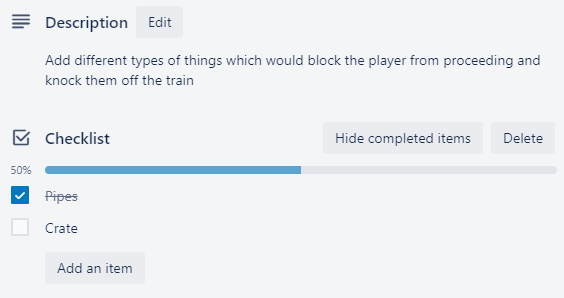 I began this by finding a crate model which I liked since I didn’t have one before and never planned to have a crate obstacle, I just needed a square crate
 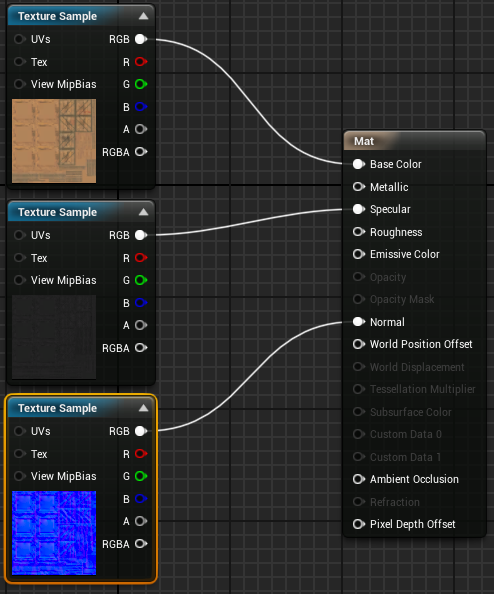 so it would be able to fit in the level just fine without getting in the way of the other lanes or the player if they’re not on the lane which the player is on, I know I can do lots of different things with the crates, like have them stack on top of each other etc.
This is the wooden crate which I decided to use, I’m using this because it’s very simple and has a royalty free license.
I inserted this model into my unreal project and I added the different textures and material onto the crate.
After I done that, I duplicated my BP_Blocker and changed the mesh from the pipe to the crate.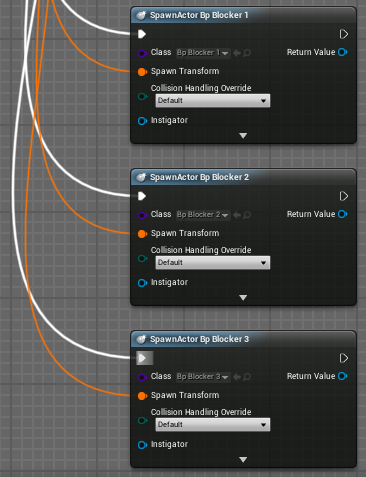 I then changed the pipe how I liked it in the view port, and once I got a result I liked, I made a few other crate blockers with a few crates on top of each other, I didn’t want to make too many though, I then attached these to the lane in my floor tile blueprint.
This all worked, except the crates and collision boxes were far too big so the player character was restarting the level due to going through a random box collision which they didn’t know was there, I thought this would be an easy fix, I thought that all I had to do was resize the crates and everything would be sorted but that wasn’t the case, after a bit of thinking I remember the trigger which I put on the player character, and that I needed to add a cast to on the player character so the level doesn’t think the player is colliding with something when the destroyer collider goes over the crates.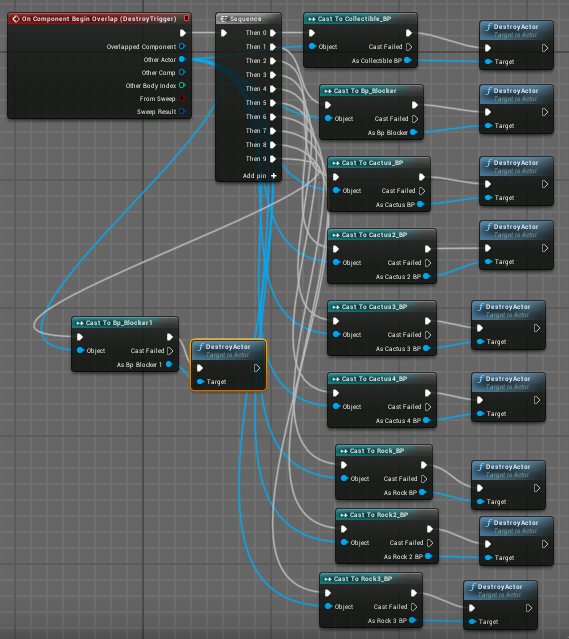
One thing I did notice during development is that my objects barely spawned and when it did, it was mostly in the middle lane, so I was looking at my floor tile blueprint and I connected a few nodes, and now it’s spawning how I want it to do.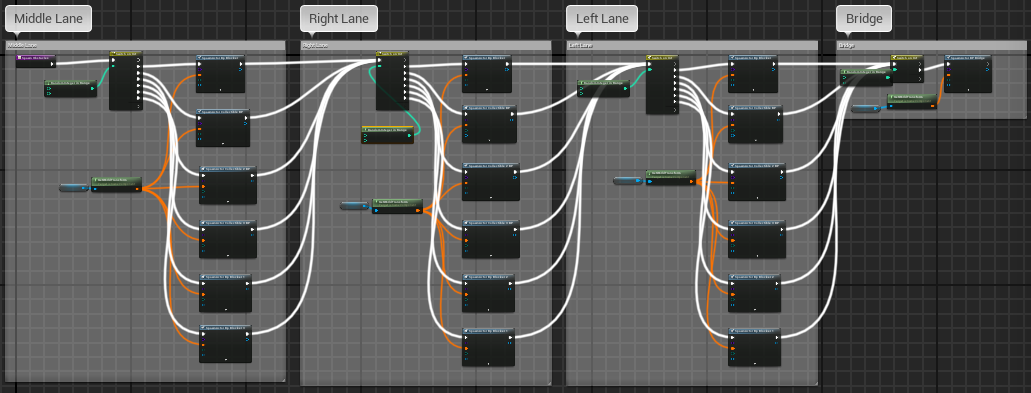
- What did I find difficult or easy?
I found getting the health system working extremely easy, since all I had to do was check if the player has collided with the object and then reset the level, I didn’t know about a reset level function, but now I know.
At first, I found getting the coins to spawn randomly challenging, since I didn’t really think about connecting the multiple nodes, but once I found out, getting the rest working was very easy.
Another thing I found a challenge was making the obstacles despawn, I kept getting errors and I really didn’t know how to go about this, but once I got it working, it made a lot more sense.
One small challenge I found was getting the other obstacles working, since I forgot to add it onto my player character destroy list, so it took me a little while to figure out why that wasn’t working, but once I figured that out, it was working.
- What tasks didn’t I complete from this week?
I almost didn’t manage to get the different types of blockers in the game on time, but I managed to right at the last minute, and I’m glad I managed to get everything done on time for this week, and I’m also glad that I got some of next weeks work done early.
Planning for next week –
- How do I plan to catch up?
I don’t have any plans on catching up, I just hope I can take the half term a bit easier and rest a bit more, I might have some catching up to do for week 8 since I want to relax for the half term.
- Do I need to change anything about my work or planning?
Not at the moment, looking ahead I might need to move some of my half term work to week 8.
I got everything I needed to get done this week and I’m very glad that I started some of next weeks work early so I’m ahead a bit.
Week Number & Date: Half Term – 28/10/2019
List of Tasks planned for this week: The image to the right is what I plan to have completed by the end of this week, I’m probably going to relax more during the half term so I’m not really sure if I will get this all done during the half term.
Current Position –
What did I do this week and why did I do it? (Screenshots/Videos/Photos)
User Interface
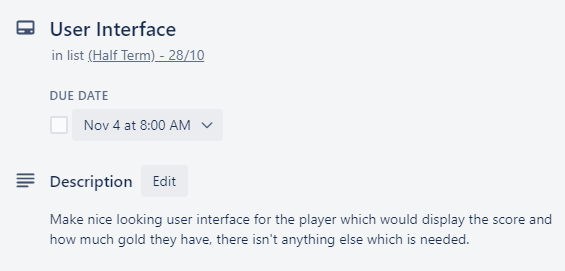
I actually began this task earlier then I needed to, since I was quick to finish week 7’s work, I began working on the User Interface on 24/10.
I don’t know a thing about how to get a user interface working in Unreal 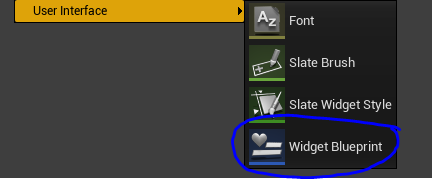 Engine, but Unreal Engine’s Documentation really helped me understand what I need to do to make everything working.
I began by making a Widget Blueprint, I found this under the User Interface section when right clicking on the content browser where I wanted the UI to be.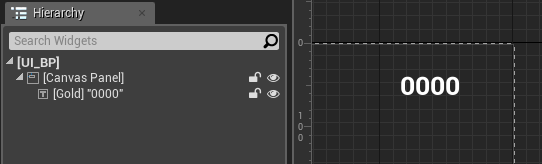 I named this UI_BP, and in here, I inserted text where I wanted my UI to be, I wanted to start with my gold coin collection score. I started by making the text say 0000, but eventually a score would be put in there.
I then went back to my game and opened the blueprints for my level, adding this to the blueprint so the UI is displayed when the player starts the game. I’m struggling making my score text appear on the UI, it works fine in the console.

This blueprint is in my player character and it creates the UI and sets and updates it, I need to make it so it updates it every time the player collides with the coins, so I done this.
Then from there, I got very stuck, everything wasn’t working and I eventually gave up, I was going to try another method, until I realized the only reason it doesn’t work is because I didn’t have the Create UI BP Widget plugged in anywhere! It was such a simple mistake which I overlooked, but once I plugged it in, it somewhat began to work, but for some reason it was
I figured this was because I had it plugged into the Event Tick so it would update every frame, but then I quickly realized, it was adding multiple UI Widgets every time since it’s plugged into the Create UI BP Widget and add to view port.
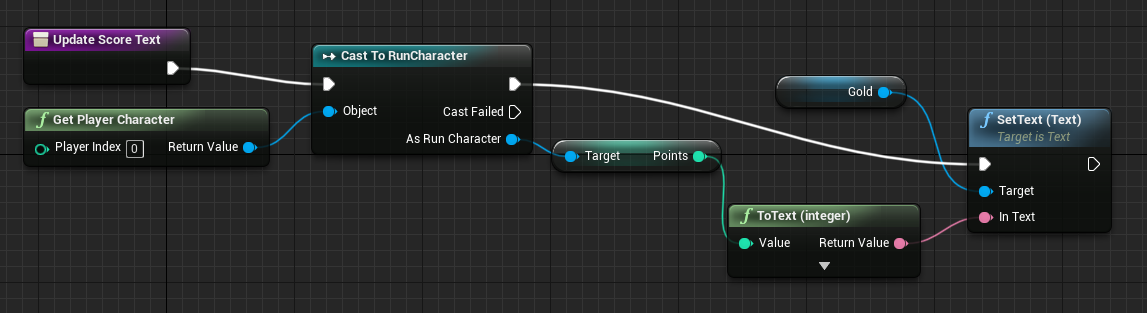
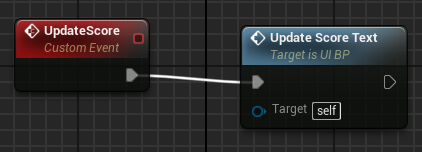 What I done to get it working is I made an event in the Character blueprint which would cast to the UI blueprint and get the update score event which, updates the score, I then plugged the event into the score function on the character blueprint
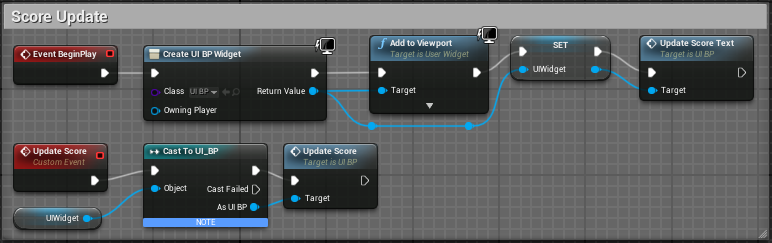
Now to make the text look nice, I found a royalty free font which I thought looked nice which I can use for the gold.
And I found this 100% free to use western style font, and I really liked the look of it.

At first I didn’t have the text
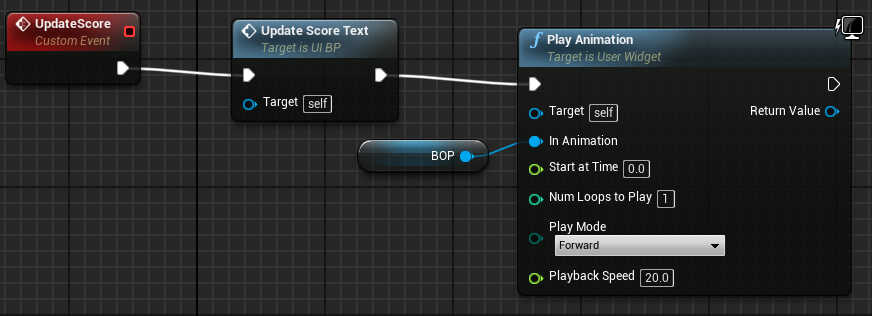
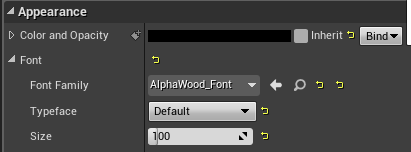 properly aligned, so I had to sort that out by aligning it to the right and that fixed everything, and now it’s looking really nice after some adjustments to the colour of it, and adding an animation to it every time someone collects a coin, I still need to add a graphic to indicate that it’s coins you’re collecting since it isn’t so clear at first.
 I added the animation to the text by pressing the +Animation on the bottom of the screen and adding a key where I want the text to move down, I then moved the text down and then added another key at the end where it was back to the original place. and then I called the animation a Bop and simply called that animation whenever the player collected a coin.
I didn’t have to do this but I feel like it gave the game a much softer and fun vibe when the text bounces every time you get a coin.
Unrelated to task list work – Animation
The first thing I done was the animations, I wanted my character to have more animations then just a running animation, so I went back to Mixamo.
I didn’t take screenshots whilst doing this unfortunately, but the problem I was having was I was exporting the model of the player character from
 Unreal Engine as an FBX file, which didn’t have the texture or the bone information on it, so every time I would try to add another animation to the player character it would always mix up and not work and distort the character, but to fix this, I ended up downloading the whole character and the bones and then using that in mixamo, finding the animations I like and downloading them, and then when I imported them into Unreal Engine, instead of them each using their own bones, they inherited their bones from the actual model, and doing this meant all the animations worked, I then done so research on Animation Blueprints in Unreal Engine, since I had no idea how to get anuimations working in Unreal Engine.
At first I was playing the animations in parts of my blueprint where the player would press the button to jump, but of course that wouldn’t work since the
 player doesn’t hold down the jump key for the whole duration which they’re jumping, so then I thought that I should do some research into Animation
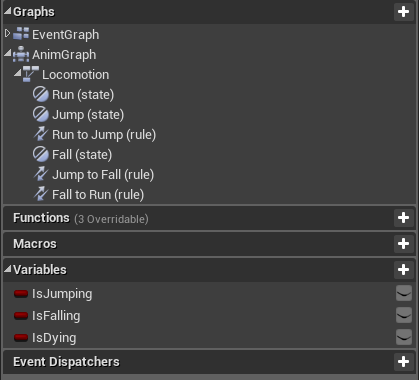
 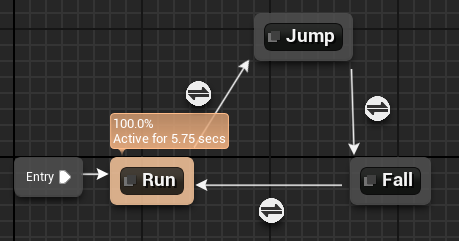 Blueprints and how they work, and by watching a few Youtube videos and reading some blogs I understood how they work, they’re very similar to how blueprints work, since they are a blueprint, and you have to map out what animation would play from entry, and from the entry, how the animations would change into other animations, for example, Run would go into Jump, and jump would go into fall and fall would go into run, and then these conditions are met with a boolean which checks the velocity of the character.
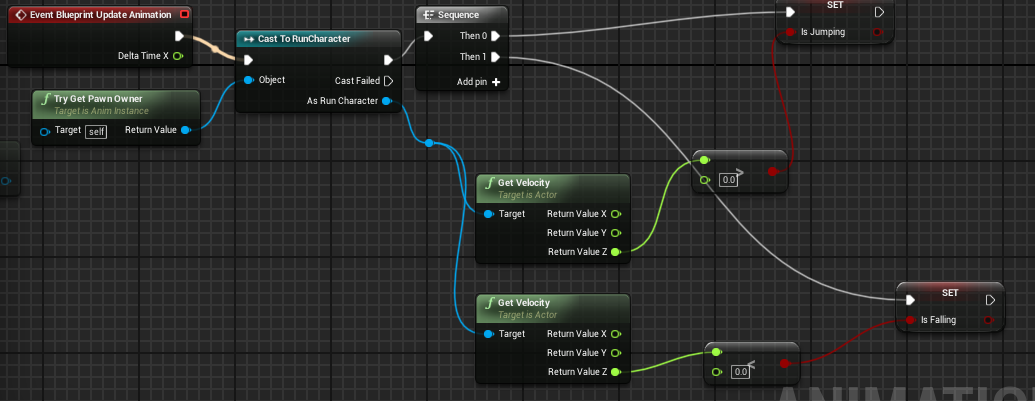
I had to install all of the SDK files and all things confusing for it to even begin to work, and then I had to link everything up in the project settings and set up all of the settings in the project settings, I watched this video to help me understand how it works.
 But of course, I had to have some functionality to have the game working on mobile, and I knew swipe controls are perfect for this game, but this too, I had no idea how to get it working in Unreal Engine since I’ve not worked on touch controls using unreal engine, so I used blogs and Youtube videos to help me out with getting this working, and now I understand how to get swipe controls to work in my game, I tested it by printing to the screen what way I have swiped with the mouse.
And failed the packaging because of the file name, and the reason for this was because it had brackets in it, which was understandable, so I changed the project name and let it package whilst I was at work, and then it finally worked.
After I got it packaged, I put the files I needed onto my phone and installed it, and then I got a texture error message.
And this is what the game looks like on the mobile.
- What did I find difficult or easy?
At first I found getting the coin score text displaying and working hard since everything I was trying didn’t work, but in the end it was a really simple fix and a silly mistake I had made on my behalf from not connecting up the white arrow on a node.
I found that getting the font applied to the text really easy, but I’m still not really sure if I like what the UI looks like!
I found getting the animations working was hard, since I haven’t properly worked with animations yet, so getting that working felt like such a big achievement, and I was really proud of myself for doing that.
I also thought getting the swipe controls working was a challenge, but I liked how I done research and figured out a solution and worked at it until I got it, this I feel helps me learn even more.
- What tasks didn’t I complete from this week?
 Most of my tasks I haven’t completed unfortunately, and that’s why I’m relieved I left week 9 blank to catch up on the tasks which I haven’t completed.
The score system and User Interface are practically the same task.
But I haven’t managed to get a score system in which counts up the further the player character runs on top of the train.
I also haven’t managed to implement a tutorial which would play at the beginning of each time you start the game which would tell you to swipe or press keys to move.
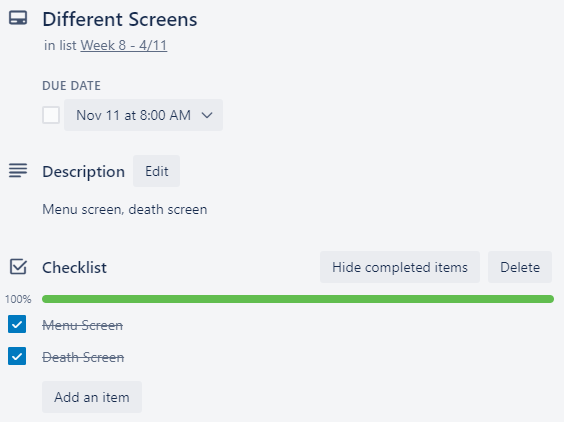
And this week I planned to have a menu screen and a death screen and a shop screen all in the game, which I most definitely do not have.
Planning for next week –
- How do I plan to catch up?
I plan to catch up by moving my Shop/Upgrades task on week 8 to week 9, and then moving all my half term tasks to Week 8, I’m pretty confident I can get all of that done for week 8.
- Do I need to change anything about my work or planning?
No, I don’t feel like I do, I think I have plenty of time to finish everything which I need to finish.
Week Number & Date: Week 8 – 4/11/2019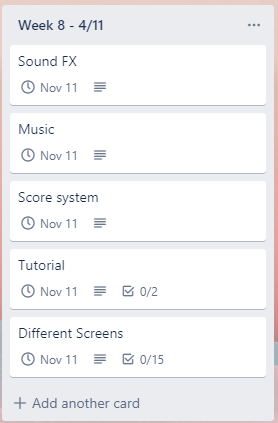
List of Tasks planned for this week: The image to the right is what I plan to have completed by the end of this week.
Some of these tasks are uncompleted tasks from the half term which I’ve extended the dead line on, although there is quite a lot to tackle this week I feel pretty confident I can do it.
Current Position –
What did I do this week and why did I do it? (Screenshots/Videos/Photos)
Tutorial
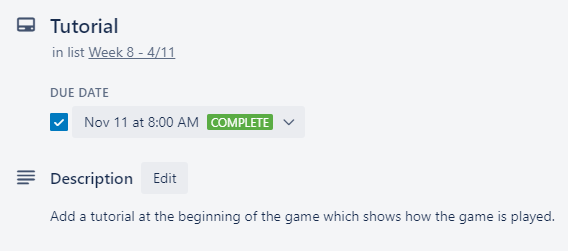
I began by making a simple UI tutorial for my game, of course the graphics aren’t final but I began by getting an image off google and duplicating my UI blueprint, I then inserted the images of the arrows along with some text and I deleted all the blueprint graph information which was copied over from the other blueprint.
I then went into my player character blueprint and added a sequence to my event begin play and then I plugged in my tutorial blueprint to it so then the UI would appear on the screen for a certain amount of time and then get destroyed, and it would show up each time you have to reset the level.
This of course would be polished when I get to Week 9’s polishing task which I’ve set myself.
Score System
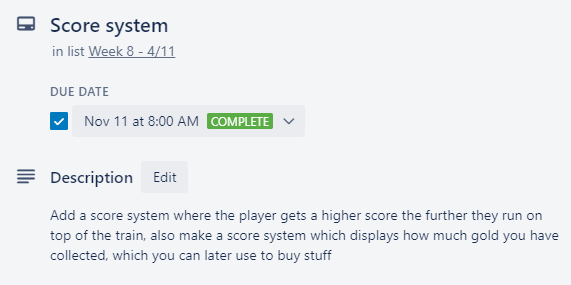
I began this by making 2 integer variables in my Run Game Mode blueprint, one called CurrentPoints and one called Points Multiplier, the current points would be what points the player currently has, and the points multiplier would be what the points go up in, the reason I have this is because I will be having a pick-up which would be increasing the points multiplier for a certain amount of time.
This points system would be different from the coins, since coins will give you upgrades, and the score just shows how far the player character has ran, but not a complete accurate way to show it.
This would be useful if I wanted to add a leader board to my game.
After I created the two Integers, I went over to the blueprint for my floor tiles.
In the event graph of my floor tiles, I cast to the Run Game Mode, and from there I attached that to Get Game Mode. From the white arrow of the cast, I set the current points, I then dragged out the blue pin of the cast to the set current points, this would run through and set the current points integer value.
From here, I dragged out the blue pin again and got the Current points and points multiplier.
I attached the points mutiplier to a Integer * Integer node, and I done this so I can adjust this value when the player collects the point multiplier collectible, I attached the points multiplier to the B pin of the mutiplier node and set the A pin value to 100, by default this should increase the points by 100 each time you step over a tile.
I then dragged out from the end of the multiplier node and attached an Integer + Integer node to it, and then I connected the pin of the Get Current Points to the B pin of the addition node.
What this would do is get whatever the points multiplier is and then add it to what your current points are, and then after this, I attached the addition node to the current points pin on the set node, and that’s simply how the scoring works.
To test it I got it to print the value.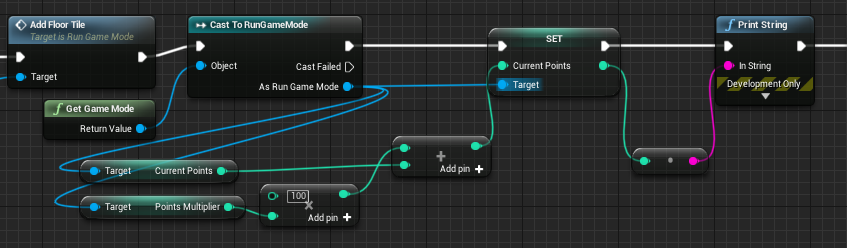
In the end, this didn’t end up working it worked part way, the game printed the correct value to the console, but it wasn’t updating my UI, and this was because there was a problem with creating the UI widget.
I was making it so every time the player collects a coin, the text updates, and the UI widget is created every time the game begins playing and the character starts running, so of course, this wasn’t working when I wanted to update the player score, so I asked for help from Colin.
I ended up creating a HUD blueprint and having my UI be created from there, this is to make sure I don’t have any problems with creating multiple UI over the top of each other.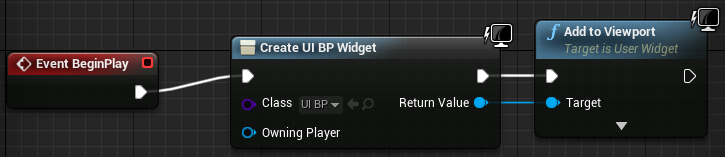
This will make it so all the UI is spawned at the beginning of playing.
To get everything to properly work together, I had to Create a binding on the text of my UI.
I didn’t have one of my text and this is why everything wasn’t working how I  wanted to.
At first I didn’t know what a binding was in Unreal Engine, but after some research I found out what it is. A binding works by binding a property to a Function or Property Variable in your Blueprint, anytime that Function is called or Property is updated, it will be reflected in the Widget. – (Unreal Docs)
After creating a binding for both my coins and score, it all began working.
The bindings worked just like my other functions in the UI blueprint worked, so I just copied and pasted them to the binded functions and got rid of the older ones. And I had to add a few things to the floor tile to get all the adding points working as well.
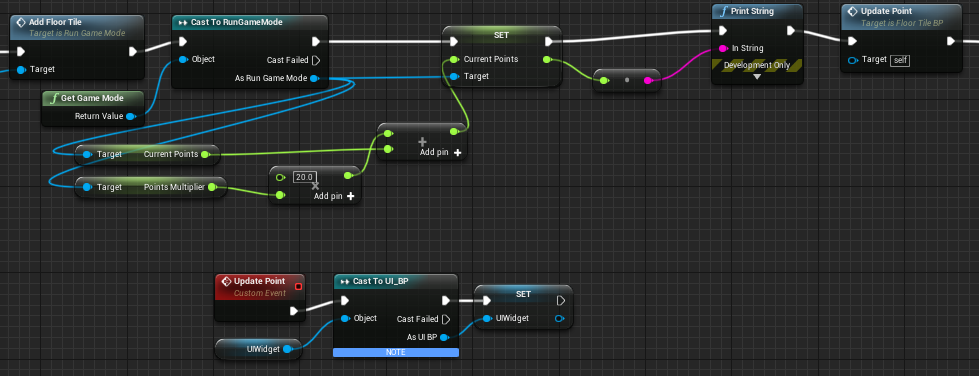 I was having problems with getting the animations to work on the text whenever the player collected points or gold, it used to work and for some reason it isn’t working anymore, the nodes on the bottom of the image above are meant to call a function which plays an animation, but now since it doesn’t work it’s not really important
Menu and Death screen
I began doing these very roughly since I will be polishing how everything looks in week 9.
To get this working, I made a separate map level which was a duplicate of the main level, I then removed all the controls on that map and began setting up a scene for the main menu.
THIS IS NOT FINAL.
This is just a placeholder scene that would be in the main menu, but it will change since I need to do some designs to make everything look nice.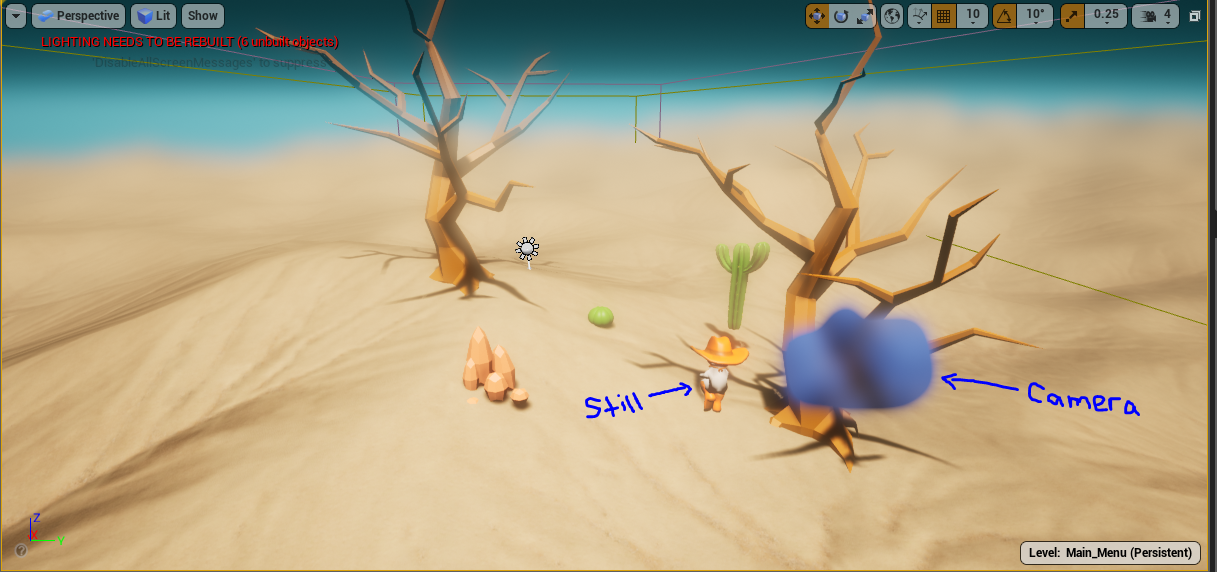
Since this is in a completely different level, it doesn’t effect the main game at all.
For the menu I wanted to just get it working first.
So I duplicated my UI_BP and changed it so it looks like a very basic menu with buttons, this will also change in Week 9.
It was very easy to get everything working how I wanted it to. On the main menu, I wanted to display a Play button, a Quit button, and a button which will display the shop.
 I also wanted the high score visible so the player can try and beat their own high score every time they play the game.
To get everything working, I just added on Click events for each of the buttons.
It really was that simple.
I’m not sure how I’m going to get the shop working but that’s something that I will work on later on.
And I’ll also be getting the high score working later on as well.
Now to get everything to be displayed, I began by going into my Level Blueprint for the Main Menu level, not the actual game level.
I then set it to add the Menu to the viewport when the game starts.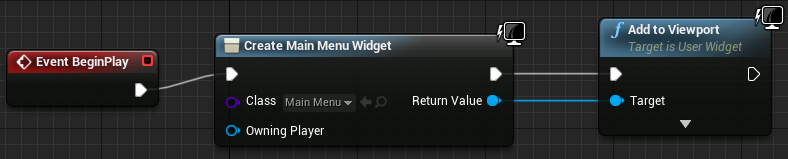
It’s important that this is added to the right level blueprint.
If I were to add it to the game blueprint, it wouldn’t appear at the menu it would appear in the game, and that’s not what I want.
The death screen is very similar to the main menu, except it’s in the actual game level.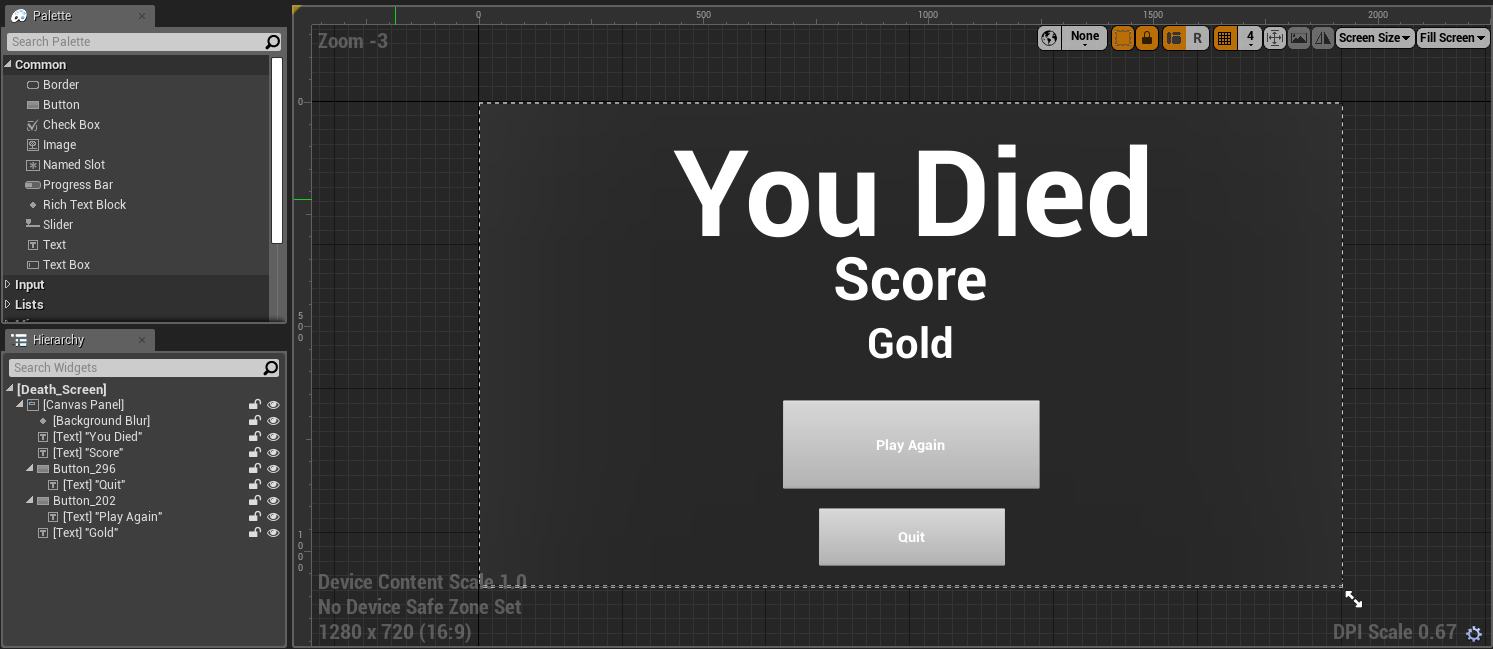 The death screen, too needs more planning but this is just a prototype as well.
Similar to a game I’ve made before, I wanted to display what score the player 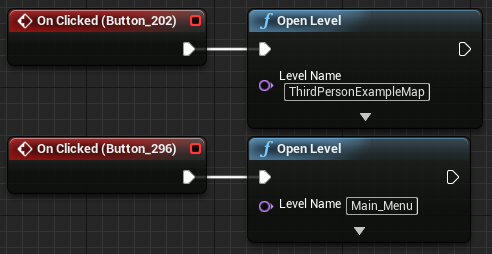 got, and how much gold they have. If it beats their high score, there will be text which tells you that.
To get this working I just linked the on click events to the buttons.
And when the player presses the quit button here it brings them back to the main menu, and if they click play again, the level will start again.
The prototypes now work. Result:
Unrelated to task list work – Player Speed
I wanted to give this game a bit of a challenge, and I thought it would be cool if the player speeds up the more they progress the game. This was very easy to implement and I used this tutorial to help me figure out how to get it working. It works by casting to the player character when they run past the tile, so the speed increases each tile they run over, and then from there it sets the max walking speed which increases by 1.01 every single time the player runs past a tile.
I used a clamp because it gets hard to play the game if the player is running more the 800 speed, since they would jump and land on the next obstacle.
There isn’t a noticeable difference at first since it interpolates smoothly so the player doesn’t notice, but when they run over a bottle, I’ve set it so their speed divides by 2, so they would notice a difference then.
Sound FX
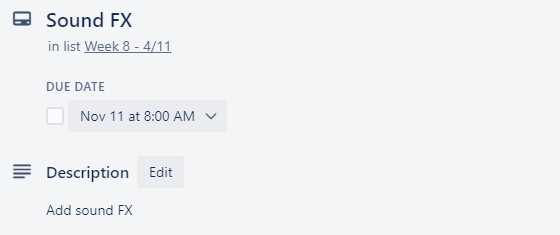
The sound FX was actually a lot easier to get working then I thought it was, all I had to do was identify where I needed the Sound FX to play and run the Play Sound 2D node and attach that sound to it. This didn’t take long to do and I found the sound FX which I needed on GameSounds.xyz, for the Coin Pickup, I used the sound Success Pickup Coin 01 I picked this one since it seemed like  a really cute sound effect and it fit perfectly on the game. For running over the bottles I used the sound Glass Break Beer Bottle this one was nice and simple since you’re collecting a beer bottle so it makes sense.
For the death sound, I used Splat Crush 01, because I think it sounds perfect for a cartoon game, and the style which I’m going for. These sound effects were from Sonniss which have a Royalty Free Single-Use license on them, so they’re okay for me to use in my games.

Music
I used GameSounds.xyz to try and find some music which would work well in my game, I was struggling to find songs which would work perfect with a western theme, and whenever I did find them, they didn’t loop.
I needed to find some upbeat music, but in the end I couldn’t find anything which was good for my games main tune, but I did know that I needed music for the death screen and the main menu, and these were very easy to find since there were so many songs which would fit with the two.
For the main menu I picked 3am West End because I think it sounded really good for the type of menu I wanted to go for, of course when I’m polishing my menu I will properly design it with this music in the back.
And then for the death screen, I picked Feel Good Feel this one fits it since it has a sad sort of failure feel to the song but it isn’t overly dramatic, I will also be referring to this song when I design the death screen. Both of these songs are in the Public Domain library of Game Sounds.
I know this music is alright for me to use because in the file, we have this licence attached.
What did I find difficult or easy?
I found getting sound fx and using them in my game very easy, and I also found finding music perfect for the die screen and main menu very easy, since I feel like they really fit the occasion, the only thing I found was hard was the main tune, since I couldn’t find any good looping western songs which I could use besides the one I had throughout the whole production of the game, and I feel that doesn’t loop so well but there wasn’t much I could do about it.
I also thought getting the death screen and menu screen to work was fairly easy, since I just needed it to be on the main_menu scene at the start and then switch to the game scene after the player pressed play and then I just needed to add the death screen to the view port when the player collides with an object.
Another thing I found very easy was getting the player to increase speed the further they ran, this was a lot easier to get working then I initially thought it would be.
I found getting the score to properly display a bit of a hassle, but eventually I got it working and it was due to the fact that I didn’t have a binding on the text which I needed to modify.
- What tasks didn’t I complete from this week?
I completed all the tasks I needed to for this week, and I’m really glad I did, since it felt like I needed to get lots done since I didn’t do much over the half term.
Planning for next week –
- How do I plan to catch up?
There isn’t any catching up which needs to be done, all I need to do is polish everything for now.
- Do I need to change anything about my work or planning?
Nope.
Week Number & Date: Week 9 – 11/11/2019
List of Tasks planned for this week: This week I’m going to use for polishing up my work and catching up with my plans which I haven’t completed yet
Current Position –
What did I do this week and why did I do it? (Screenshots/Videos/Photos)
Cutscenes
At first, I began planning out a cutscene I want in my game, since I feel like the game would feel more fleshed out and complete if I had a cutscene, so I done some research into cutscenes in Unreal Engine.
I know since my game is just an endless runner, I wouldn’t need any serious cutscenes or anything too over the top, I just thought it would be great if I had a cutscene at the beginning where the player is relaxing in the start screen, and as soon as you press play, someone yells from the distance because the player has stolen something, so the camera pans to the person who is yelling, and then back to the player, who is running away, I think this is quite a good way to start a runner game, since now we know what the player is running away from.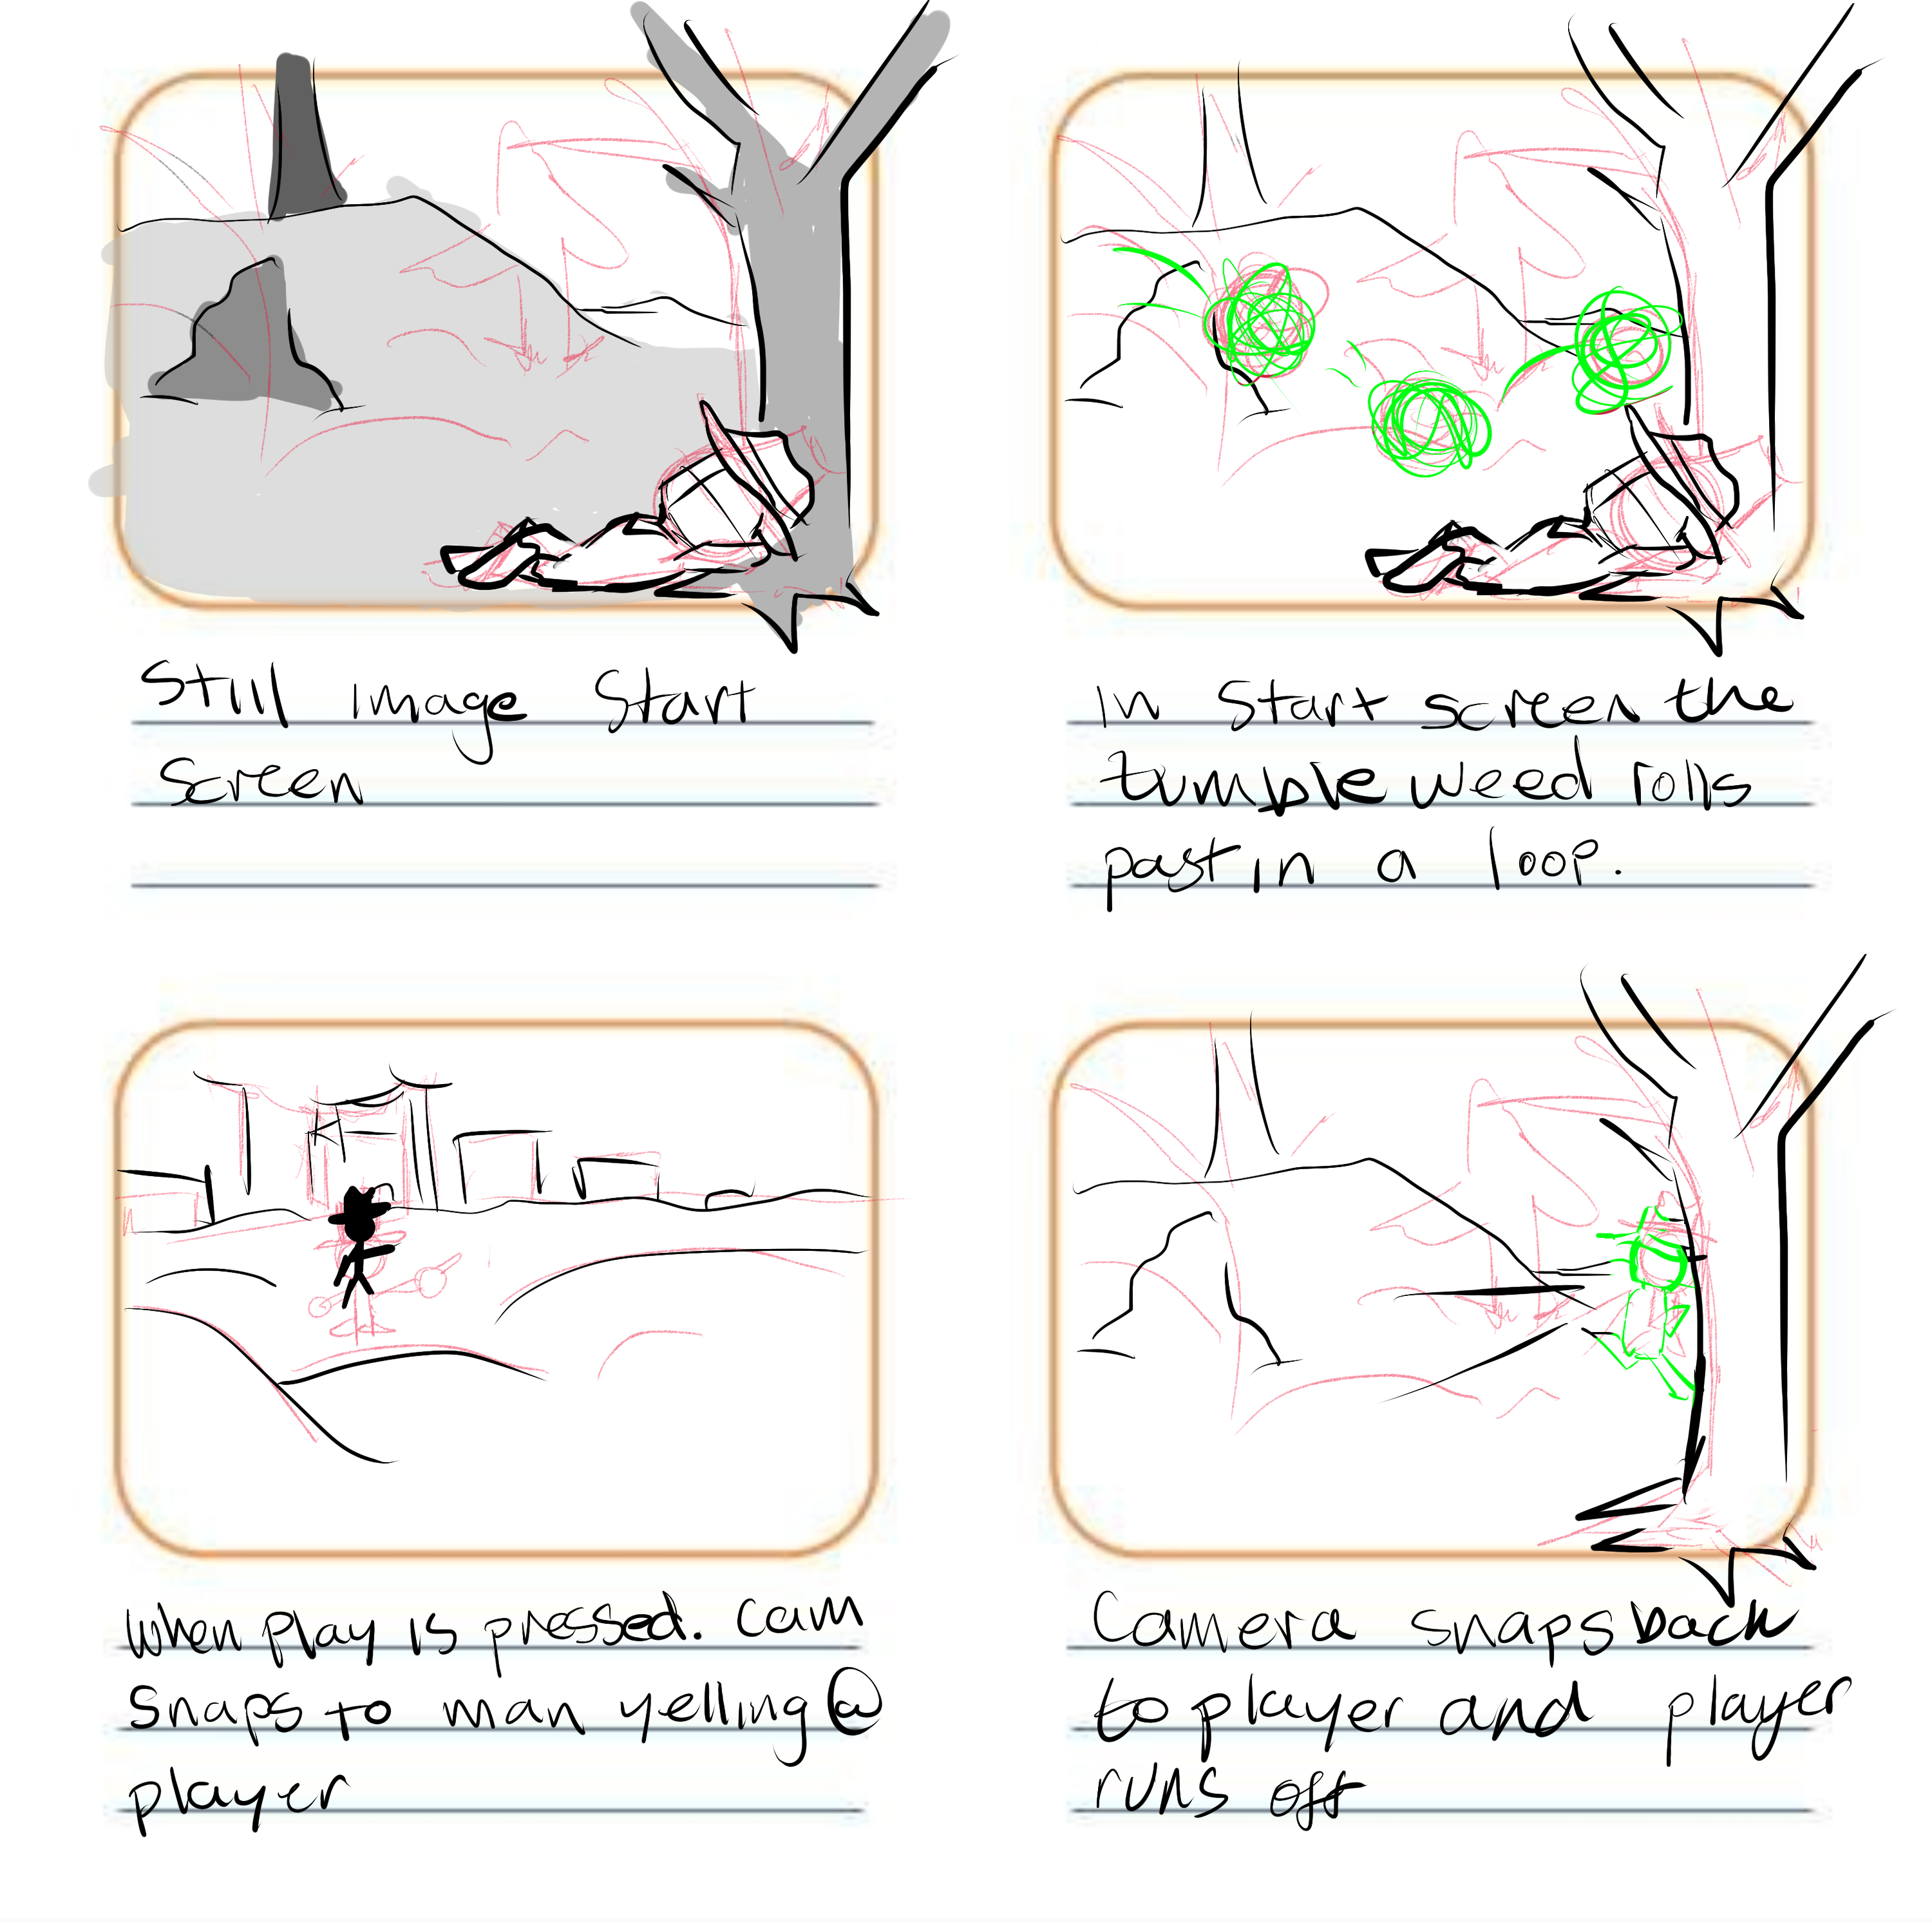
I began making these cutscenes by making a level sequence blueprint in my Main_Menu scene, and going into cinematic mode by clicking the cinematic button on the top.
From here I added my camera into the level sequence, and then the character which was in the main menu, I knew I wanted this cutscene to loop over and over again until the player presses play and then another cutscene would be played where the player is running from the yelling man.
So for the looping cutscene, I wanted to have tumbleweed roll through the scene, over and over again, of course with a few seconds before the next one rolls through.
So I found this free to use Tumbleweed 3D model which I’m going to use.
I like it because it fits with the low poly style for my game, and it’s just a mesh with a plain material.
I inserted this into the animation as well and animated it bouncing and rolling across the screen, and I just made it so that looped.
And then for the pressing play animation, I made a separate level sequence blueprint, but had everything in the same place as the last frame of the looping animation.
I then added the player to the animation and changed the transforms a few frames ahead so the player was stood up in a running animation.
It would snap to this transform instead of lineally interpolate to it, this is because, if we didn’t have it snap, the player would start moving from the beginning of the cutscene, and we don’t want that.
I then done the same with the camera, when the player snaps to the running position, the camera also snaps to the area which the man is going to be yelling from.
And then it snaps back, and this is where you see the player character running away.
After this finishes, the game starts.
To get these working in my game, I went into the level editor blueprint of the main menu map, and then set it so the level sequence with the rolling tumbleweed loops.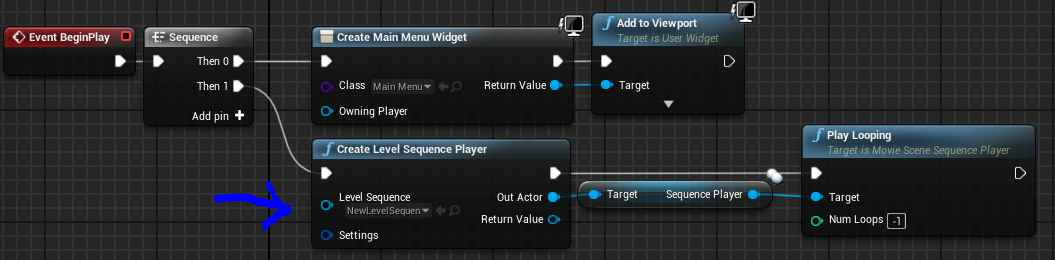
And then I went into the blueprint for the UI of the play button, and set it so the level sequence of the cutscene where the character runs away plays once when the play button is pressed, and also, when it’s pressed, the UI gets removed from the parent.
Then there is a delay of 6 seconds before the main game gets loaded in, this is so the cutscene can play fully.

I decided now that I need to add a little more style to my play screen, to make it look nicer, and more alive with more plants, so I added a few.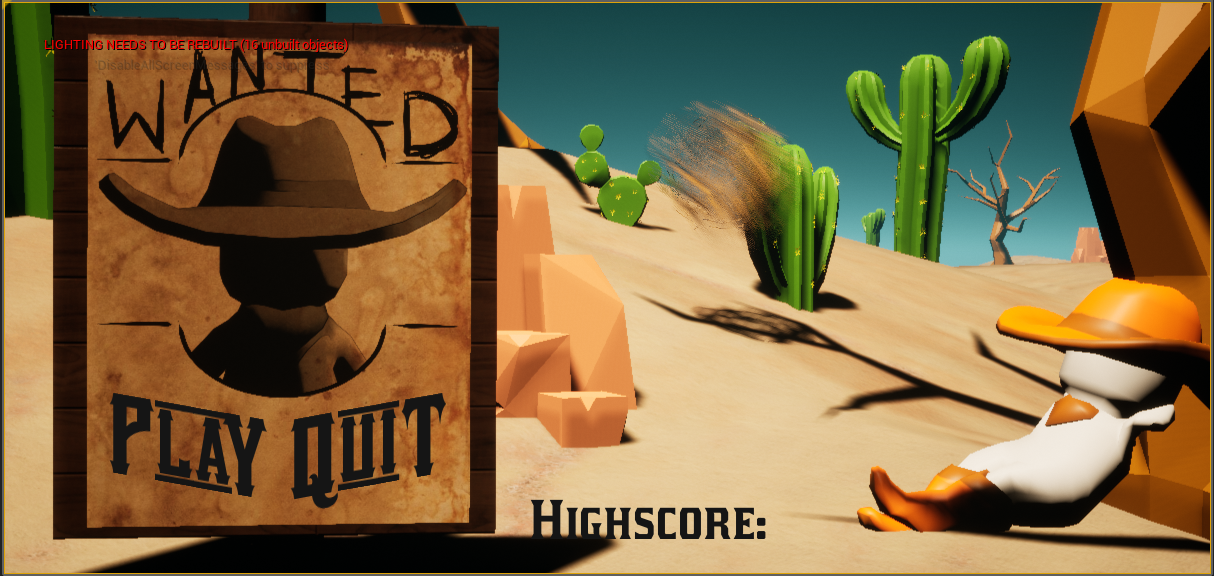
Fonts/UI
Since my game is lacking good UI, I decided to find some fonts which I think would work well in my game, I need to have a font for the score system in the top left, and I feel like I also need a better font for the coins in my top right coin collection UI.
I also would need a font for the Play, Quit and Play Again buttons on my game.
So, to find a perfect font, I went to Dafonts.com, here I found the category of font which I wanted, which was western, and then I made sure to check 100% free, so I had a font which I can use properly.
The first font I found was Vanilla Whale, I am only looking at the numbers on this one since I feel it would work nicely as my money and my score.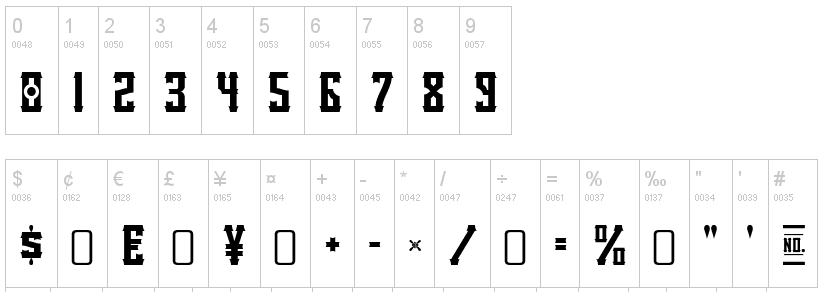
This gave me the idea for the money, that I could just have a dollar sign in front of it and maybe colour it a gold colour so the player is aware it is money, since at first I was thinking I could just get a coin graphic and place it in front of the numbers, but I feel like that wouldn’t look as good as having a dollar sign in front of the amount of coins you’ve collected.
This Saddlebag Font I feel would work perfectly for the Play, Quit and Play Again buttons on my UI, since it’s bold and you can clearly see what it says, I don’t think it would be a good idea for my points though since the fonts are very thick and that wouldn’t be easy to read at one quick glace since the player won’t be able to look at the UI for too long since the game is fast.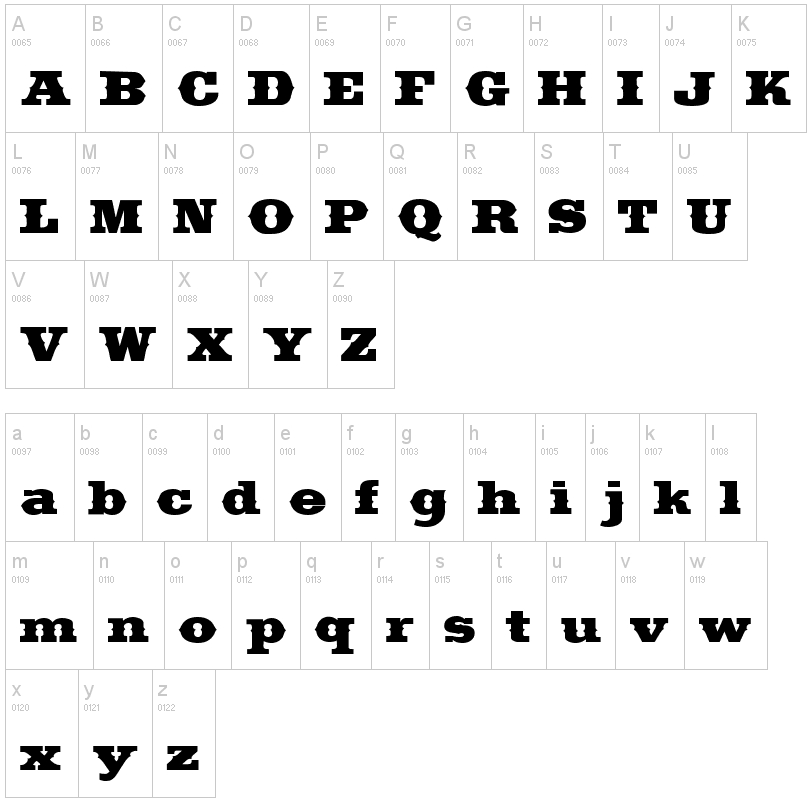
I like it because it has a very western feel to it, and that western feel isn’t exaggerated with unnecessary strokes or details.
I also like this Kirsty Font, since it is very plain like Saddlebag, but it’s not as thick, and the numbers look nice as well.
The one thing I love about this font is how rounded and smooth looking it looks, unlike the other fonts this one looks a lot more gentle, and it’s easy to read quickly, this would be perfect for both my UI and my Score System.
So I began experimenting with the fonts in my game to see which one I feel fits the best into the game.
Main game UI
I feel like Vanilla Whale works best with the main game UI since it is easy to read and it looks very nice, I like how the text has the lines through it.
Kirsty is my 2nd favorite out of the three, but for the main game UI, I’m going to have to go with Vanilla Whale, since I absolutely love how it looks.
Another reason why I love Vanilla Whale in comparison to the other fonts is how it looks like it’s final, bold and like it comes from a poster.
Main Menu
For my main Menu UI I wanted to make everything look more complete, and I think it would be really cool if the start menu was on a wanted poster, since those are very western.
I began by figuring out a design for this poster and how I wanted it to work.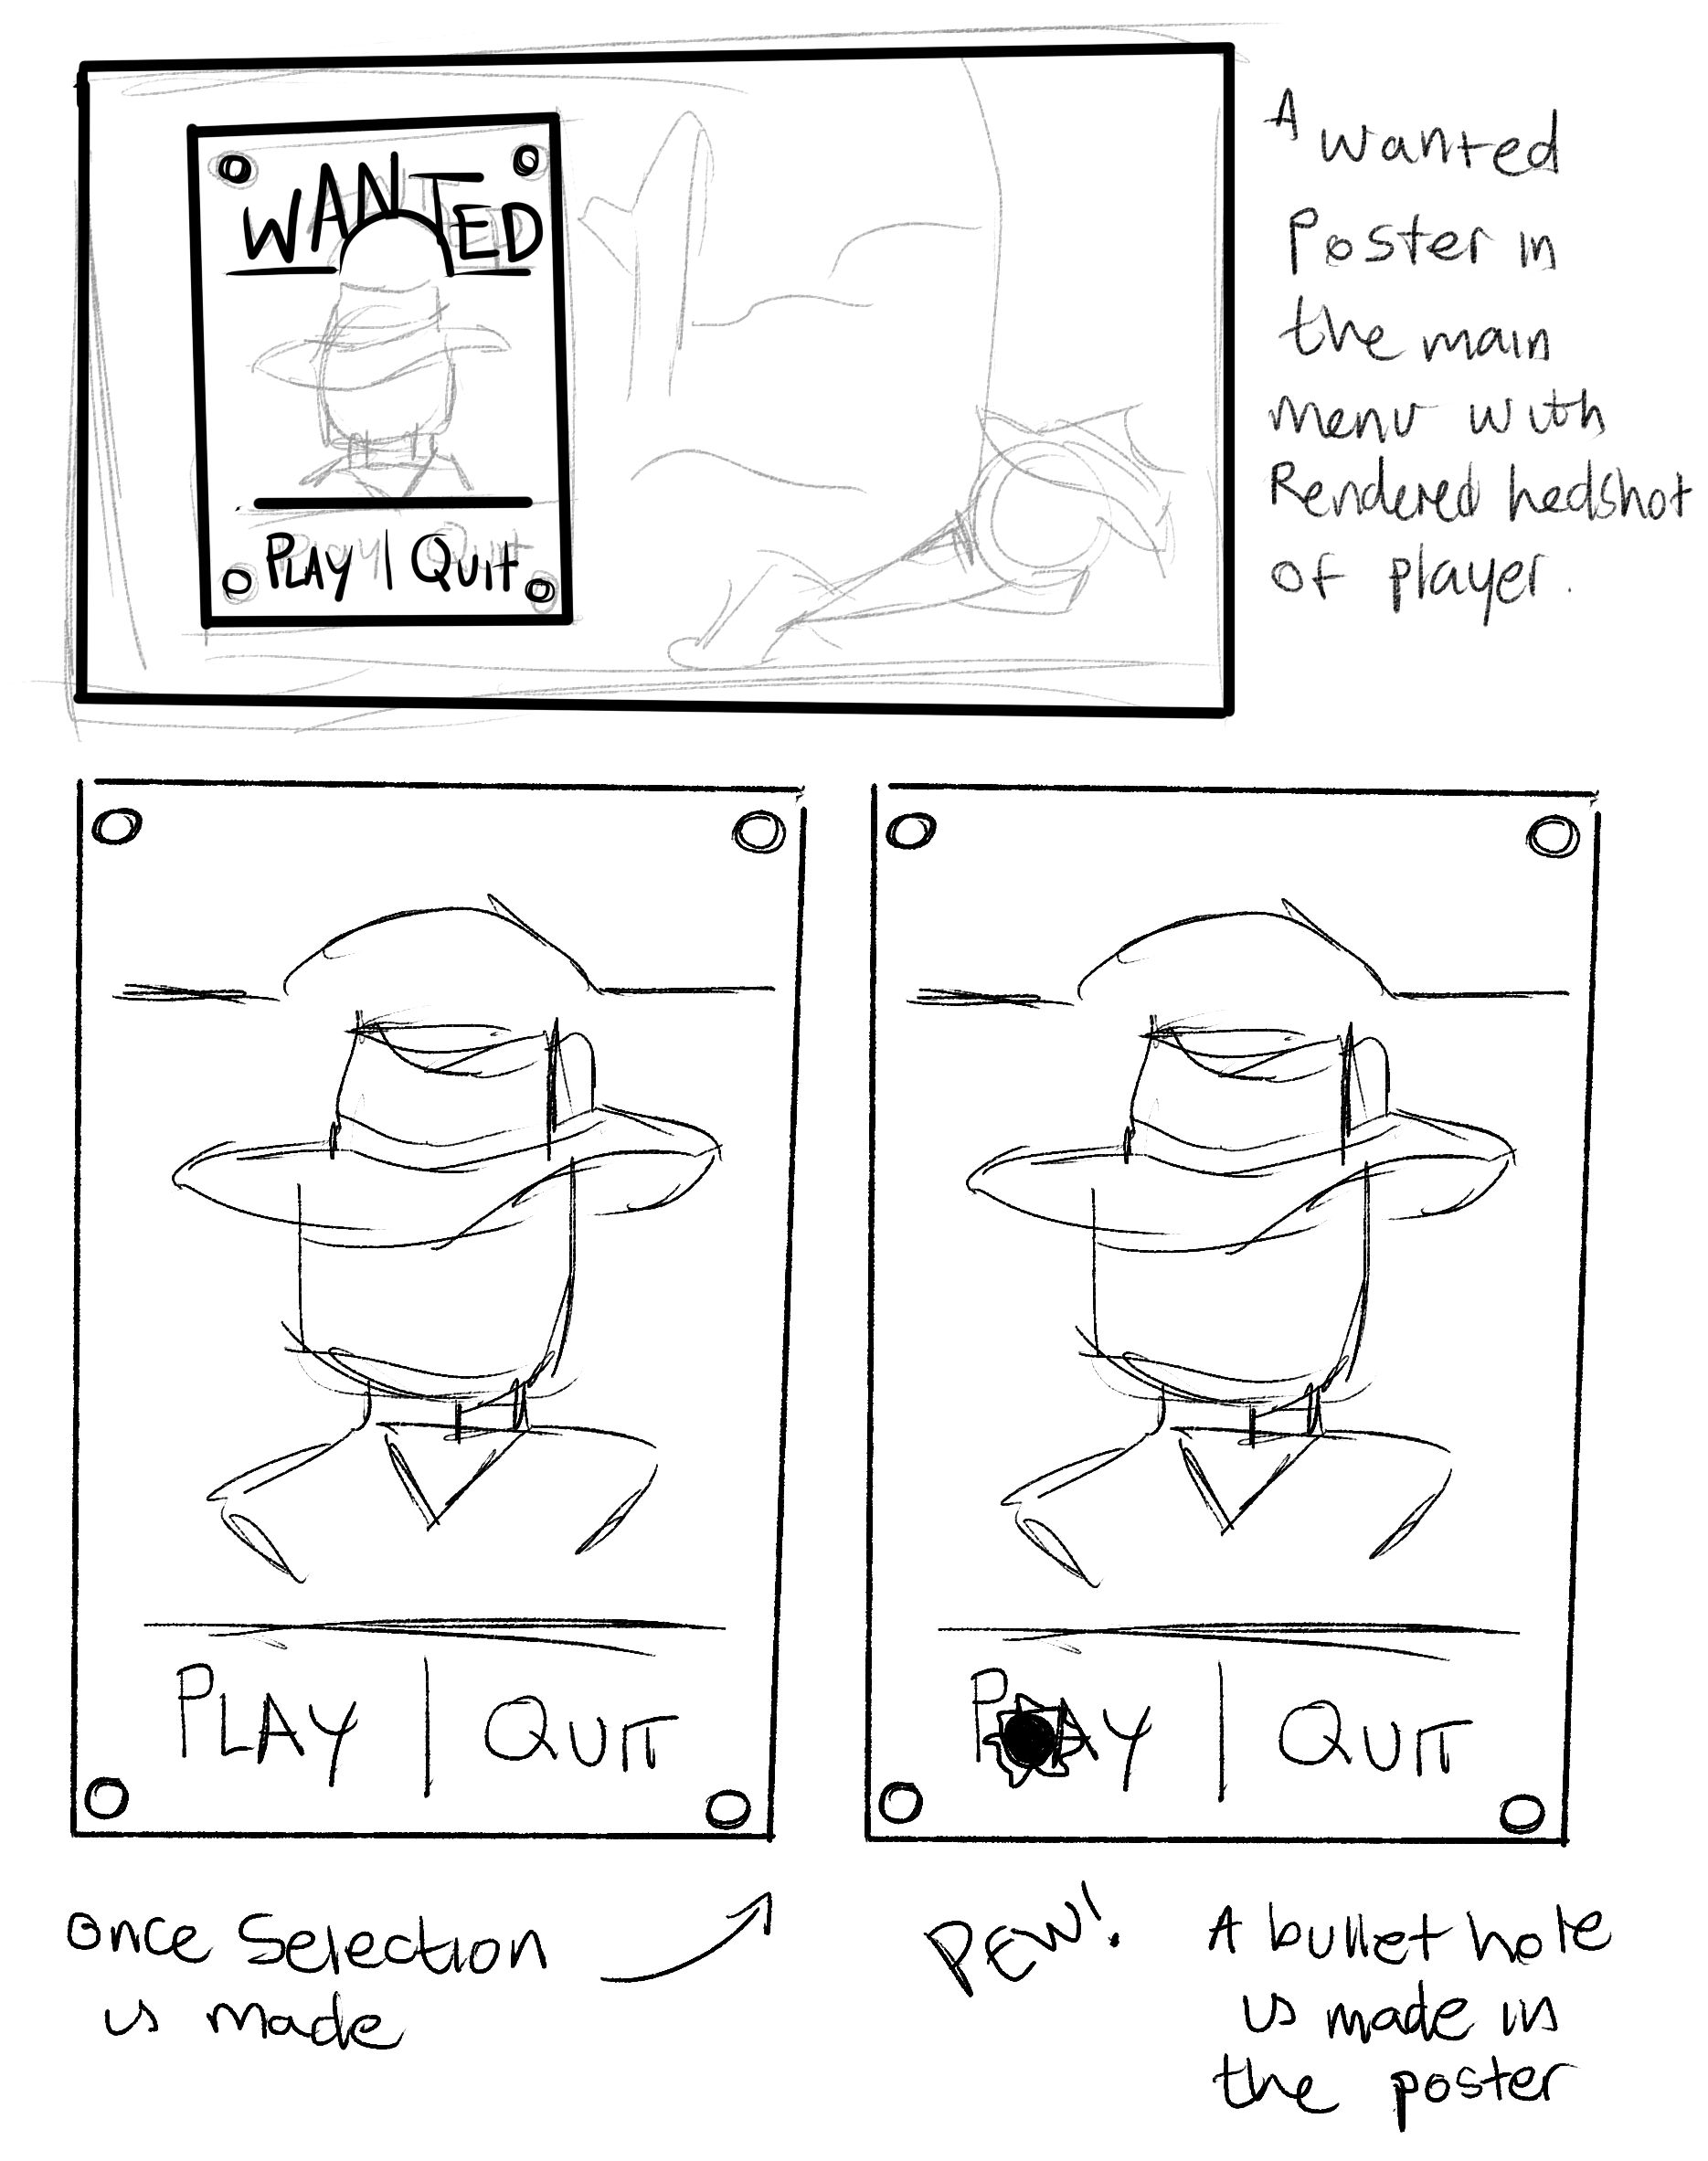
Firstly I used Blender to make a render of the main character, and I made it so there was shadows on his face to make him look even more menacing.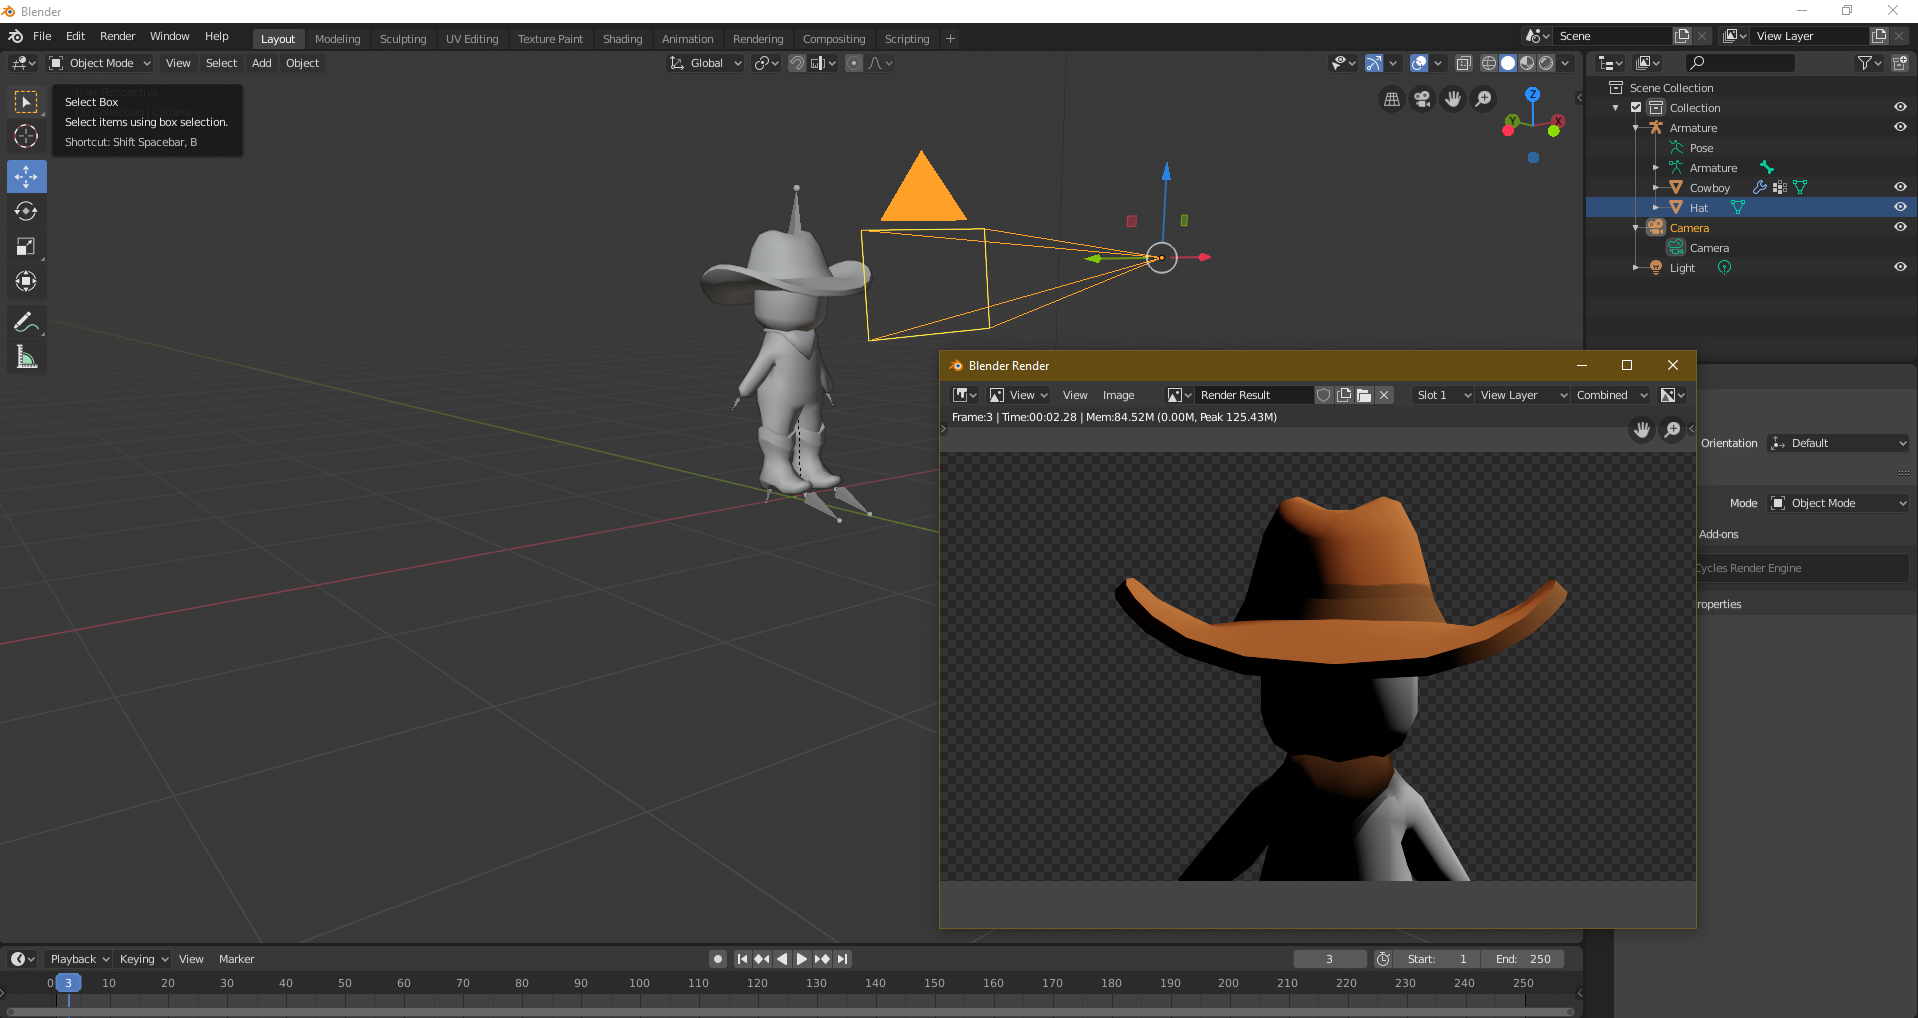
I also made sure the background on the render was transparent so I could add effects to it and make it actually look like a proper poster.
I then made the Wanted poster, by getting a tea stained background and adding some effects to the PNG image of the player.
After I done this, I wanted to apply a roll effect to it, so I headed to Maya, and inserted a plane into my scene, I then sized it how I wanted it and then added the texture of the wanted poster to my plane, after I done that, with the plane selected, I went to deform, I then went to bend, and then from there I rolled up the paper and animated it to unroll.
I then exported this plane as an FBX and made sure the animation was applied to it, I then went to Unreal engine and inserted the FBX into the project, with the animation.
Once I inserted the animation and the poster into the game, I came past some issues with the animation not working in unreal engine.
The paper just moved upward, it didn’t roll up.
I posted this issue on the Unreal Engine forums, but I haven’t got a reply yet.
For now I decided to just leave the poster on a flat plane, since this was the easiest thing to do.
I decided to give my game more style, so I wasn’t just going to have the poster floating in the air, I added a wooden board behind it.
At first I wanted to add a saloon which it was pinned to but that would just ruin the scenery.
The board works perfectly as it’s small and doesn’t take up too much of the scenes space, so I can add more desert landscape and the player can still see it.
Instead I put the saloon in the distance, where the guy was going to yell from at the play cutscene.


- What did I find difficult or easy?
I found getting the fonts working in my game very easy, doing this helped me polish my game and reposition the UI in the main game, I did find it difficult to position the UI exactly where I wanted it on the main menu though.
I found working the cutscenes a challenge, but it was a good challenge, and because of this I’ve learnt a lot about using the Level Sequence editor in UE4, since I came past lots of problems but I fixed them all myself.
I found making the wanted poster easy, but getting it to animate in maya is hard, I had to do research about maya and getting planes to deform, but eventually I got that working, but in the end it never worked.
I also found rendering the image of the character hard because I haven’t used the updated version of blender in a while, I was struggling with figuring out how to make the background transparent, but after some research I found an answer.
