Week Number & Date: Week 4 – 09/12/19 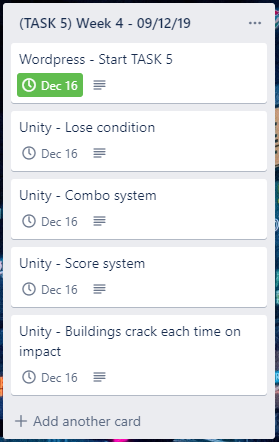
List of Tasks planned for this week:
I started my task 5 early since I felt like I was ready to start it, this is the week where I start properly developing my game, making it FUN to play, since I feel like my game at the moment isn’t fun at all.
Current Position –
- What did I do this week?(Screenshots/Videos/Photos & annotations)
Unity – Lose Condition
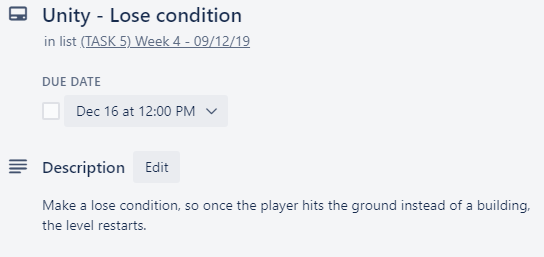
This one wouldn’t take too long to implement since the code for this is very very simple to plan out.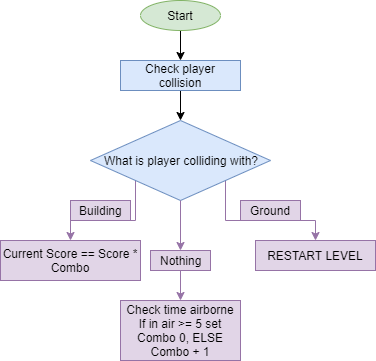
 I started with making a tag named Ground, I need to do this since it’s an easier way to check what the player is colliding with rather then checking the name of the object which they are colliding with etc.
I do this for all of the ground objects, since there a 3 which are spread out, and I also put these ground objects into an empty object which I named Ground.
From here, I then made a new script which I’m calling Char Collision, this is so we can keep track of what the player is colliding with.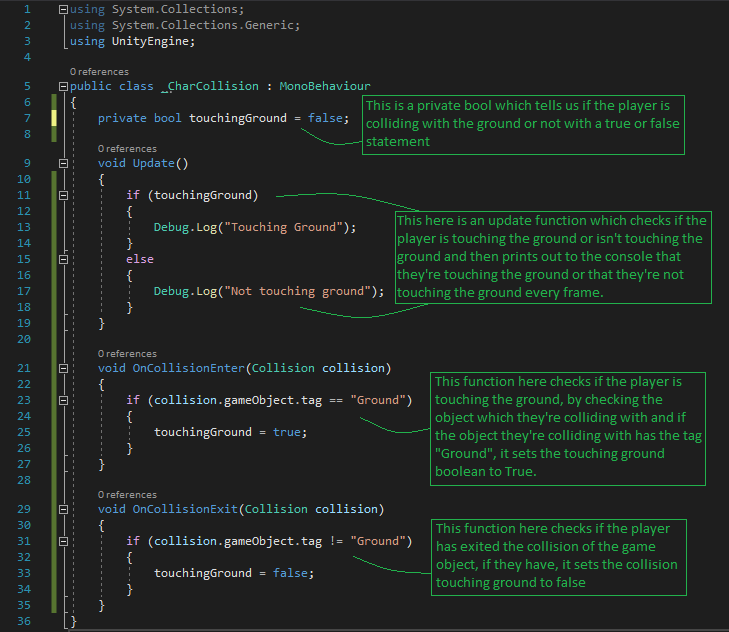
I then began implementing the level restarting when the player touches the ground, this was very simple to do, I only had to add these two lines:
What this does is it use UnityEngine.SceneManagement, if we didn’t have that there, the script wouldn’t understand the syntax of ‘SceneManagement’ therefor it would bring up errors when that runs without using the scene management.
The second line simply reloads the current scene.
Result:
Unity – Combo System
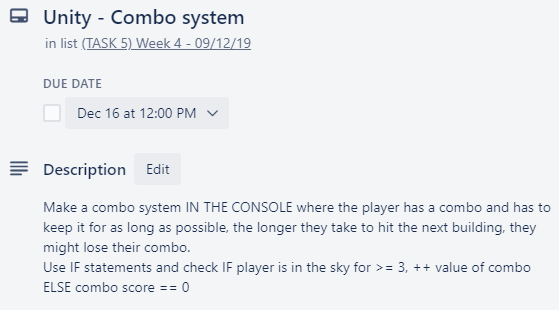
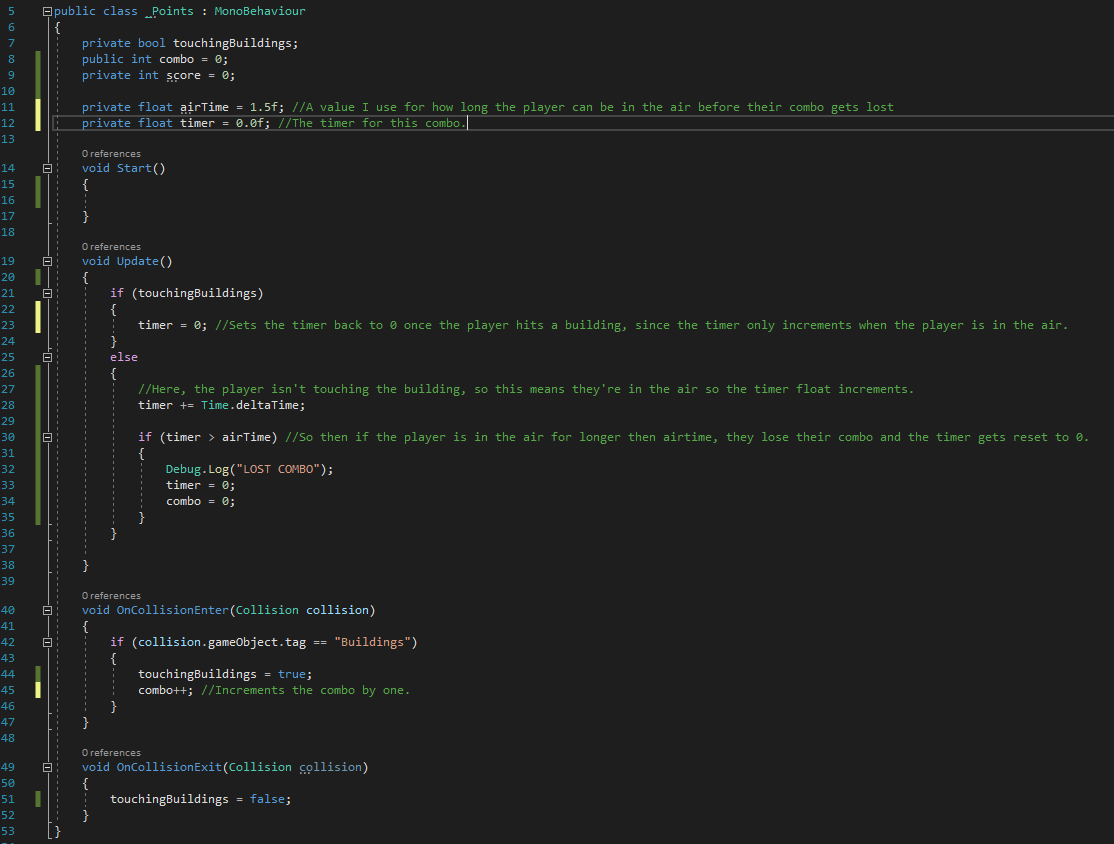
This was rather simple to do, following along with the flow diagram which I’ve made, I first began by making sure everything worked by printing the condition of the collision to the console, checking if the player is collided with the building or not, at first I had trouble making it so it detects if the player is collided with the building or not since I had it so it checked if the tag is not equal to buildings, and then set the touching buildings to false, but that just didn’t work, so I fixed it by getting rid of that if statement in the OnCollisionExit and just setting the Touching Buildings to false in there.
I then began adding my combo system.

Unity – Score system
This was easy to get working, I just needed to add this into my script.
This is the result:
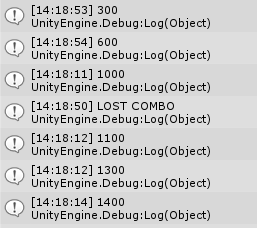
And you can see that this works because in my debug log, it goes from 300, to 600, and then from 600 to 1000, and then when I hit 1000, I lost my combo, which meant my score only went up from 1000 to 1100, since my combo must’ve been 1 at that point, and then from there you can see it gradually increasing in value but not as much as it previously did.
Unity – Buildings change on impact
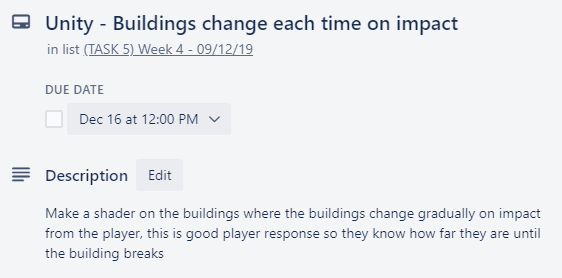
To do this I began by making a shader graph.
I wanted to make it look like the object is dissolving/cracking.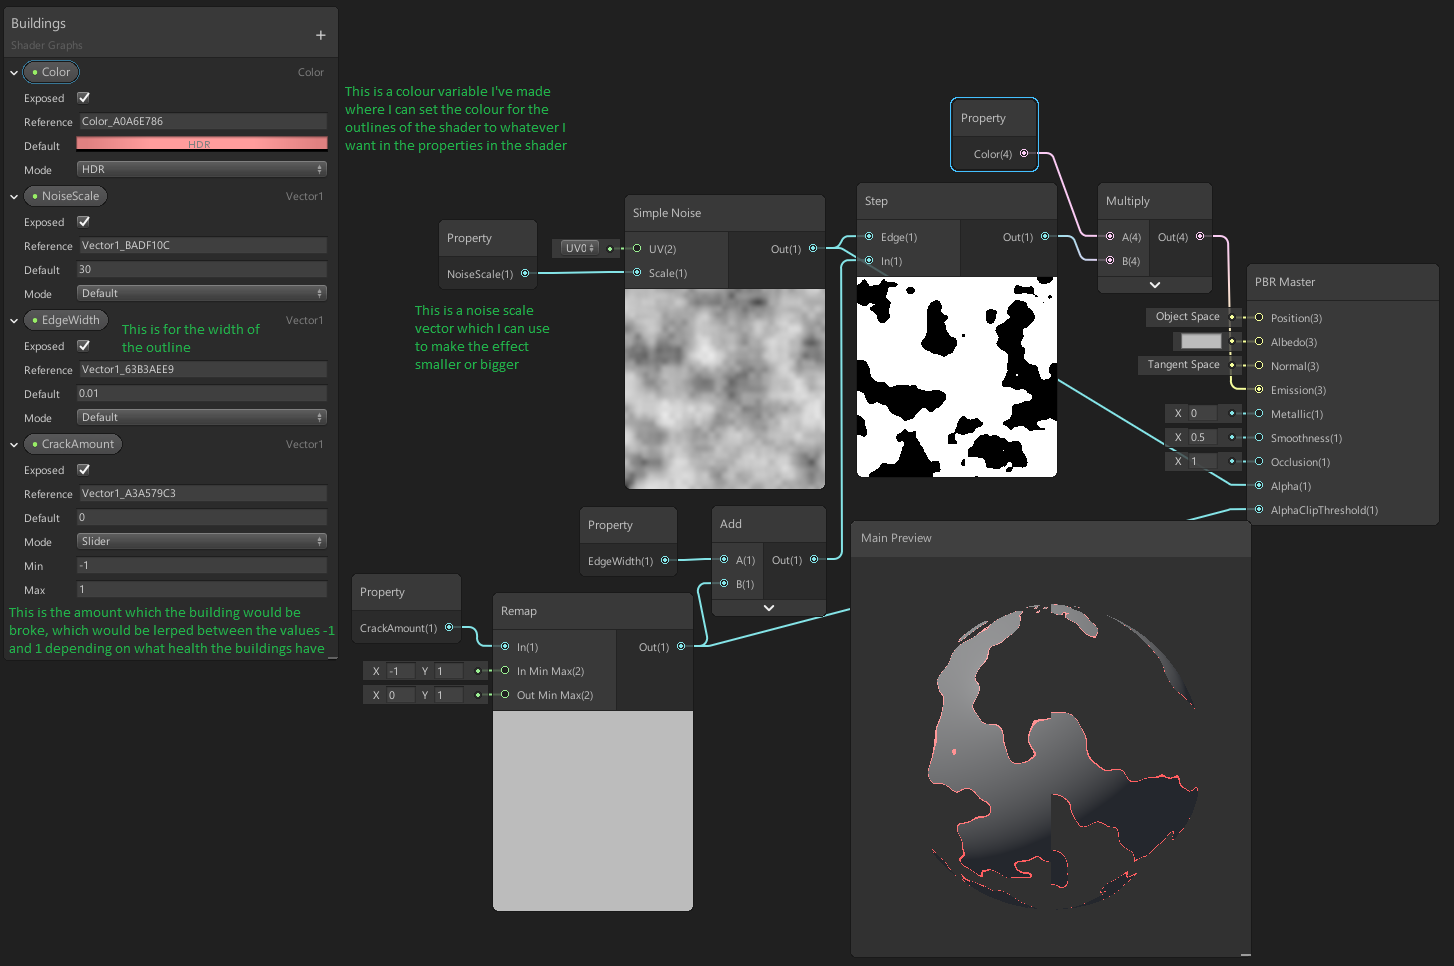
This is the shader graph.
From here I had to change a few things.
I applied the shader to each building object, after making it a material, I quickly found out a problem with the material, since the crack/dissolve amount of the material wasn’t an instance and was applying to everything once it was changed, and this took quite a while to figure out how to get it working, I got Ashley’s help 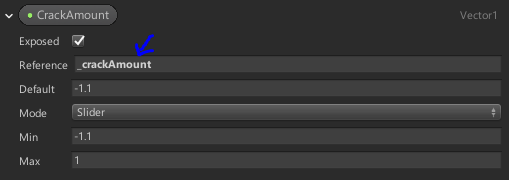 with this but the solution was very long.
We started in a new scene, to test everything out, and in the shader graph we changed the name of the reference, which made the text bold, which makes it into an actual variable that we are able to edit in the script.
We then made a separate scene, to test everything in, making 2 cubes and putting them aside each other, and then applying the materials to the cube, and then we made a MaterialTest script for both the cubes.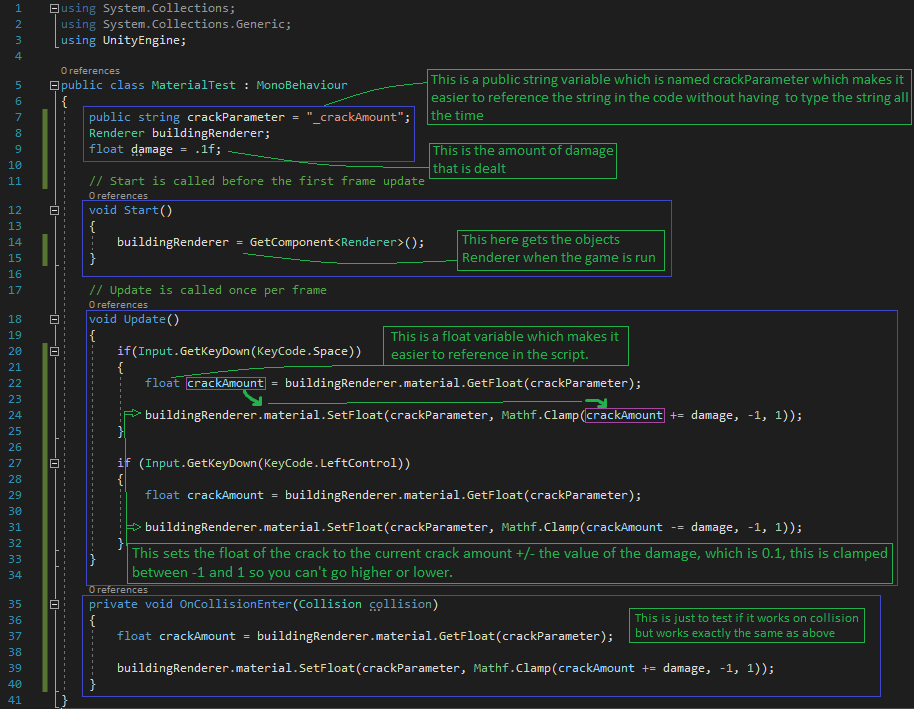
I tested this and it all seemed to work just fine, cracking by the amount of damage which I’ve set.
I didn’t like how the shader looked, so I found a picture of a crack and added it into unity, making it so the block cracks more each time the crack amount increases.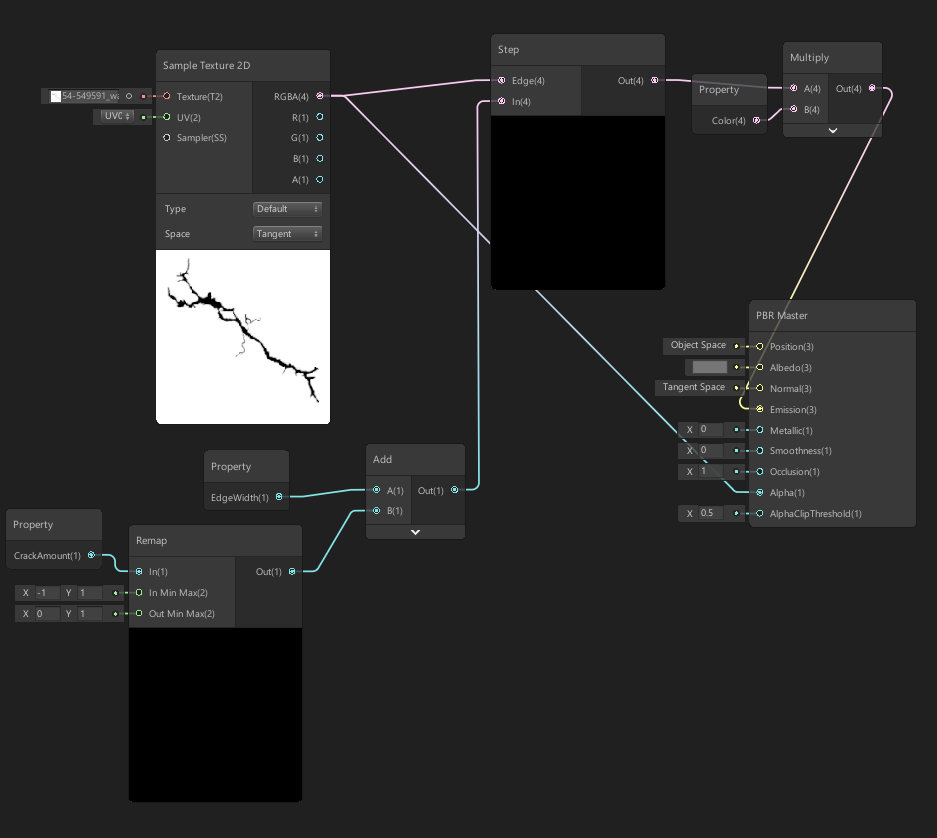
I applied the crack script to the collision detect script on the buildings on my main scene, and this is the result: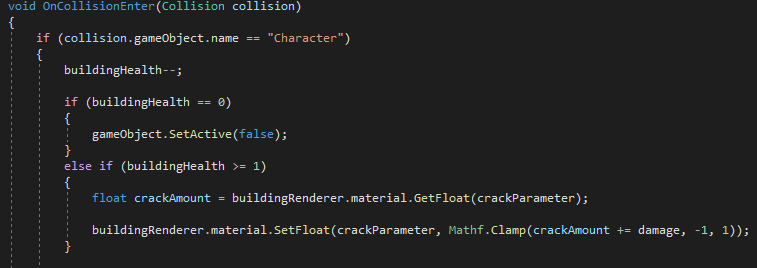
With music: https://www.youtube.com/watch?v=s9FnDyUJHSc

Unity – Improve Collision
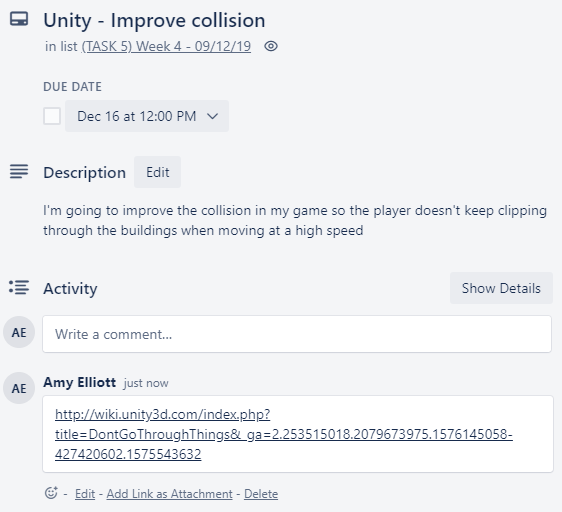
After play testing my game for a while, I figured out I need to further improve the collision detection since the player always went through the mesh collider when approaching it at high speed, which the player would be doing a lot so it’s something important which needs to be fixed.
I added this onto my trello board and then found a blog which I find very useful to help me with improving my collision.
That didn’t help at all.
I then went onto Unity Documentation and looked around for everything related to Collision.
I found a post which helped me solve my problem somewhat, not 100% since I don’t think there is a way to improve my collision since both object are moving fast and there is no way to do any raycasting.
I just selected all of the building and the player character and changed the collision mode to Continuious Dynamic which effects your performance a little bit but not much and then it makes my accuracy on the collision slightly better which is what I need since the objects in my game would be moving fast, doing this made me figure out if I change the mass I can make the player jump higher, which makes the game feel completely different, but still fun.
Unity – Stylish Combo
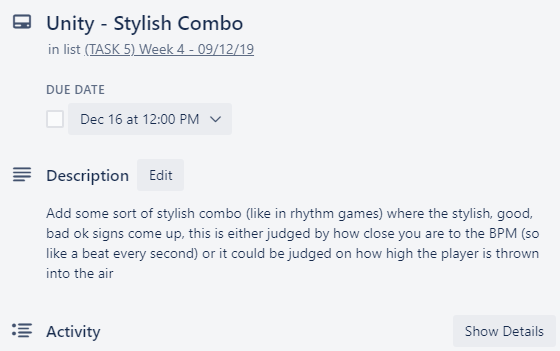
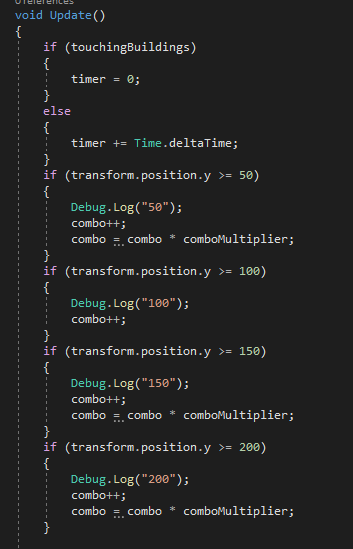 I began this by adding this into my points script, I feel as if it would be much better to give combos and points based on the players Y position since it can be a lot more accurate and fast then a timer, I can tell that this coding is very flawed and needs lots of simplification, but at the moment I’m just testing out everything to see if it works.
I wasn’t able to figure out how to get it to compare if it’s exactly equal to a value, only greater than or equal to, since the == and = operator wasn’t working, so I was getting thousands of the combos since the player would be above the Y axis in the combo for a few seconds, and this is on the update function which runs every once per frame. – This is also because the Y position wouldn’t always be an exact value.
Then I realized that I could just make this fire alongside a bool if I only want it to work once.
And this worked.
This is all I needed to do in the script.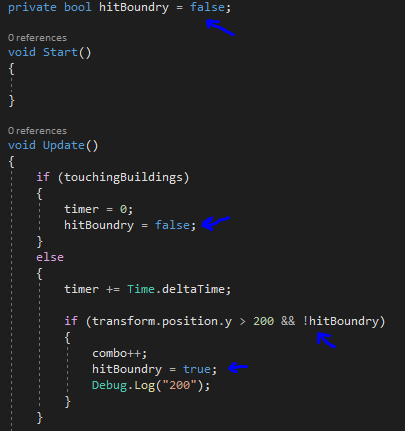
But then I came by another problem, doing this only meant that I could have one combo, I couldn’t run a good, cool, amazing type of combo the higher I go.
So I decided I would need to do a loop of three, with three height values and three booleans, my friend helped me with figuring this out.
These are the three bool arrays I made for my combos to work.

And this if my loop which I made to get the combo system properly working.
Result: https://www.youtube.com/watch?v=gptrh7bD4JU
Planning for next week –
- How do I plan to catch up?
I plan to catch up by doing all my fonts and UI in the next week so my combo system is up to date and ready, but besides from that I am up to date.
- Do I need to change anything about my work or planning?
No
Week Number & Date: Week 5 – 16/12/2019
List of Tasks planned for this week:
This is all I had planned, I didn’t have any other idea of what I wanted to do this week, so I’ll be planning along the way.
Current Position –
- What did I do this week and why did I do it? (Screenshots/Videos/Photos)
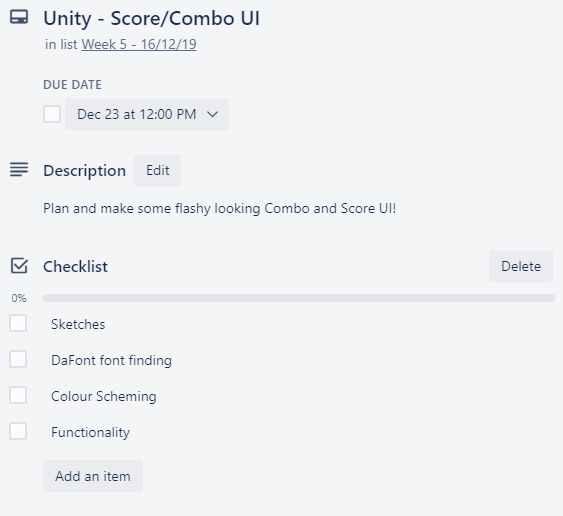
Unity – Score/Combo UI
Since I managed to get both of my Score and Combo system working pretty quickly, I decided to do some UI.
 DaFont font finding – Firstly, I thought it would be sensible to get a font which I like first, so I can do all of my sketches and my planning knowing what fonts I have available.
The college had blocked font websites so I had to download them on my phone and email them to myself.
These are the fonts I’ve downloaded, they’re all either 100% free or free for personal use.
These are all of the fonts which I have downloaded, so I’m going to go through all of these in Unity and see which ones I like the most.
I made a google form on all the different fonts, asking people which font they like the most.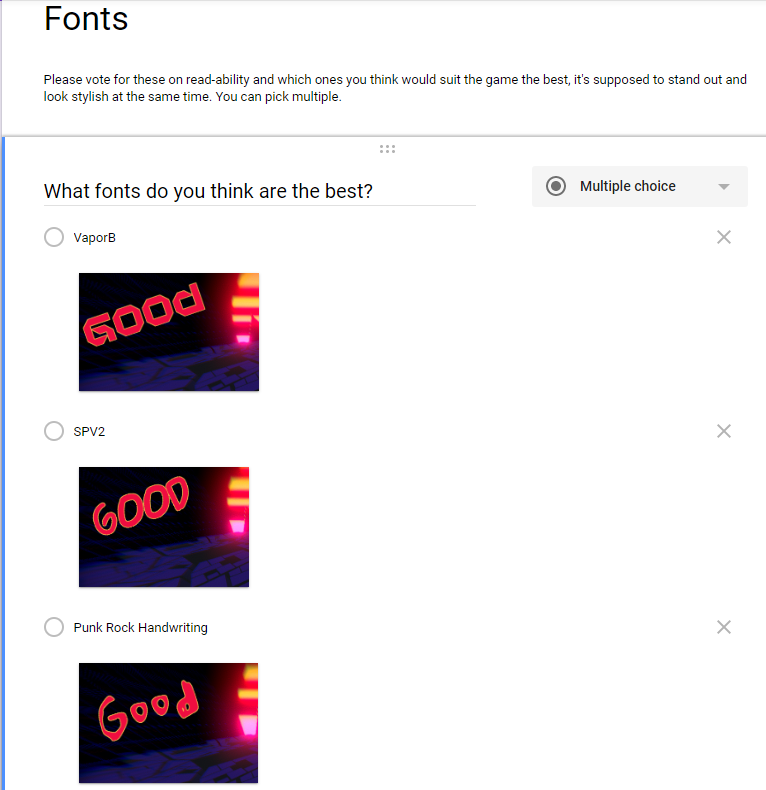
Sketches/Planning –
I began by sketching my plan for how I want the text to be animated, and where I want the text to be on the screen, this has helped me come up with lots of different ideas.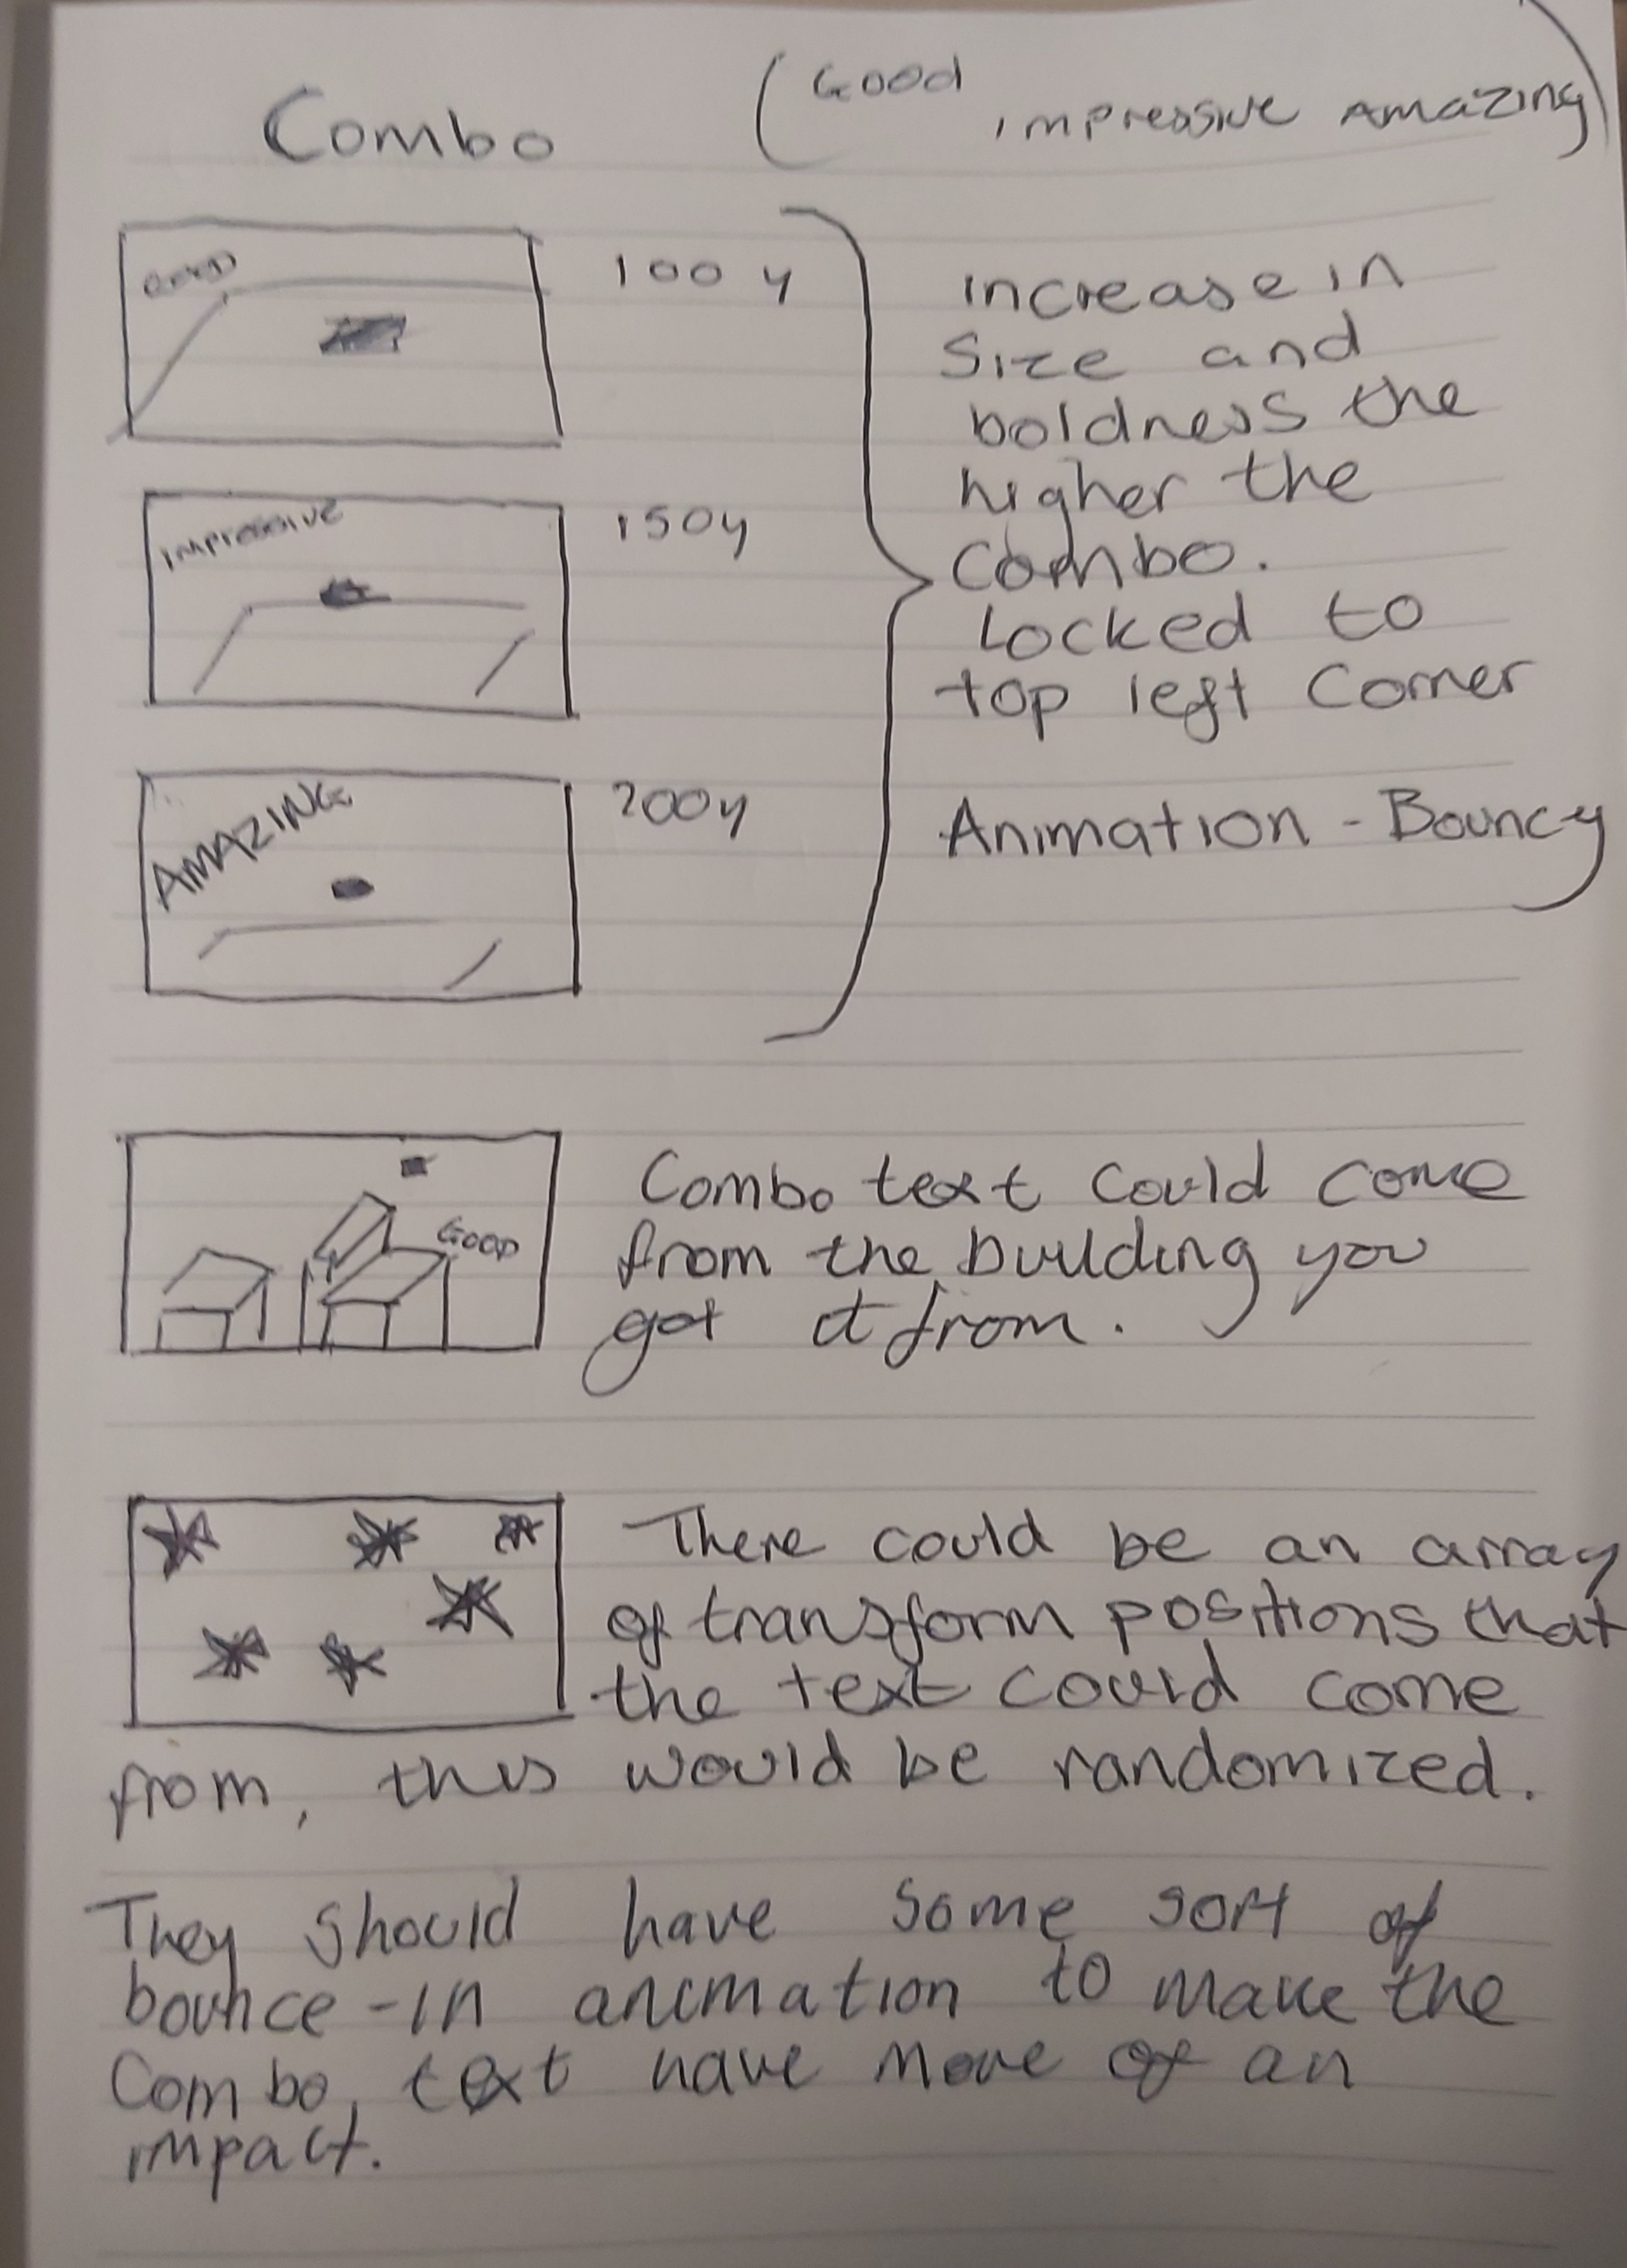
Once I had a rough idea of what it would like I began planning out my combo system in more detail, thinking about what specific combos could do the effect the game and so on, I done this so I can put it into my game for testing.
Colour Scheming –
I began this by making multiple GIFs with different colour schemes on them, and these are the ones I’ve made:
")
")
")
")
To help pick the colours I got a few people to vote on their favorites using a google form.

This is the winner of the vote on the google form:
Functionality –
I wanted to test this by actually putting the fonts into the game and testing how everything would look like that, so I tried my first concept on my sketch, where the text would bounce out from the corner.
I had to make an animation, which is simple enough in Unity, it was a bounce animation so I used the animator tool and resized the scale with a keyframe and then back again, I then applied this to the text.
And to get the combo animation and displaying working, I had to add a few lines of code into my script.
This is the result:
Unity – Fire Shader
Now I wanted to add the fire to the player when they hit an ‘AWESOME’ combo.
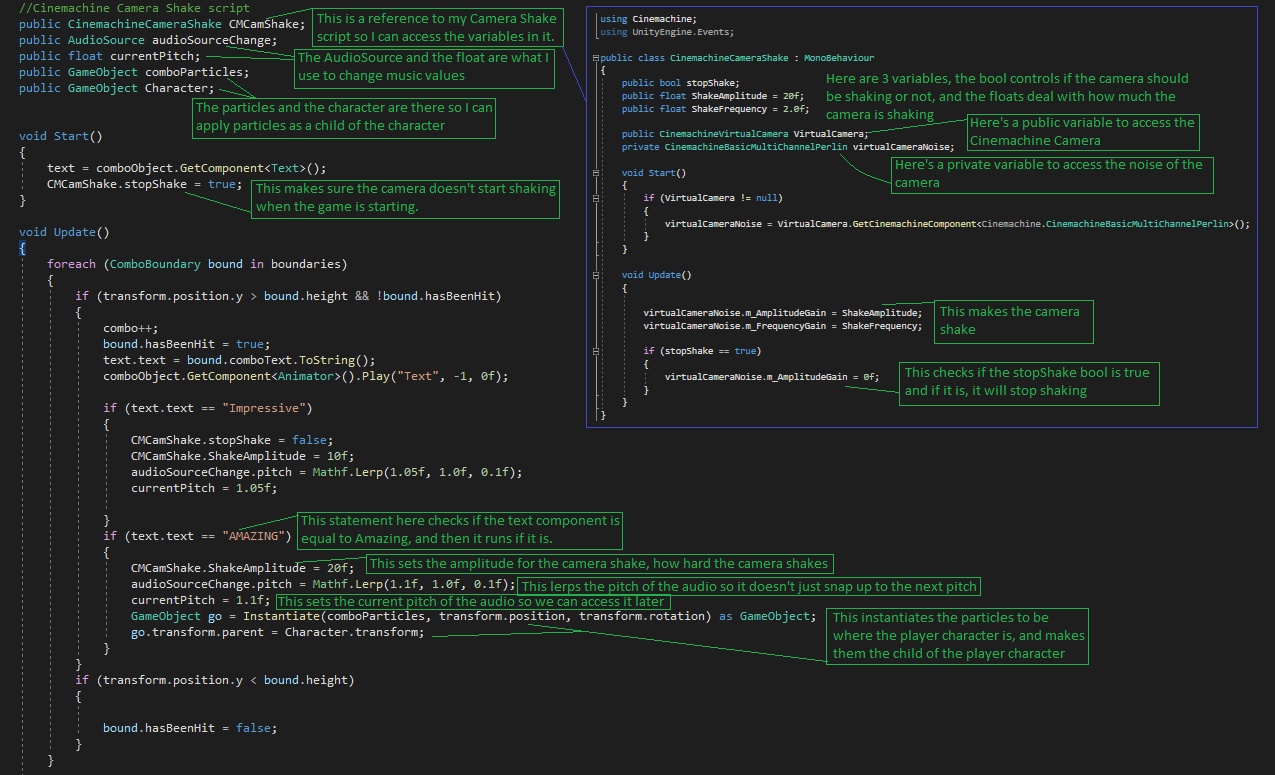 This is how I got the fire to work, which means the fire instantiates above the player character and as a child of the character.
This is the fire shader I made and how I made it.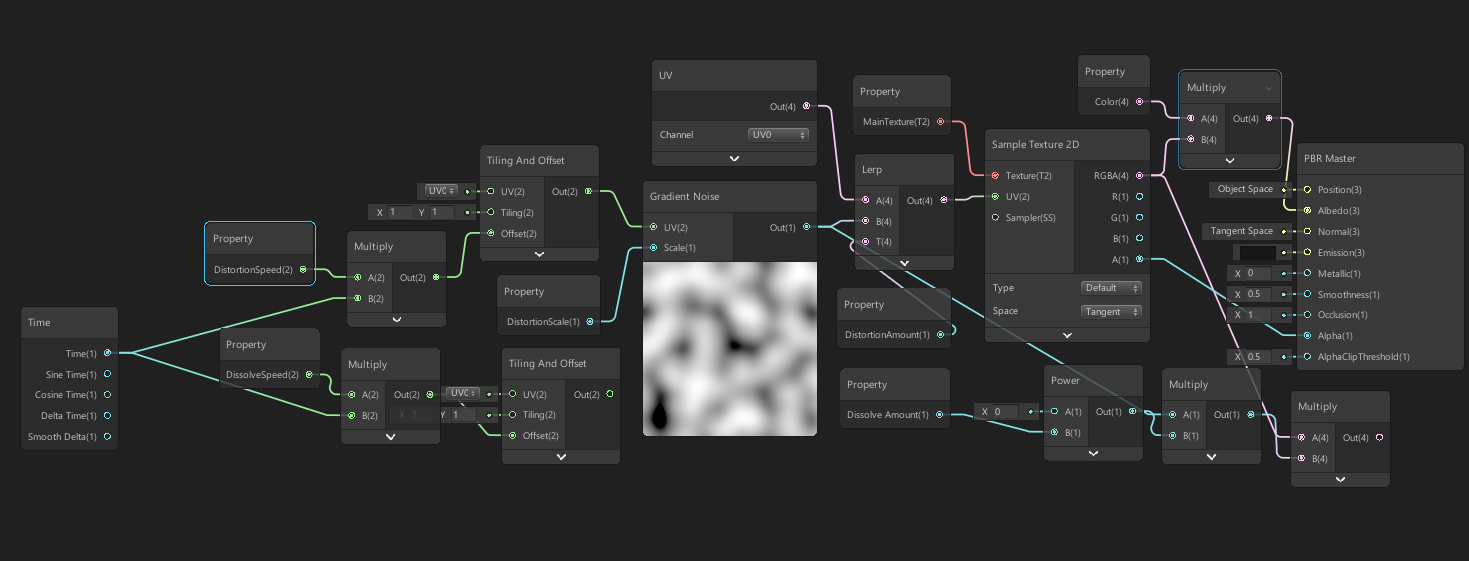
This shader basically takes the texture of the fire and distorts it using Perlin Noise, it also moves it along an offset with time properties so it flickers like a flame, I then made this shader into a Material, and then made a particle system using that material to make the fire, I also added some smoke.
Unity – Stylish Combo
Even though I’ve completed this, I’ve tried to simplify my scripting, to make it shorter, since I know I could use a for loop and have one array which has 3 values.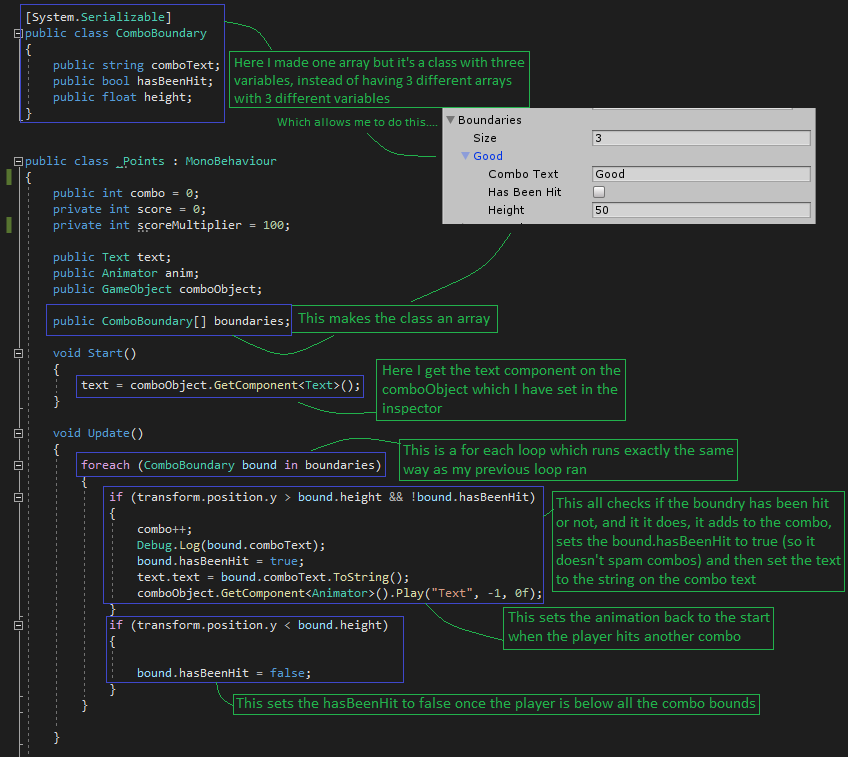
This has made the code a lot cleaner and shorter then it used to be.
Unity – Attempt to make mobile tilt controls
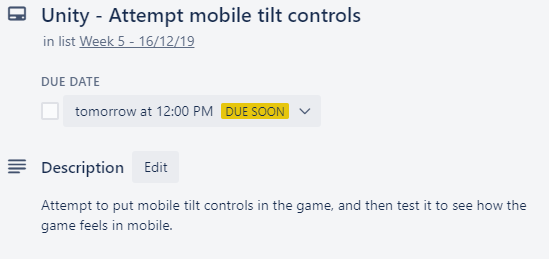
All this is is just messing around with mobile builds and see how the game plays on mobile.
The script to get mobile tilt controls to work with this is very similar to how you get normal move controls to work.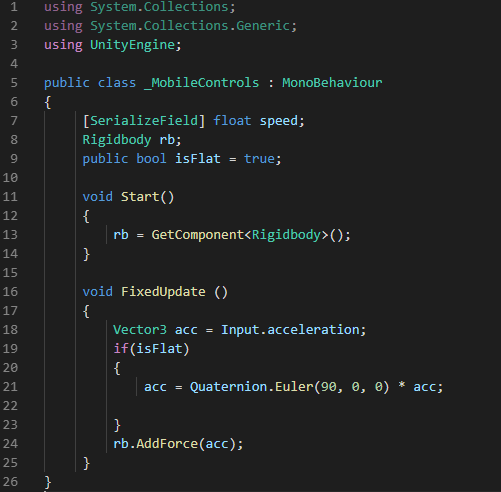
Result:
I didn’t like this result at all, I was very disappointed at how poorly the tilt controls worked and how slow the game ran on my mobile, the reason it is running so slow is perhaps down to the shaders and the amount of memory which is being used on my game to get each building to move to the music, and each building having a mesh collider instead of a box collider.
I figured that it’s probably not the best idea to have this game made for the mobile.
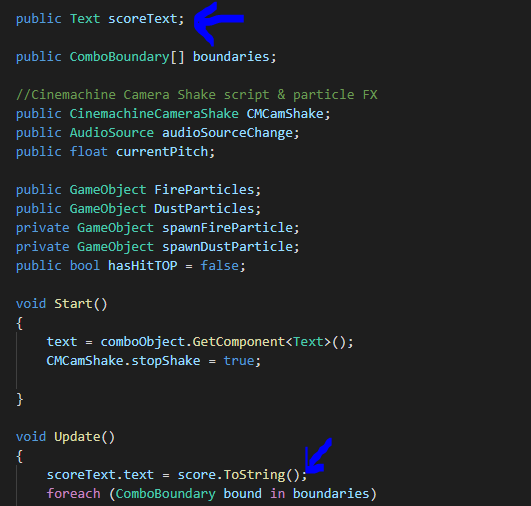
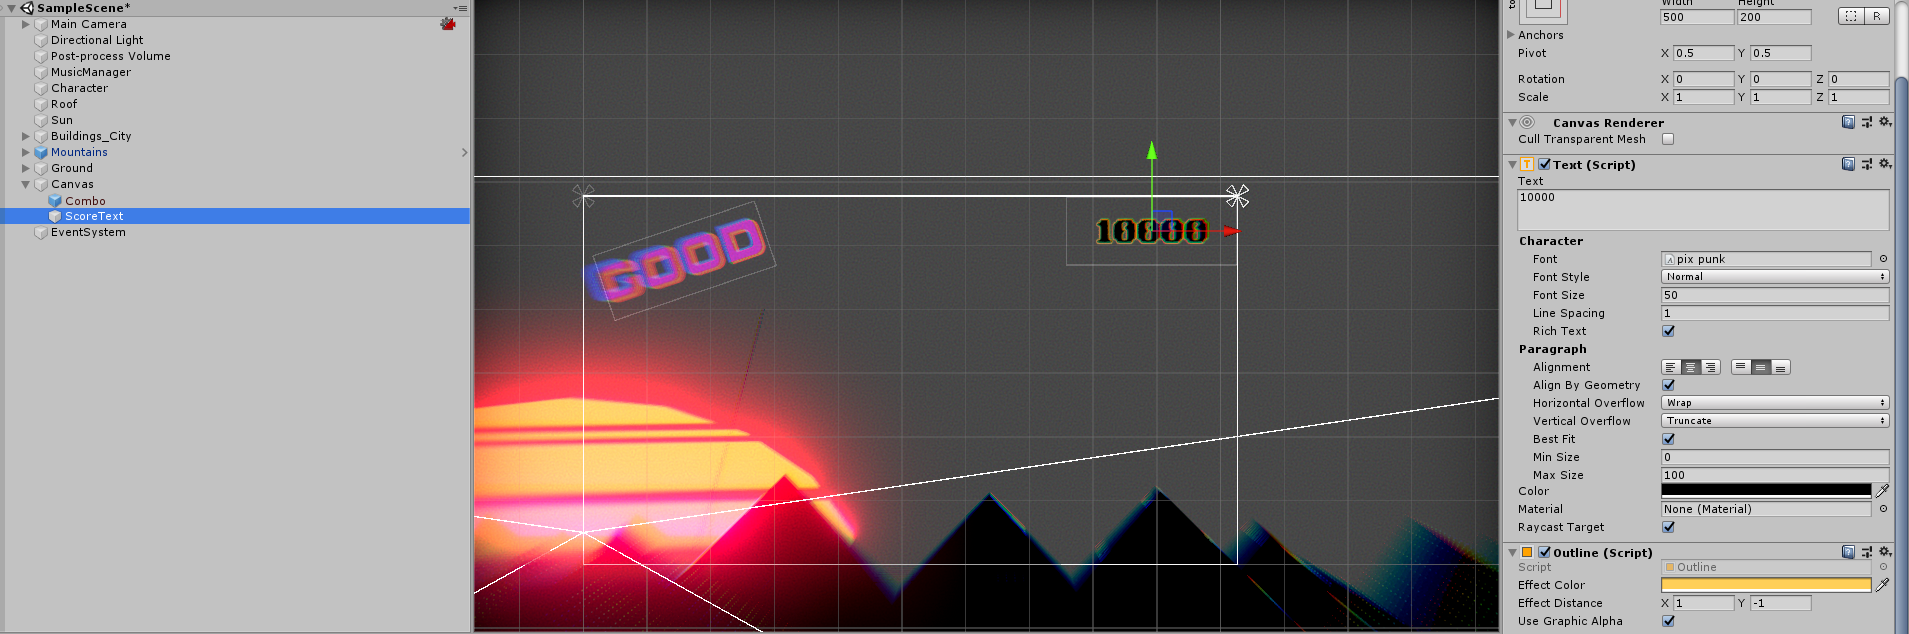
Unity – Score UI
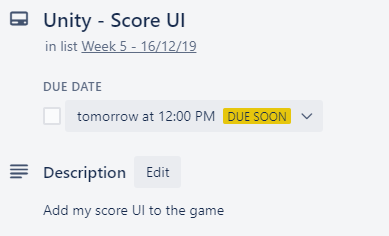
This was fairly simple to get working, all I had to do was add my UI and then reference it in my _Points C# script
- What did I find difficult or easy?
I found making the Score UI easy, but getting the combo stuff to work was a slight challenge until I thought of it in a different way, and then it was easier! At first I was going to determine the combo stuff by checking the players Y-Axis but, then I thought using bools and floats would be easier to make it much more accurate.
I found instancing the fire just right to be a bit of a challenge, but I eventually done it!
Planning for next week –
- How do I plan to catch up? Do I need to change anything about my work or planning?
Next week, or after Christmas, I plan to work on sound effects for the game and making more of an impact on the player by having the score interpolate up instead of snap to the next value, and having sound effects, and making a start on menu screens.
Week Number & Date: Christmas Holiday 23/12/19
List of Tasks planned for this week: I plan to relax this week, since it is Christmas after all, and I’m doing more work shifts over the break.
This week I will mentally plan for what I want to add into my game.
Week Number & Date: Christmas Holiday 30/12/19
List of Tasks planned for this week: I plan to relax this week, since it is Christmas after all, and I’m doing more work shifts over the break.
This week I will mentally plan for what I want to add into my game.
Week Number & Date: Week 6 – 06/01/20
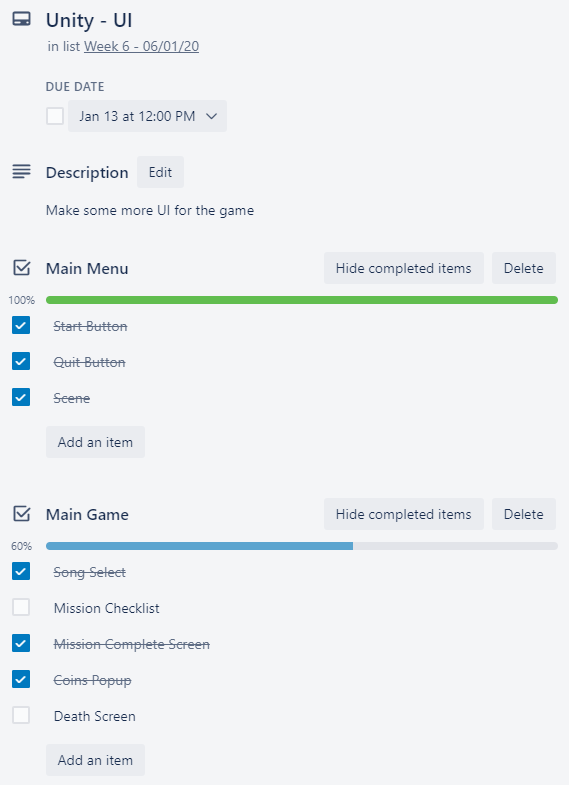
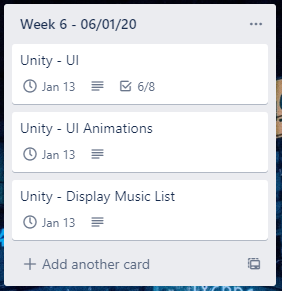 List of Tasks planned for this week: This week I plan on making functional UI for my game, the UI won’t be polished since I will leave that until the last few weeks of production.
I plan to get all the UI in my game working and make the game actually feel like a game.
Current Position –
- What did I do this week and why did I do it? (Screenshots/Videos/Photos)
Unity – UI
Unity – UI: Main Menu
This is the UI I plan to put in my game today, it may not be polished UI but I plan to make it as functional as I can.
I started off by making the main menu, it doesn’t look like anything special at the moment, but it works.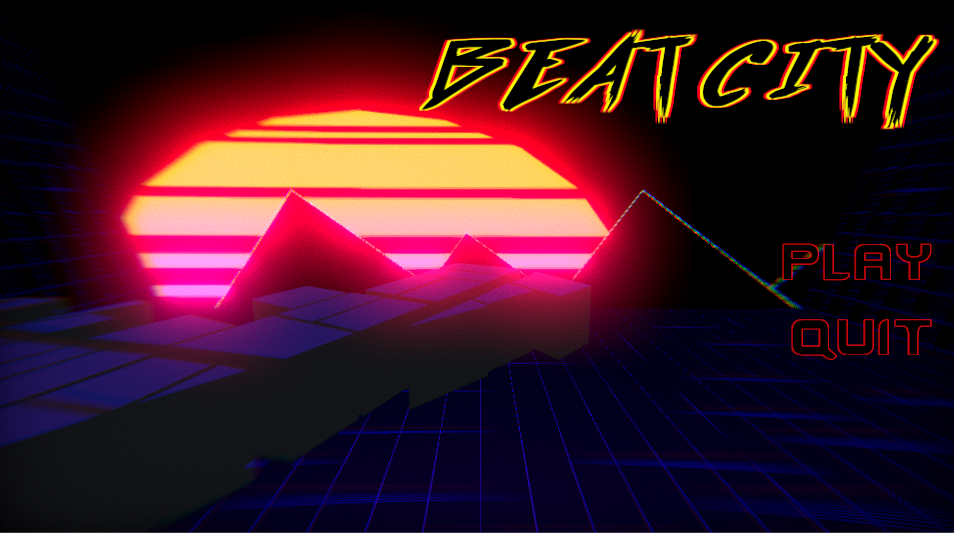 This is the finished menu screen, it’s not polished, it’s just functional.
To make this, I began by duplicating my main scene, just so I can use the scene of the game for the menu.
I deleted the player character and the cinemachine camera on the new scene, and everything unnecessary, I then set up the camera how I wanted and added in the title and the play and quit buttons.
After this I made a script which I called UI_Menu, which simply included public voids of the QuitGame and PlayGame which I can use in the OnClick function on the buttons.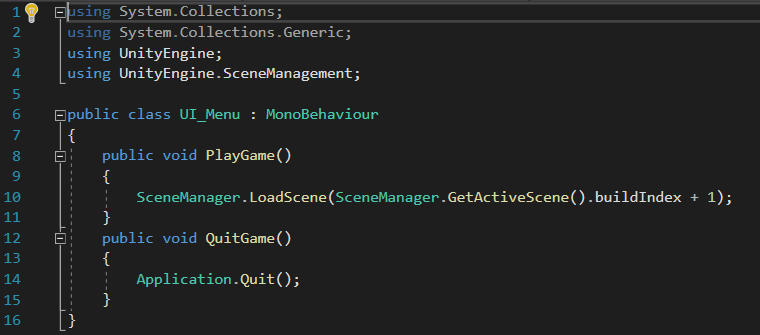


This simply either starts the next scene which is buildIndex 1. The menu is buildIndex 0, the next scene is the game.
If the player clicks Quit. the game quits.
Unity – UI: Main Game
For the main game, I began by making the mission accomplished UI, which just came into my head out of nowhere, which gave me the idea to have random missions in the game for each new game.
I made this Mission Accomplished UI
This UI still needs polishing since I’m simply testing out animations and functionality at the moment, and this GIF doesn’t properly display the UI since it is a lower framerate.
To go along with this I have a UI for the players money.
These aren’t functional yet, and they’re not polished at all, but it’s a rough idea of what I want to have in the game.
I then began to make a Song List UI.
I began making the checklists for the missions, this was very simple to make.
At first I was going to have the checklist go vertically down on the left hand side, but I didn’t like the look of that, so I made it go horizontally along the bottom, and I thought this looked a lot nicer to the player, and it’s easy for the player to look at the checklist whilst playing since it’s at the bottom of the screen.
This is the checklist I made, I made an empty game object and named it Missions, and in that checklist I made a panel with a Horizontal layout group in it, I then inserted a checklist UI and named a few random missions, making the checklist a prefab so it can be referenced and instantiated, much like the song list, the values of the checklist will change as well.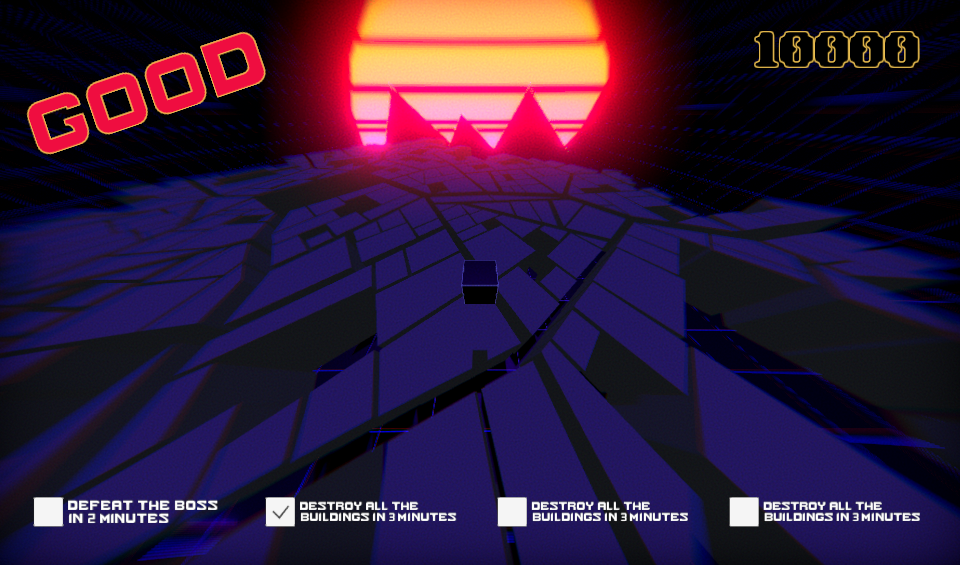
To make the checklist look nicer, I changed it from being a checklist to being some text with a separator next to it, I done this since I feel like it looks a lot neater.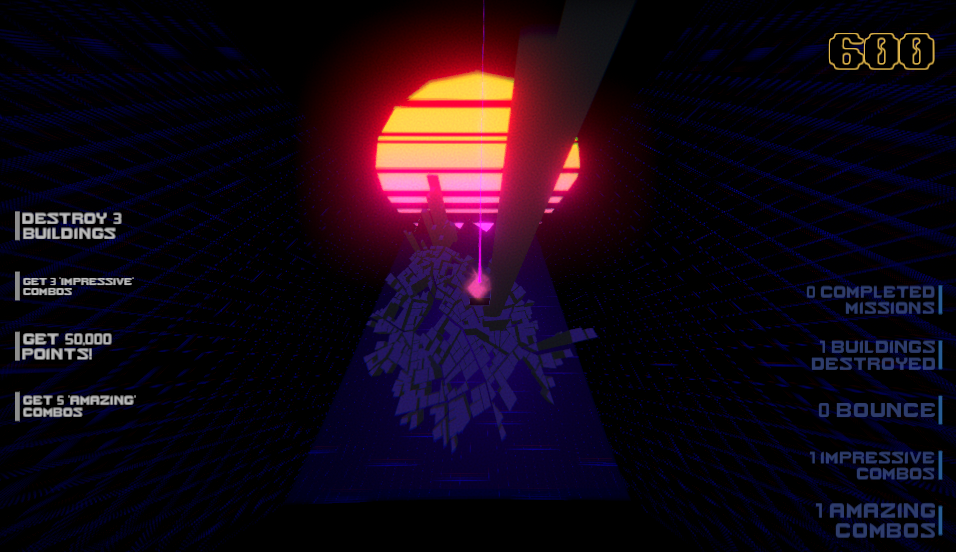
And now there is also, on the left hand side, some UI which tracks what you’ve done in the game so you know how close you are to completing your next mission.
Unity – Mission Functionality

I wanted to make my missions functional this week, by making a list of missions and making it so once a mission is done, a next mission would display, until all missions are complete.
I started this by getting the checklists to function properly.
 I began this by adding a script to my Mission empty object of my UI.
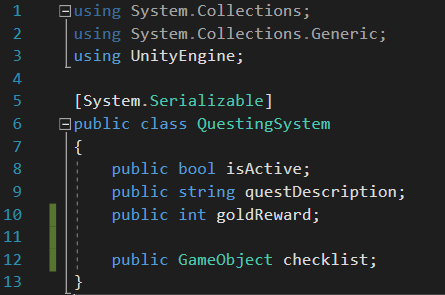
This script was going to be a Serializable field for adding all of the values which I’m going to have in a mission.
The reason why I’m making it serializable is so I can make multiple instances of that object and not have to have loads of copies of different things. It also didn’t have to derive from Monobehaviour since it is it’s own class.
After that I made another script applied to my Mission empty object called QuestList
This made the checklist work, and spawn, and then replace a completed quest when one is completed.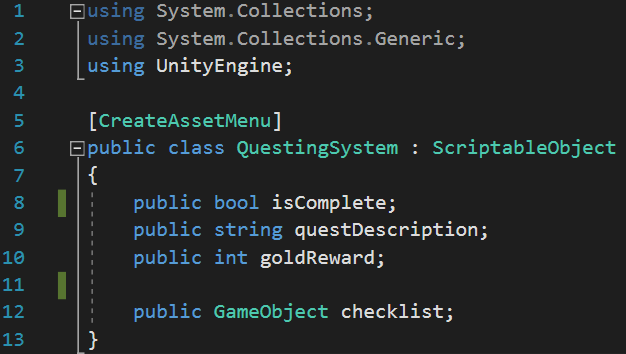 To get this to actually be functional, I made a few basic missions work.
And to make everything more neat, I made the QuestingSystem script a scriptable object, so I can create assets for each quest and add them into my quest list.
Using scriptable objects make things so much easier since I can access the QuestingSystem and make separate assets for it instead of having to type each one in the Missions inspector.
It also makes things so much easier to reference.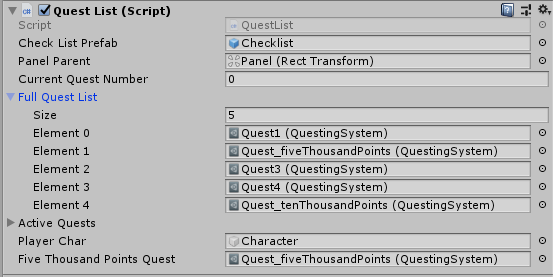
After that I began working on the quests Five Thousand Points and Ten Thousand Points, I made these work by going into my _Points script, which manage all the points the player gets and adding this: 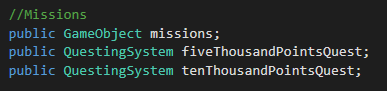
I added a public GameObject called missions so that I can use the components of my QuestList, I then made two QuestingSystem variables named after the quests.
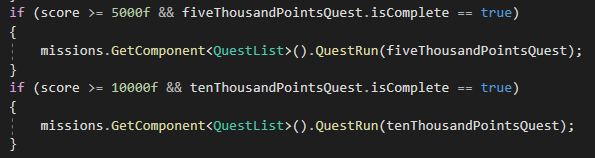
Once I made those, I assigned them in the inspector and then, in the same Points script I ran an if statement which checks the score and if the score is more than or equal to (Whatever score required for quest) AND the quest is not completed and set to true, it runs the function inside the missions Quest list which is called QuestRun.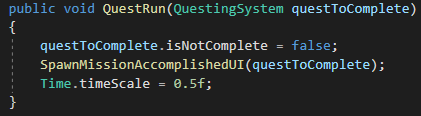
During writing this script, I was being lazy, and I wrote separate functions for each quest which was complete, like this.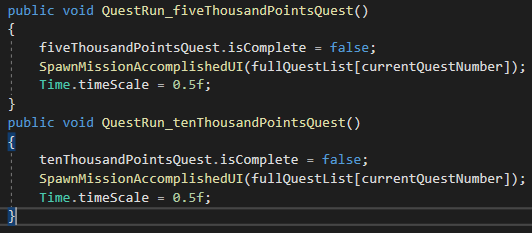 But I did see how inefficient that was and made eveything into one singular function which I called QuestRun.
I also managed to get the Mission Accomplished UI to spawn once the mission was complete.
This is the function which I use to spawn the UI: This instantiated the UI and it plays its entry animation, which is the panel sliding in, I also made a separate sliding out animation which was the same as the sliding in but backward, it then also sets the text to the gold reward which the player is going to achieve when completing missions.
To get the exit animation working, I made a script on the UI itself which I called UI_AnimationMissionAccomplished, and inside this script I wrote this: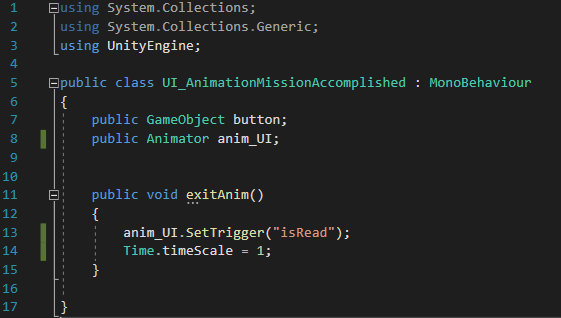
I had to assign an Animator to the UI and attach the animation, I also had to make the exit and then set a trigger which would trigger the exit animation when its set.
Unity – Display Music List
I had Ash’s help to make the music list work. I began by making this script: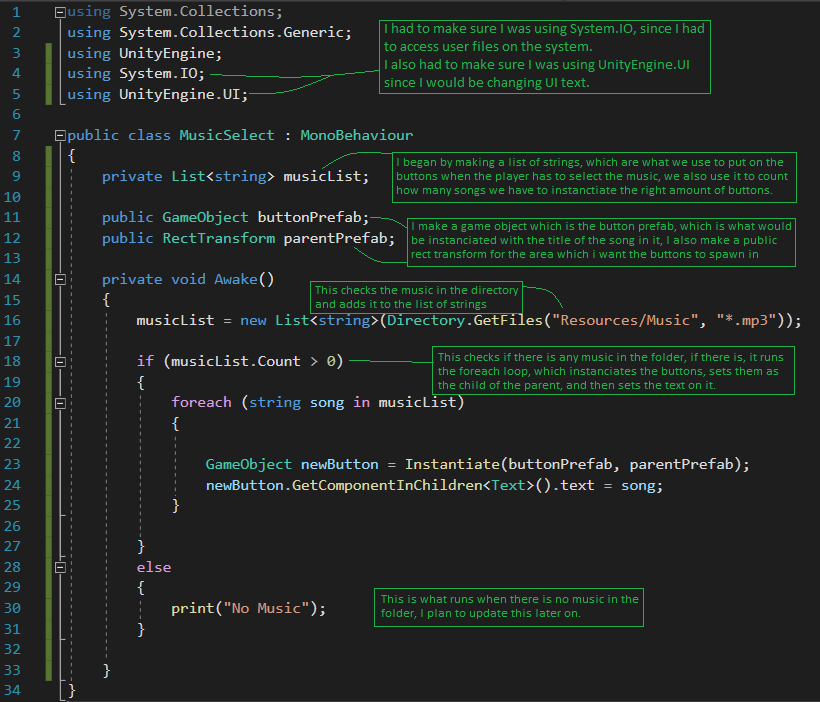
This script is then attached onto the panel which is inside the Music Select UI, this panel controls the layout of the buttons and how they’re going to populate.
I then made a button and made it look nice, I then dragged this button into my Prefabs folder, making this a prefab so I can reference it and then instantiate it when needed, this means that every button which spawns would neatly horizontally populate the panel, and not all be ontop of each other.
- What did I find difficult or easy?
This week, I found the animation quite hard to get working, since I don’t know fully how to use it yet, but I’m learning.
I also found displaying the music list a tricky task since I was using functions which I haven’t even used before, but it’s all part of learning
- What tasks didn’t I complete from this week?
I didn’t get the death screen done on the Unity – UI task.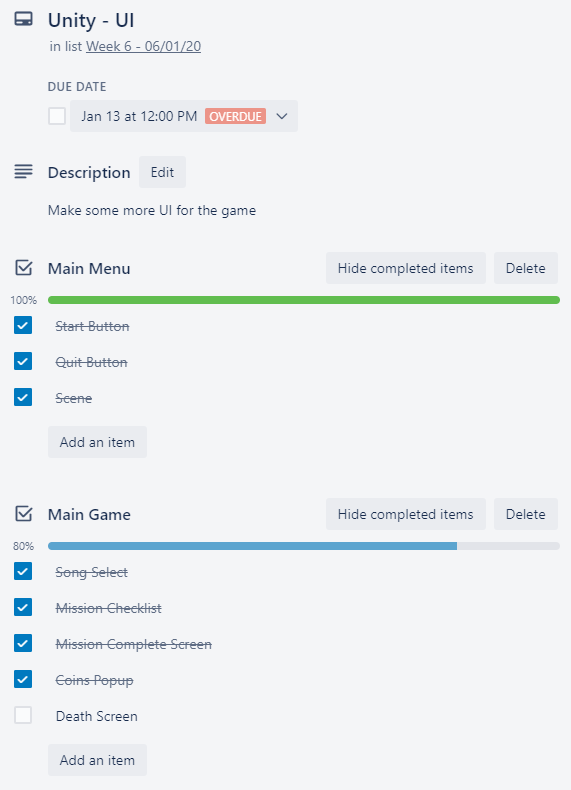
Planning for next week –
- How do I plan to catch up? Do I need to change anything about my work or planning?
I plan to catch up by getting my death screen done and working on getting my song selection to function in the game.
Week Number & Date: Week 7 – 13/01/20 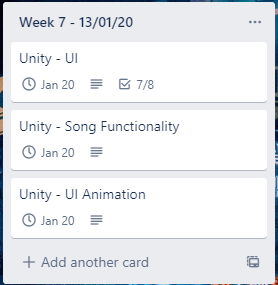
List of Tasks planned for this week: I plan to get the death UI on my game completed, and polish up on my UI so it’s all complete, I then plan to make my song selection functional so it works in my game and uses any users songs. I also plan to get my UI all nice and animated! Which will mean I need to watch a few more videos on Unity Animation.
Current Position –
- What did I do this week and why did I do it? (Screenshots/Videos/Photos)
Unity – Song Functionality
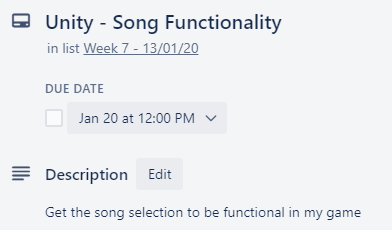
I began by looking at scripts which Ashley had done trying to get this to work, he got very close to getting this working but it just didn’t work in the end.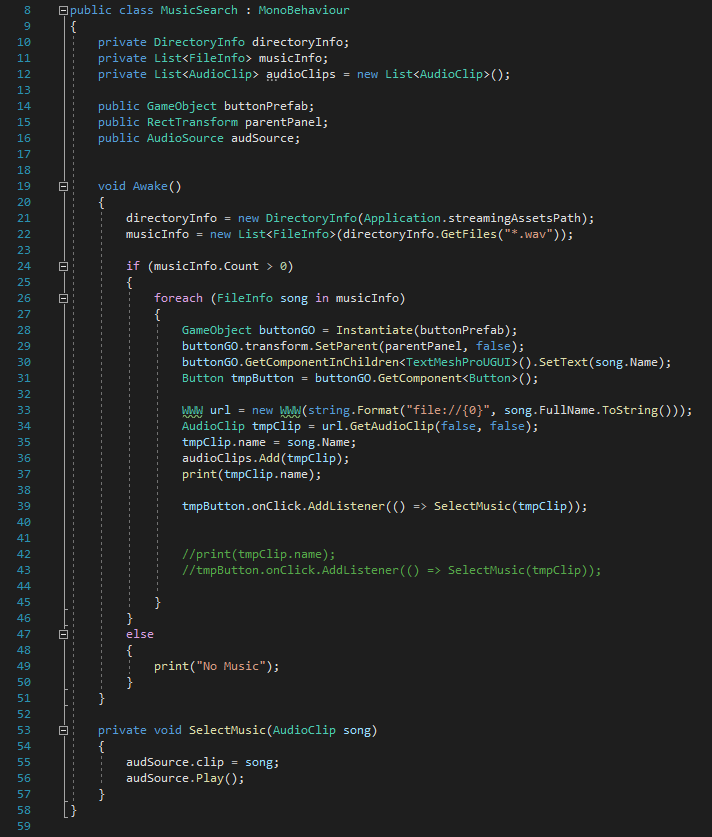
This never worked because, you would click on the button where the music was and then an audio clip would go into the audio source, but it would be empty, and wouldn’t play anything, you click on the actual audio in the inspector and the music would play, it was quite a difficult problem, and I didn’t know what to do to fix it, so I took the problem to a friend to see if he had any idea, and he did know how to do this! So I asked him for help and he helped me write this script, explaining to me how everything works.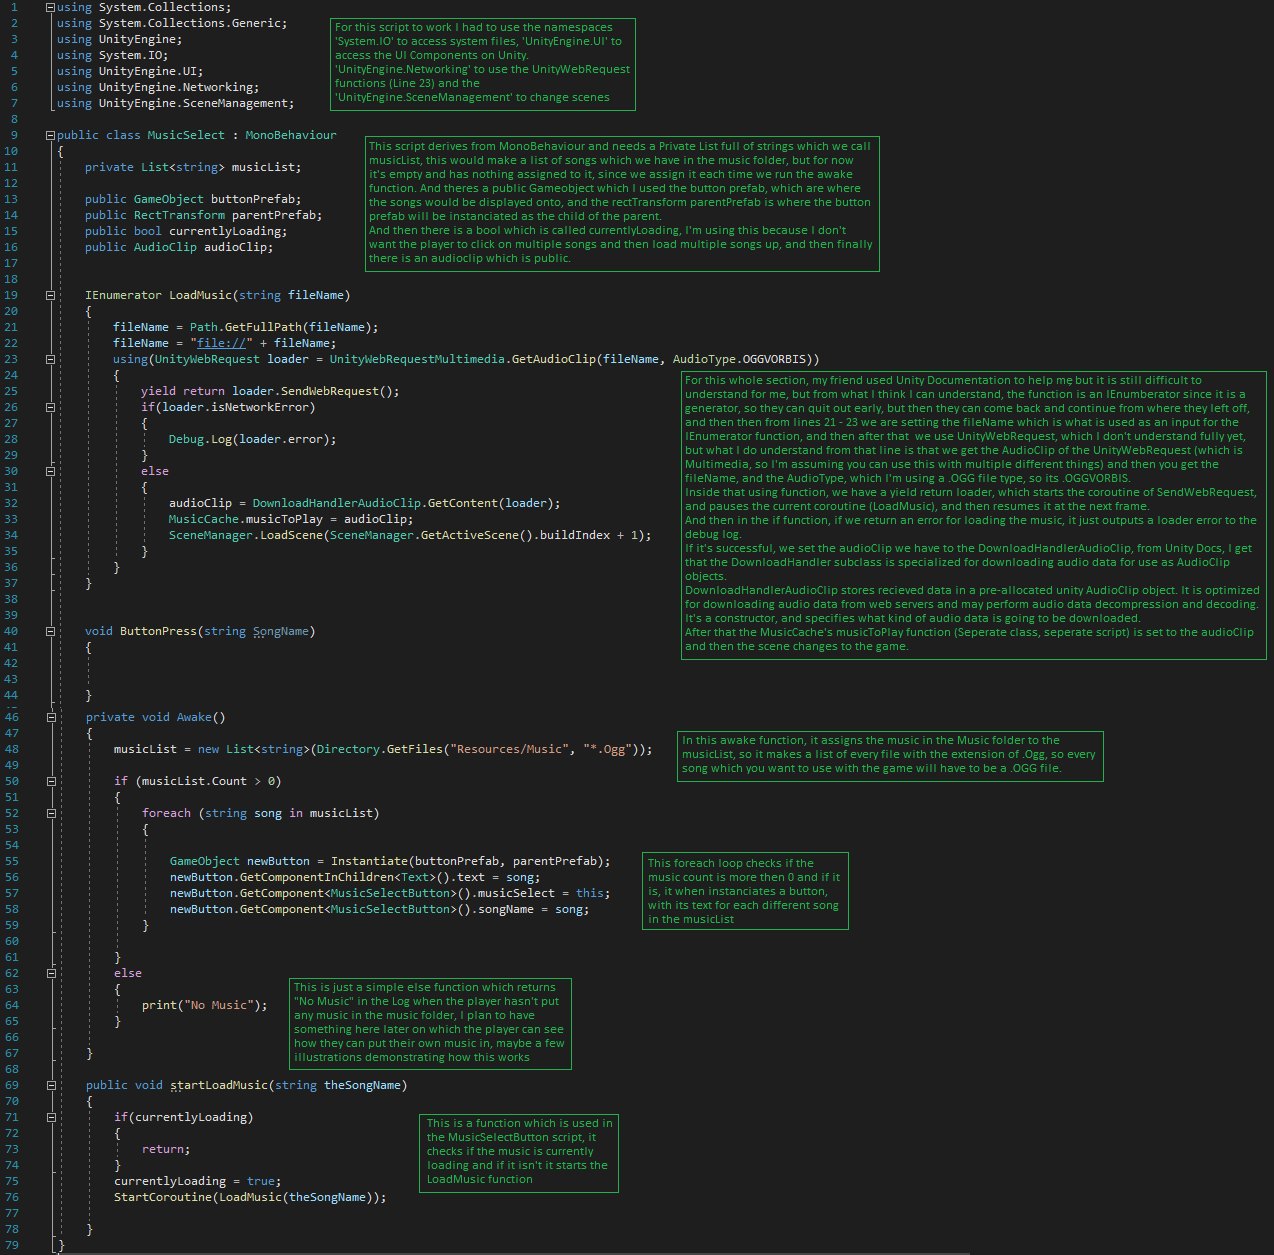 This is the Unity Documentation which was used to help me understand:
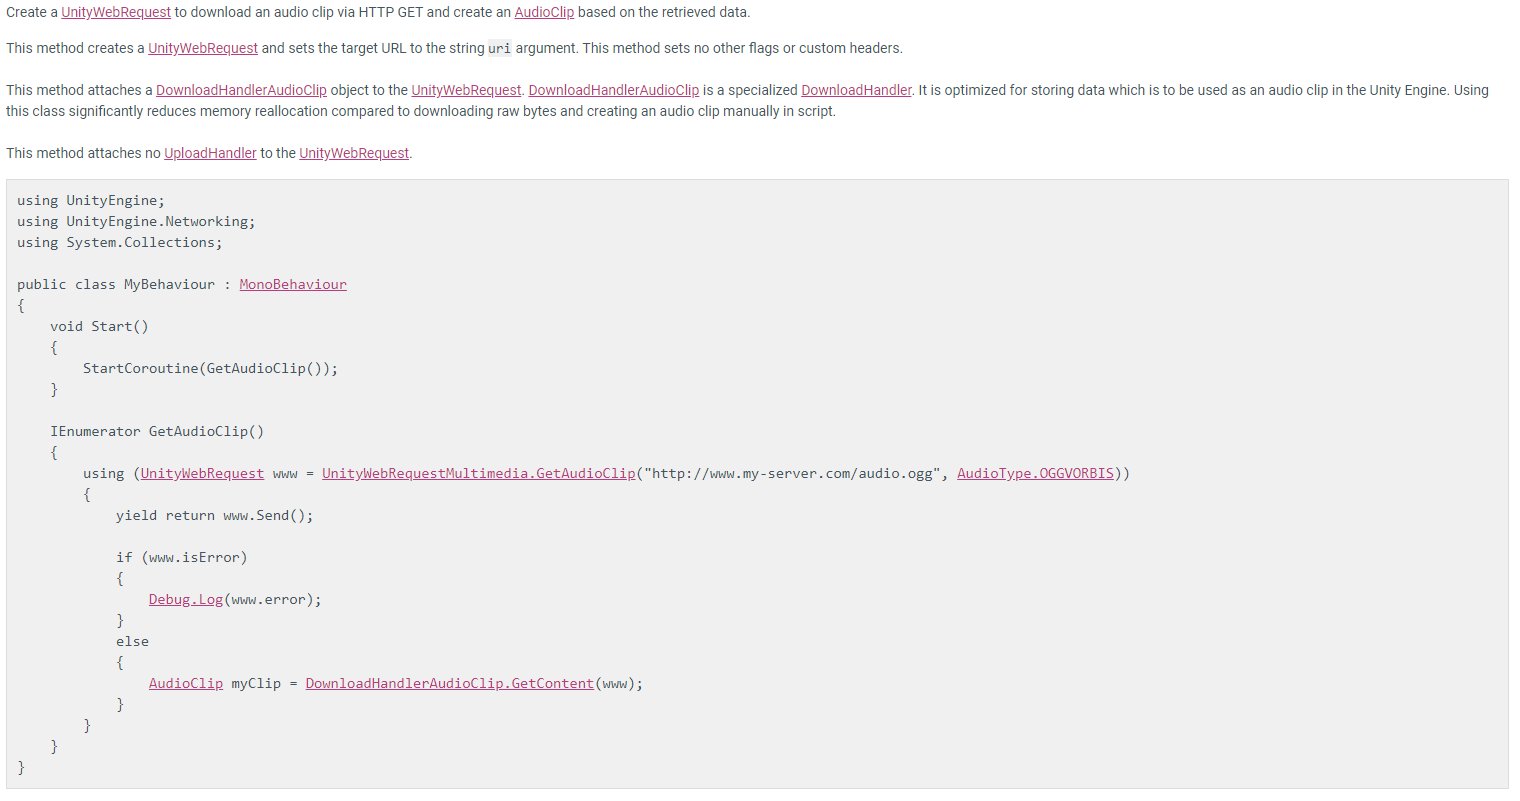
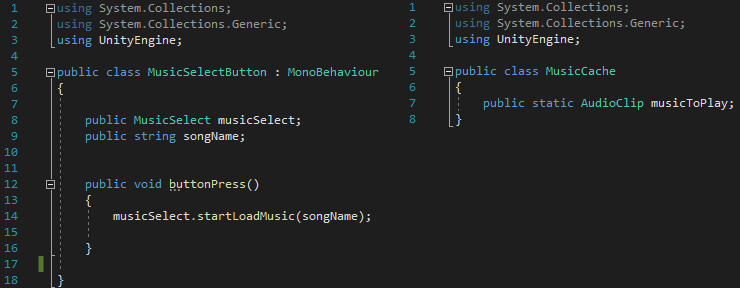
And these are the other two scripts which work alongside it to make it all work:
Unity – UI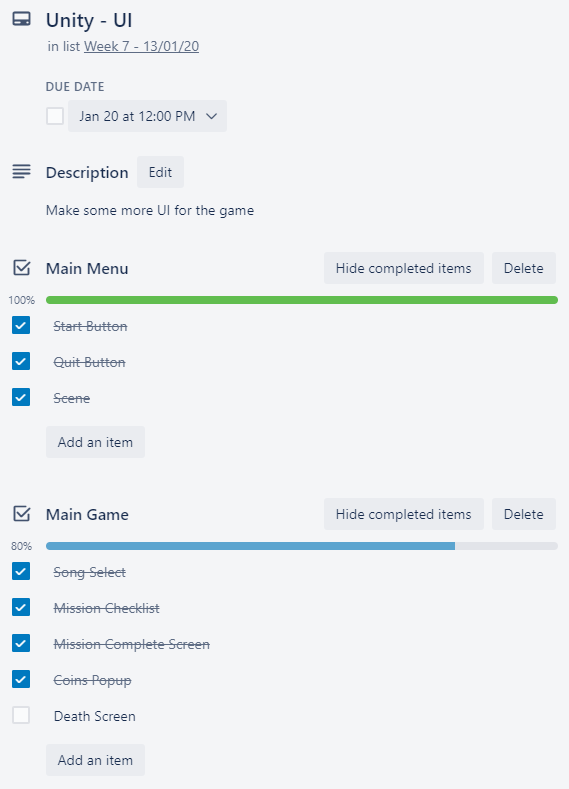
I only had to get the Death Screen UI done, and I had to edit some of the text on the Song Select, I also had to make sure everything UI-Related is polished and pretty before I animate it.
I began by drawing out quick concepts for my Death Screen, getting interest from a pinterest board I made.


After making these two concepts, I went with the 2nd concept since I liked it more. And I began production for this death screen.
I began by making a separate canvas, which is where the death screen is going to be on, and then I also made a separate camera which is where I’m going to have the death camera and then I’m going to use a culling mask which would block out the whole game besides the death UI, which is useful instead of switching around all of the UI.
And then I wrote a script which hides the UI and game, and then displays the Death UI whenever the player hits the ground.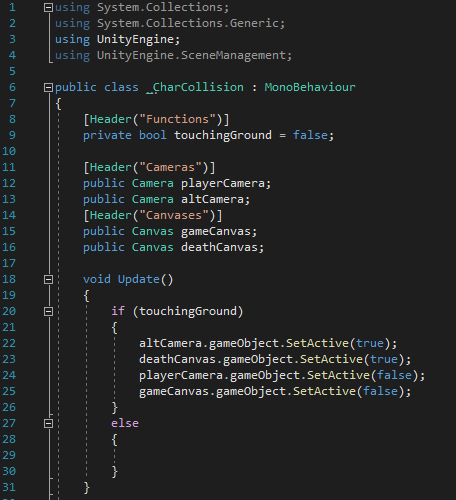
This was a pretty simple script, since I just needed to setActive(false) to the component which we need to hide whenever the player dies, and then I just added a menu button to the death screen which leads you back to the main menu.
I decided with this one I wanted to copy a Kingdom Hearts type style and then replicate something similar to that for my game with the player cube rotating in the air as it dissolves, and I used a shader which I hadn’t used in my game yet to achieve that, so I’m glad to have used the shader there.

I’m also planning to have a Game Over screen display once the players music has finished playing, displaying what score they got and displaying all of their game stats, and once the menu button is clicked, their gold and score data would be saved, so they can always try and get a higher score, I’m hopefully able to also use the gold to make a shop system where the player can buy upgrades to make the game easier.
Another thing I added (this wasn’t on the list) was improvements to the menu screen UI.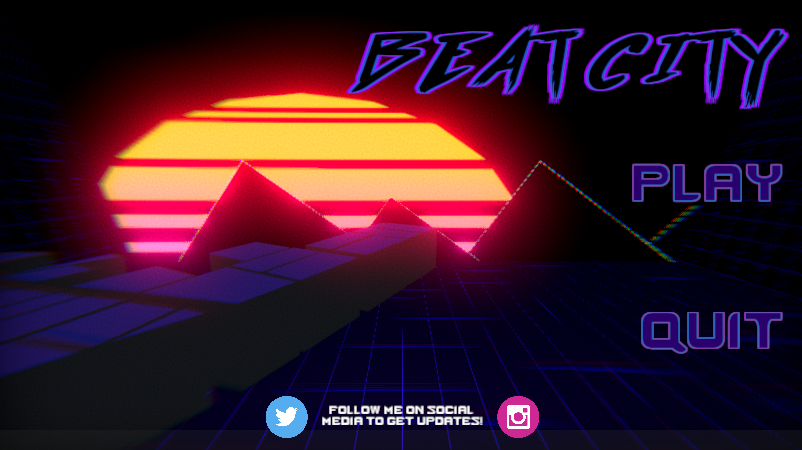
On the play and quit buttons, I added a highlight to them which had a gradient png image which I made in photoshop to make selecting the button feel better.
Another thing I added was buttons which take you to my social media. This is the script I used to make it work on click.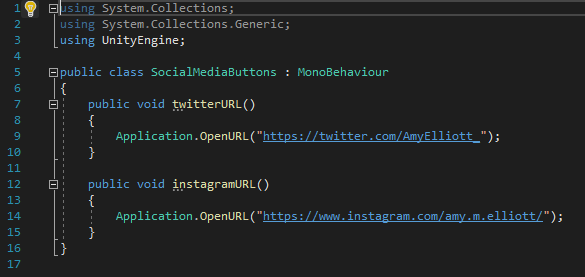

- What did I find difficult or easy?
I found getting the song selection functional hard since I’ve never used some of the syntax in there, so it was a lot of research and talking to friends to get this to work, but I am SO glad that I did get it to work, since I feel like it’s a very big and important part of the game to have it working.
Everything else was pretty much polish, so that was pretty simple to get done.
- What tasks didn’t I complete from this week?
I left the UI animation since I feel like it’s fine as it is.
Planning for next week –
- How do I plan to catch up? Do I need to change anything about my work or planning?
I plan to finish up everything by next week and get to publishing and polishing final bits so the game is ready to upload to Itch.io.
Week Number & Date: Week 8 – 20/01/20 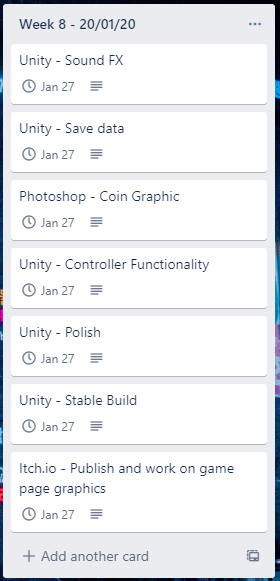
List of Tasks planned for this week: This is what I plan to do this week, but I feel it may drag onto the next week, especially the stable build and the publishing of the game.
I’ve divided it all up into what I’ll be focusing on in college and what I’ll be focusing on at home.
College:
Sound FXSave dataPolish- Publish and work on game page graphics
Home:
Coin Graphic- Game page graphics
- Controller functionality
Stable build
Current Position –
- What did I do this week and why did I do it? (Screenshots/Videos/Photos)
Unity – Sound FX
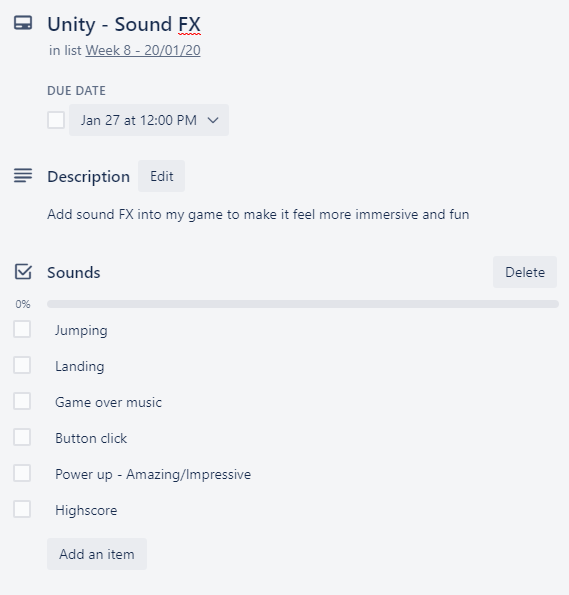
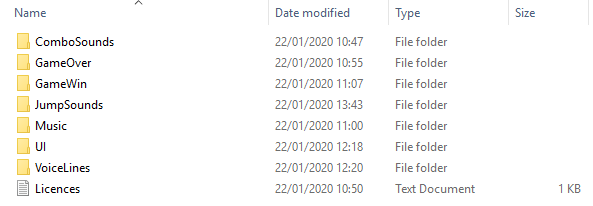
I feel like this is a really important part of my games development, and to find these sound FX I used a website full of royalty free sound FX called gamesounds.xyz, out of all of the sound FX and music on there, I picked a few which I really liked and made a folder full of them, and I made sure to write down each sound effect/song I used, just in case I had to reference it somewhere later on. (Like my itch.io game page)
Inserting the music was very simple, for button click noises all I needed to do was add an audio source to each button and an OnClick() function which played the click sound.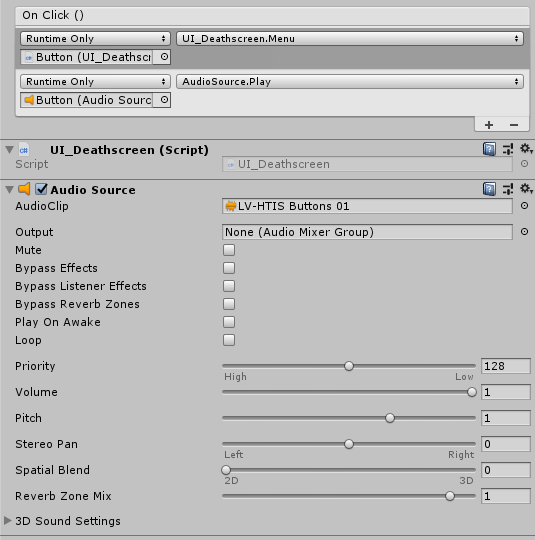 To get the ‘Game Over’ and ‘You-Win’ voice lines to work, I had to create an Empty Object which I called Voice Lines Manager, which would insert whatever voice lines I needed in there once the game has ended and play it, I got this working by putting the voice lines with the death music on whatever triggers the game over, in this case it was the character, with the character collision script.
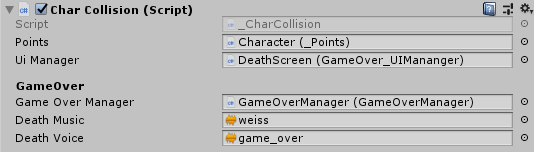 The Voice Manager object was referenced in the Game Over manager, which receives the data when it’s game over and feeds it into the voice manager.
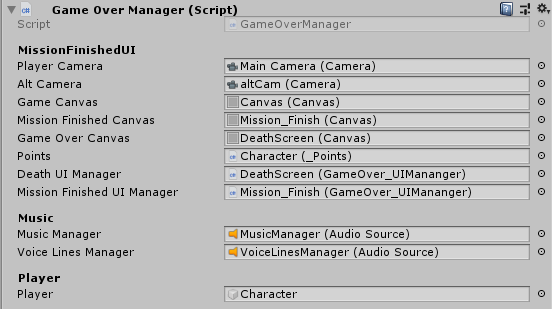
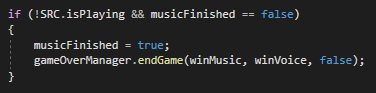
I had to write this inside my music scaler script so the game would detect when the music has finished: 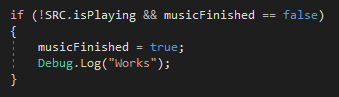
Once I found all the music I needed I put it into my project and made everything work with the audio. And the game feels so much more fun to play with audio along with it.
Unity – Save Data
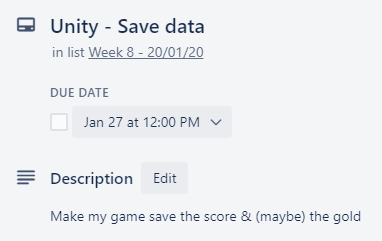
To do this, I began by making a script which I called SaveData, and this is what was in the script.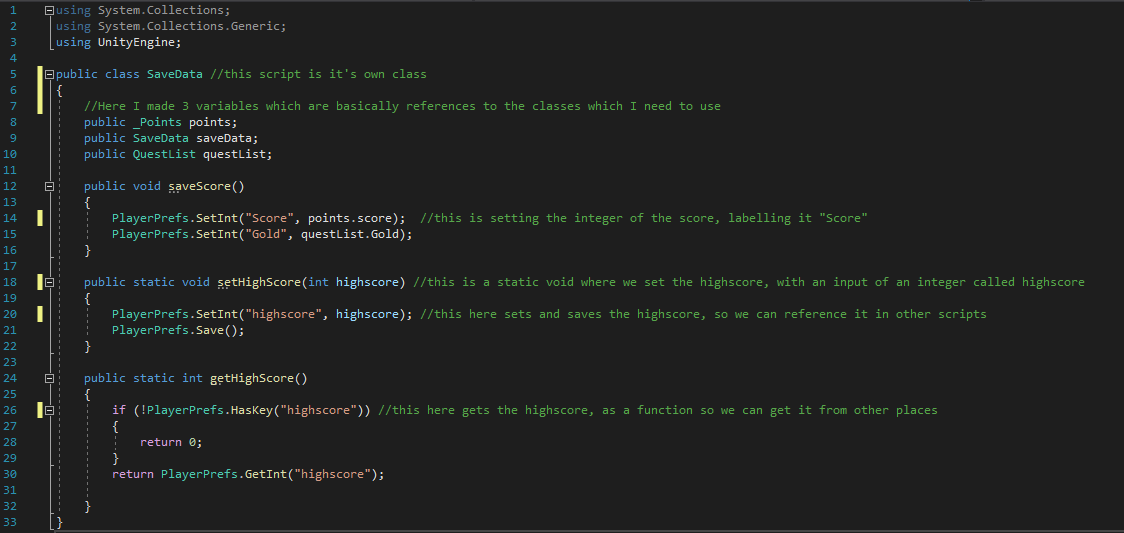
I did struggle with getting odd things working, but in the end I did get everything working fine, along with this script I needed to make everything more efficient when ending the game, since I felt like it was really repetitive and too much to be doing separate disabling of cameras and such on each game over, so I made a Game Over Manager script, this is the script.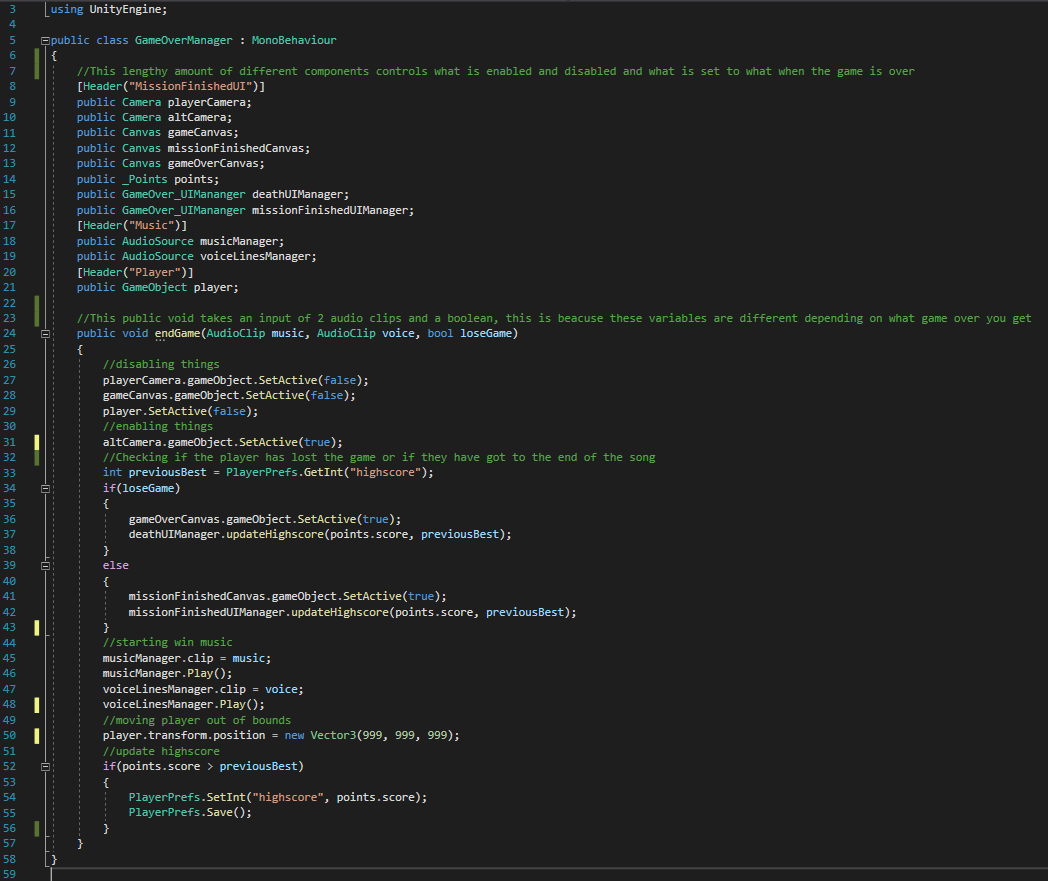
Doing this script made everything much more efficient, since the only difference between getting a game over and getting a music finished screen is simply the canvas, the voice lines and the music, so that’s all was different, which is what Refactoring is, I learnt what this word meant recently.
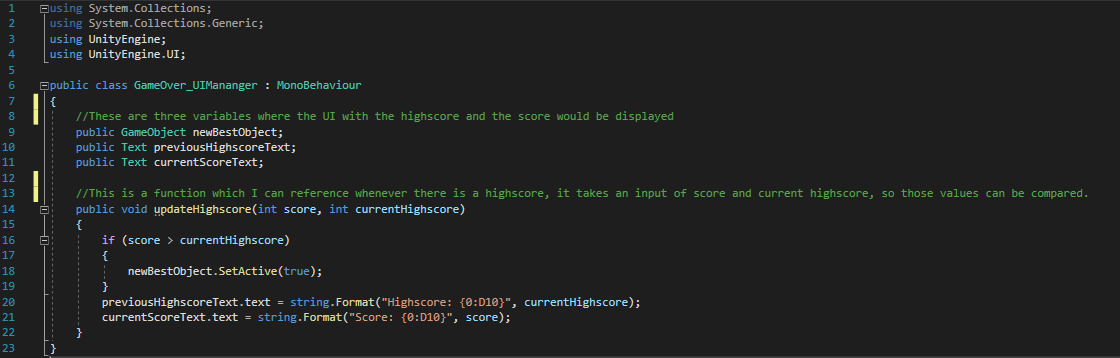
I then used this script, which displayed all of the highscores on the UI.
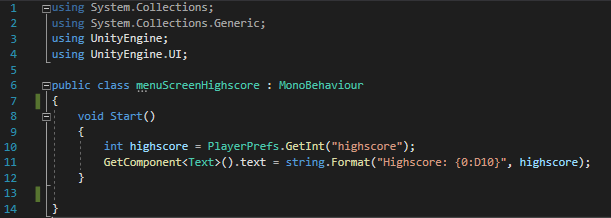
And finally I made a script which referenced the highscore in the different scene, which was the menu screen, this script is fairly short and easy to understand.
Then I just simply needed to call the function when the game is over.
After linking up some references and making UI for the highscores in the end screens, my save data was finally finished and working, this was challenging to get working efficiently
Photoshop – Coin Graphic
This was fairly easy to do, I done this at home using Paint Tool Sai, since that runs best on my home PC. I began this by finding a Coin Graphic on google which I can reference and get ideas of colour on.
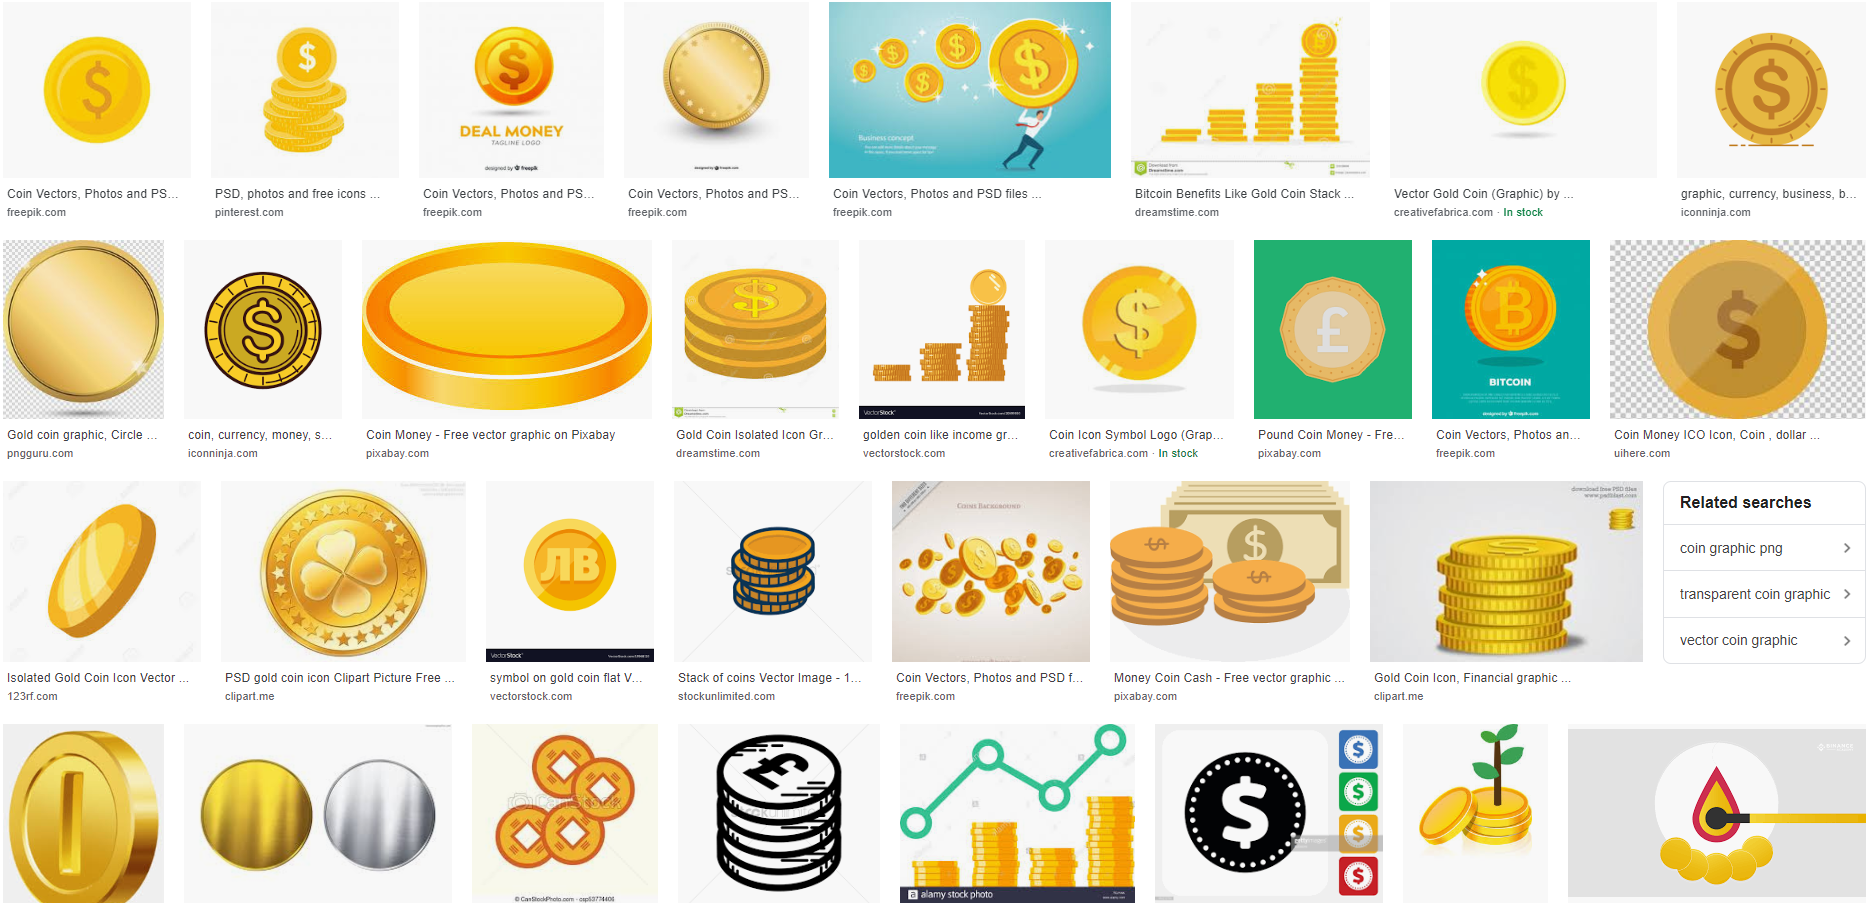
From looking through the images, I knew I wanted to draw stacked coins, and so that’s what I did, and this is the result:


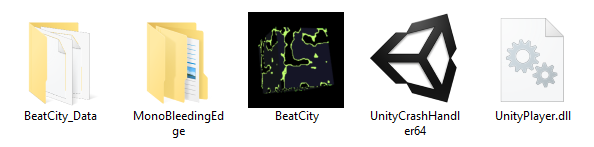
Unity – Stable Build
Doing this required me to fix all the pesky little bugs, and making sure everything worked as it should do before I upload it to itch.io, eventually, I got myself a build which I was happy with, I made sure to rename it so the game was called Beat City, and then I also made sure I had a logo for it.
To make a logo, I really wasn’t sure what I wanted, I ended up taking a few screenshots of the dissolving cube on the game over screen and that proved to be quite a nice logo!
One thing I had to make sure I did, was I had to make sure that the script which grabs the music components for you was the right one, since before this, to test this game on a college PC, I had to take music from the Resources folder inside the Unity file, which you don’t get access to when you build the game, but that was simple since I wrote both scripts and just commented out whatever one wouldn’t work when I’m at home or at college.
Itch.io/Photoshop – Gameplay Graphics, Advertisement & Project Making
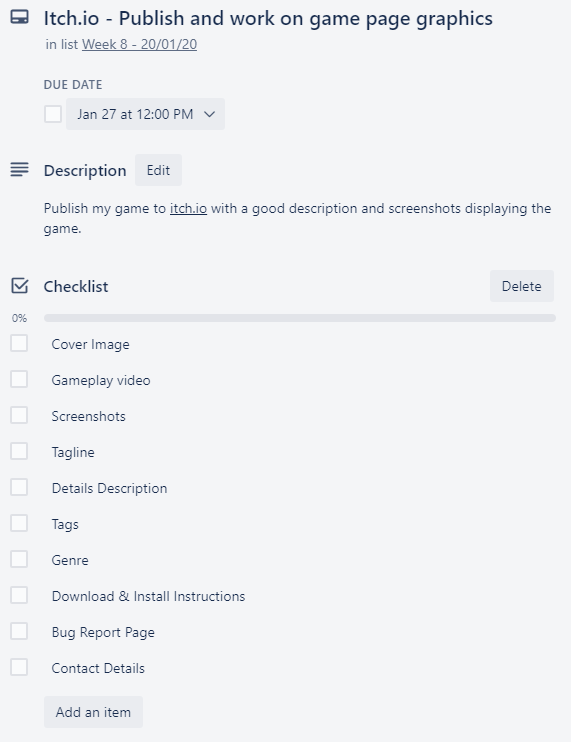
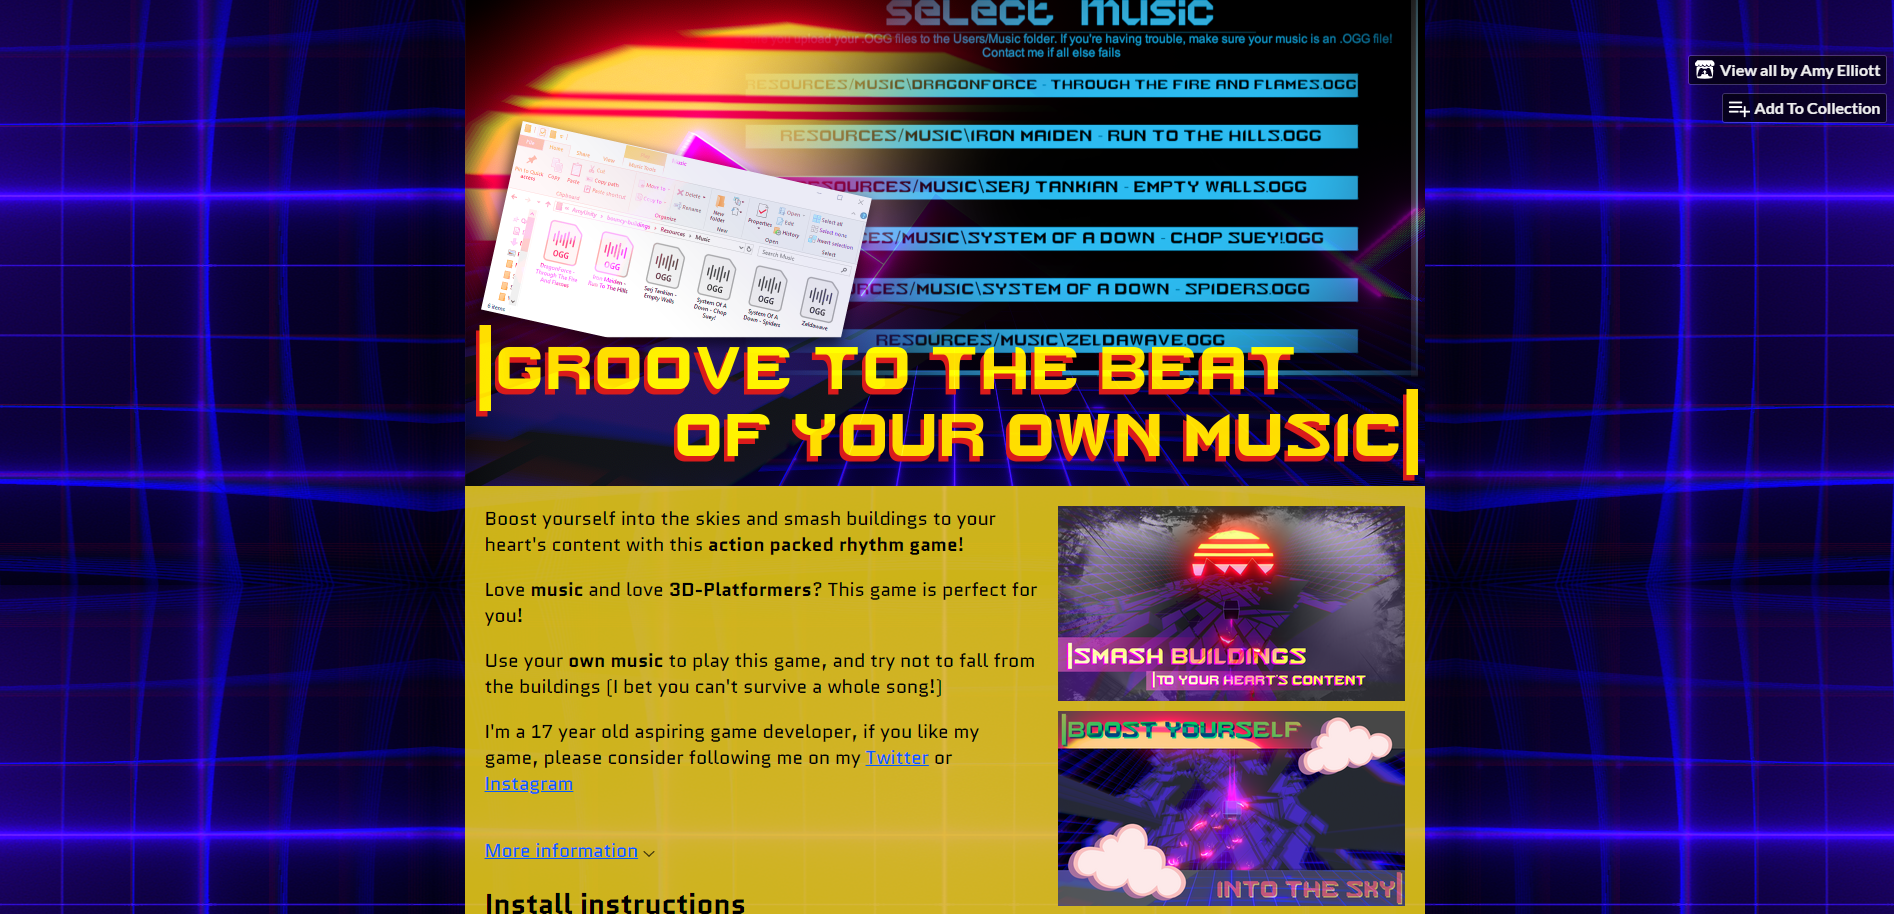
This is a very important part of my project, I would like my game displayed on itch.io and making it look good is VERY IMPORTANT since that is what the player would be drawn in by.
Doing this part includes having screenshots and videos advertising the game, similar to advertisement screenshots you get on any other game which are made to specifically show the fun of the game so the player would want to play it.
Because of the importance of having this to make my game stand out like a polished game, I made a pinterest board.
A lot of these are for mobile games, but I feel like the same principles apply. And a lot of these are art work instead of screenshots of the game, but I wanted to include screenshots of the game which are just edited to make the screenshots look more like screenshots. These also tend to have tag lines, and involve what is included in the game to make the player more excited to download and play the game, so I began to brainstorm some taglines for my game.
I’m not the best with taglines, but I wanted to have at least 4, so I began narrowing them down and picking which one I liked the most.
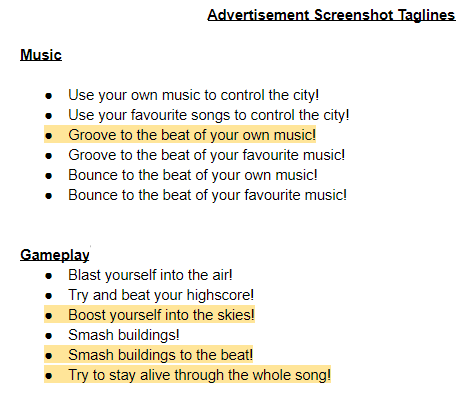
These are the four I liked the most, I can also use one of these on my Itch.io’s tagline.
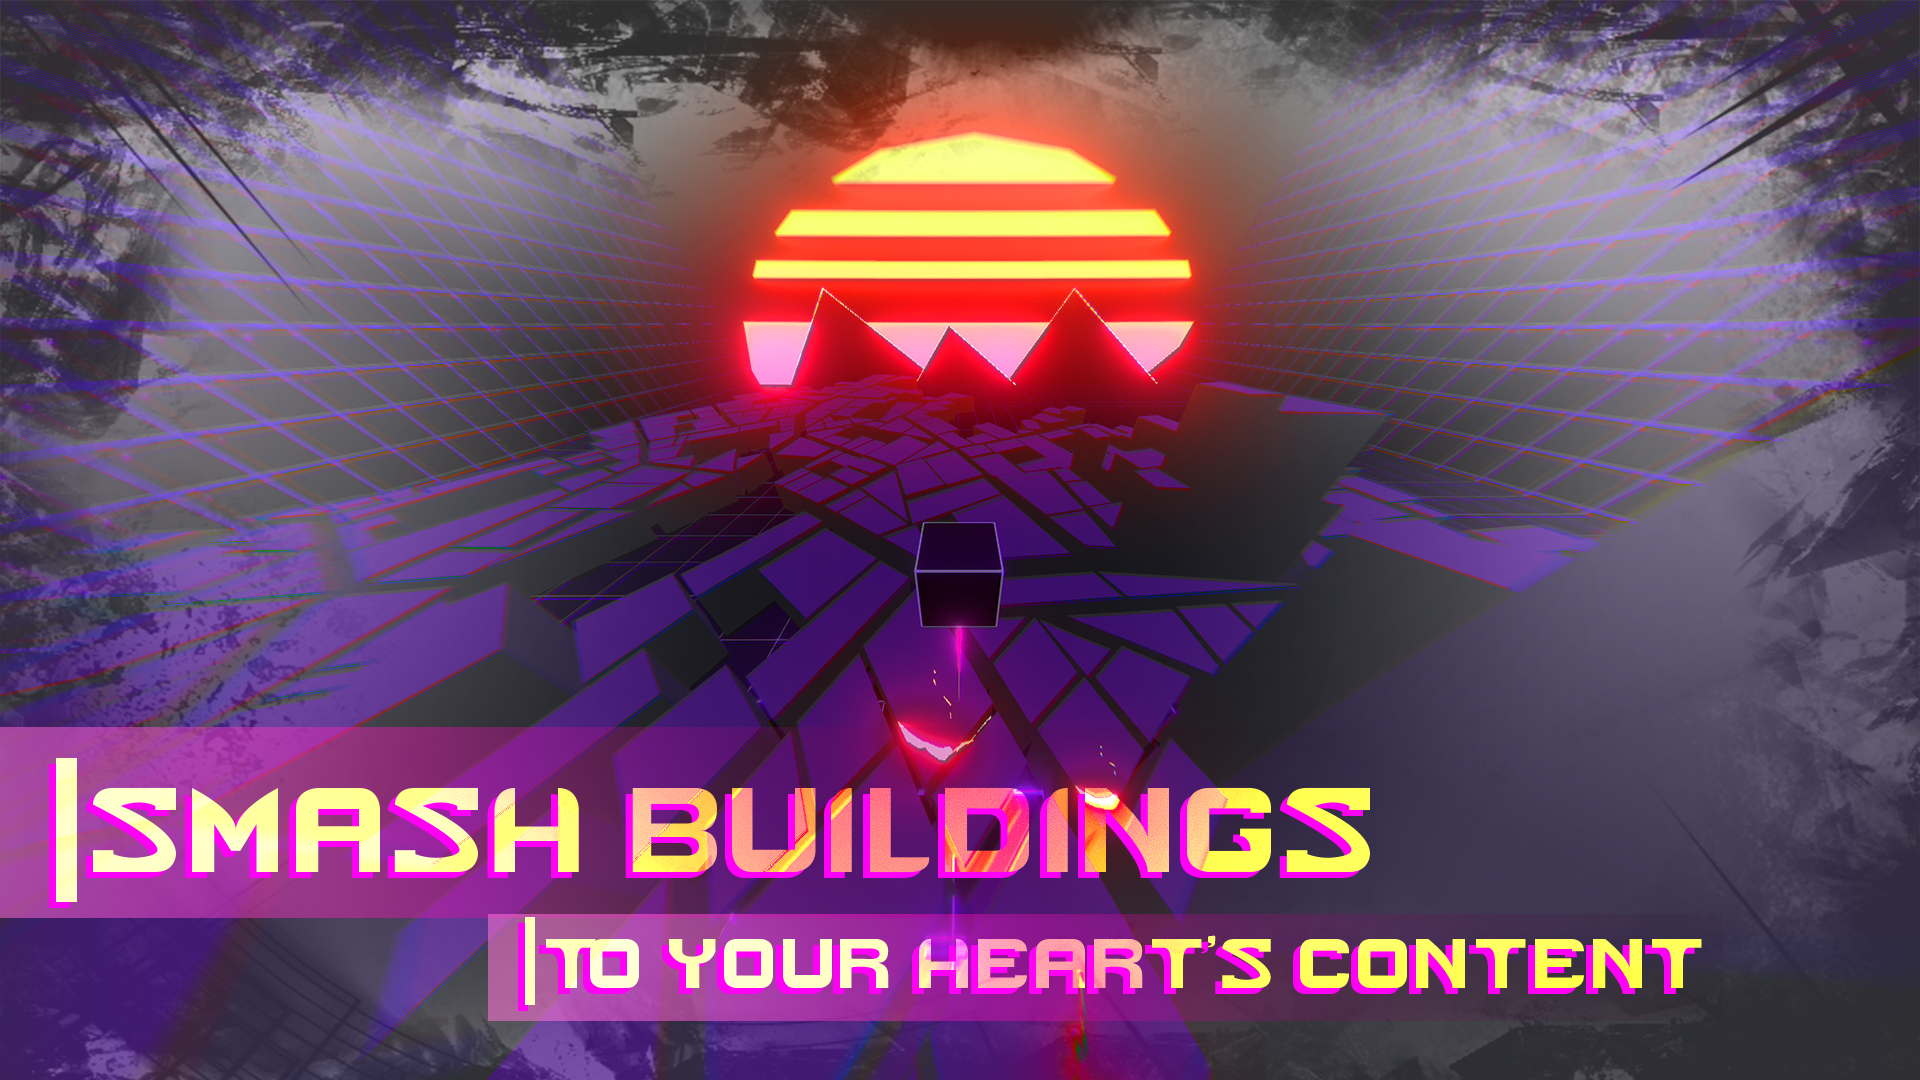
After reading through these a few times, I didn’t want to have the repetition of ‘beat’ on Groove to the beat of your own music and Smash buildings to the beat, so I changed the second one to ‘Smash buildings to your heart’s content’ and I felt like this fit more.
I picked ‘Groove to the beat of your own music’ to the itch.io’s tag line.
To begin making the screenshots, I broke these down into what I would expect to see on the screenshot when hearing that tagline.

The reason why I want to have some sort of character in every screenshot is because I feel that would catch a persons attention more than what I have as a main character in my game, which is a cube. But these character illustrations are optional, I may have them or I may not have them.
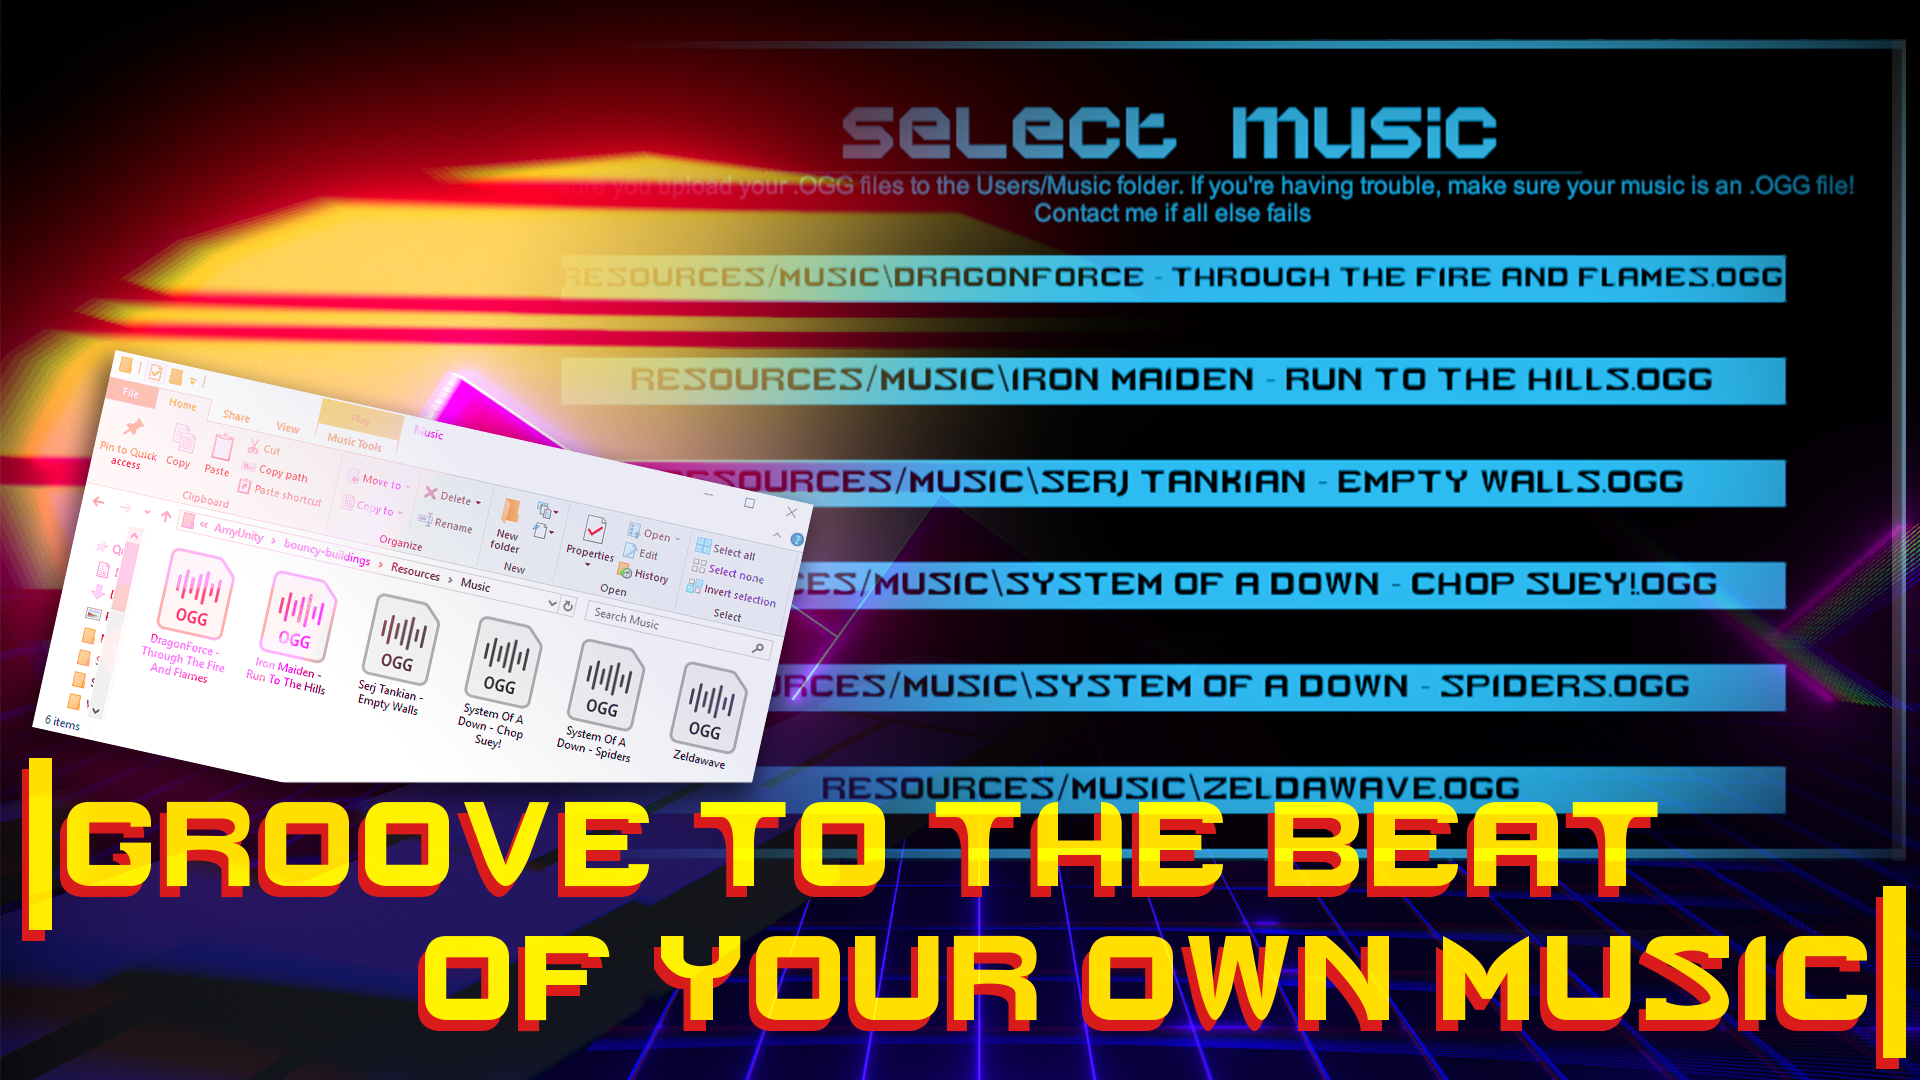
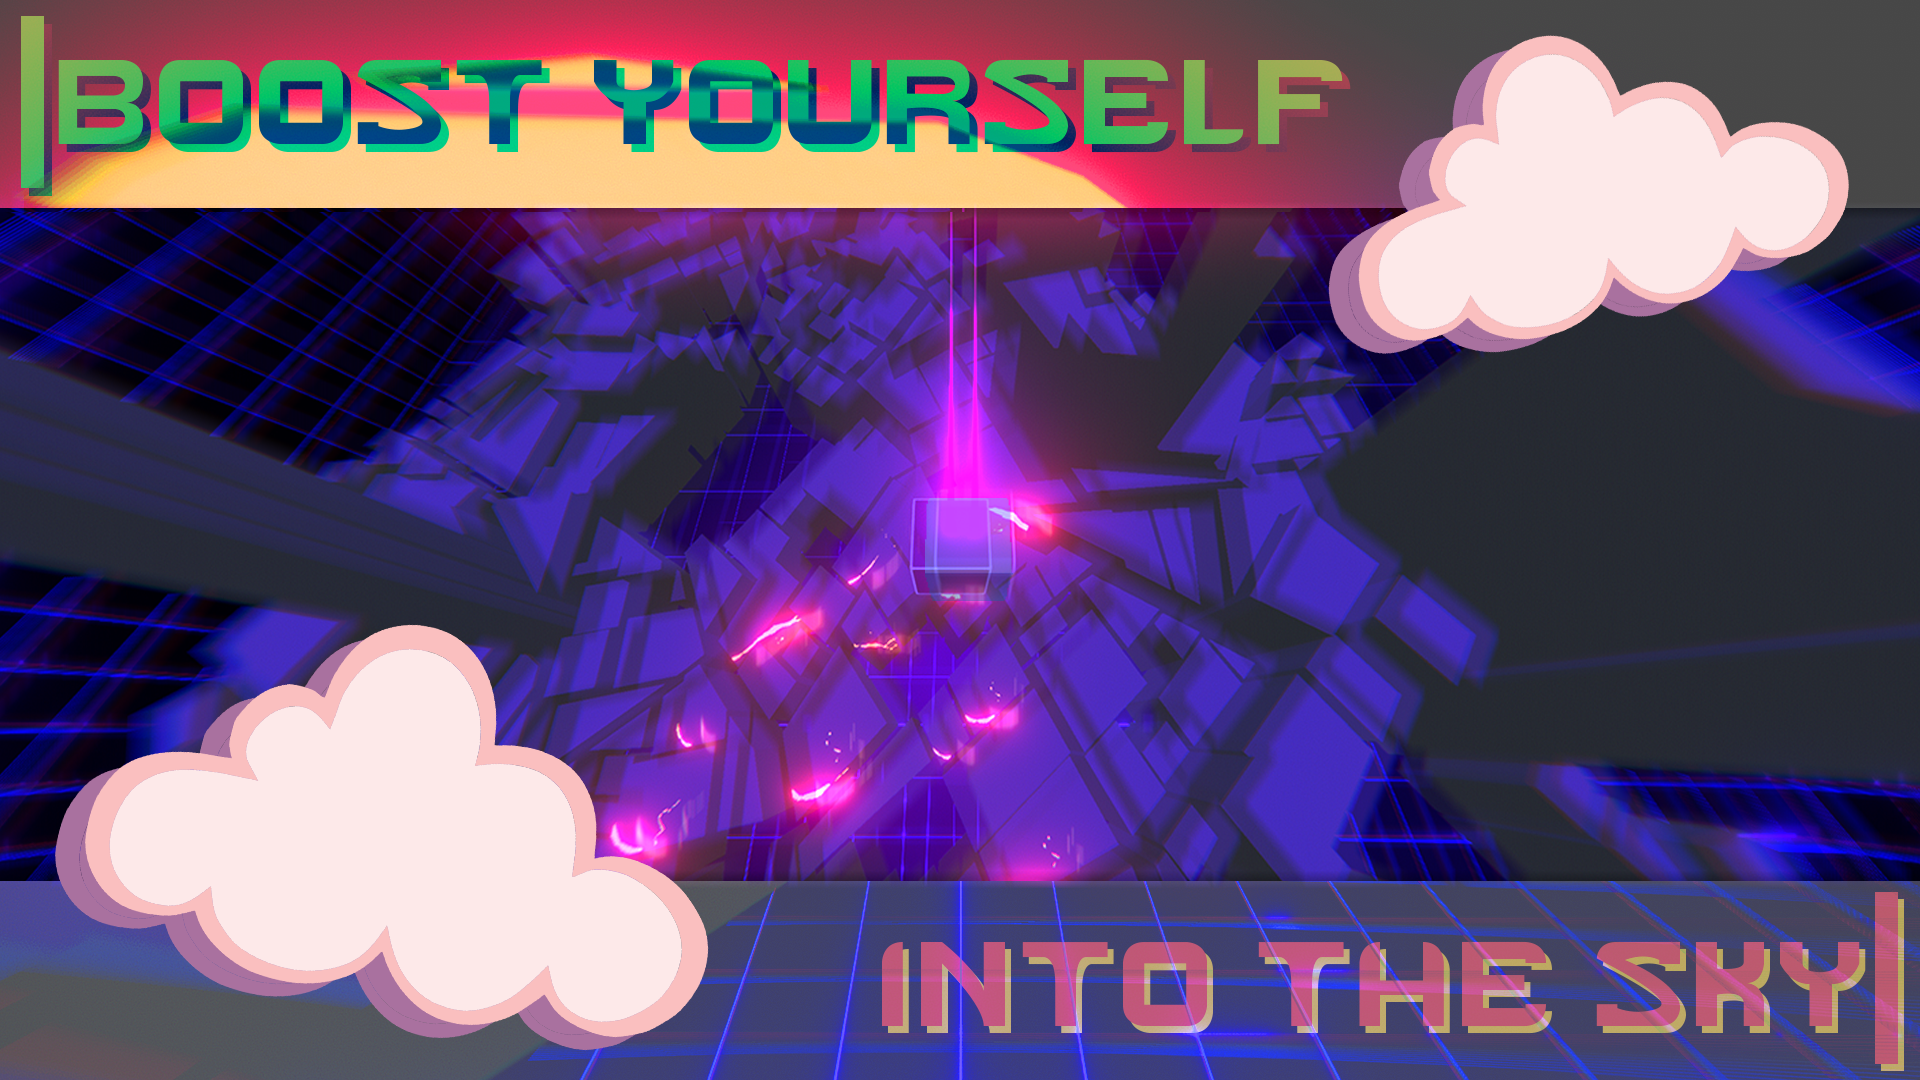
I feel like these three screenshots are enough, I like them. The one I like the most has to be the ‘Groove to the beat of your own music’ This one looks the best.
I then began to make the cover image for the page, and this is what I made.
I’m quite proud of this cover photo since I love the way that it curves around the sun, it makes it look like it is part of the sun.
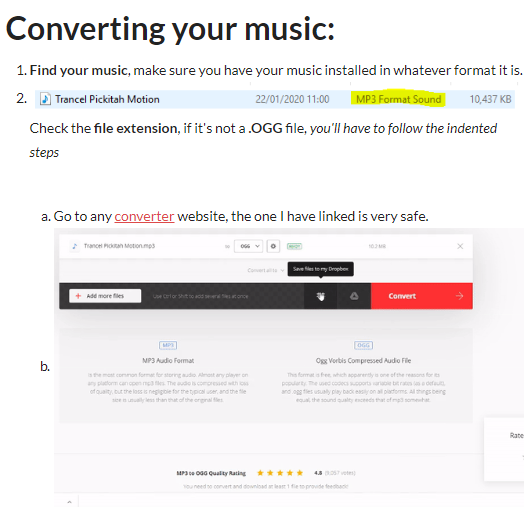
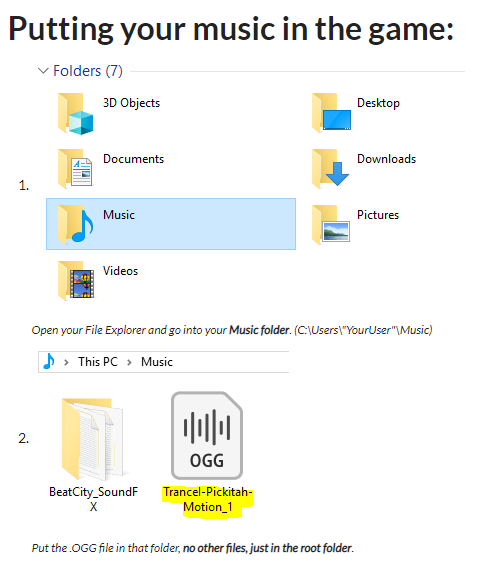
I then began writing the install instructions, of course I will have this detailed in the description as well. The underlined words send you to a google drive folder which has a royalty free .OGG file in it, so whoever is struggling with getting their music in .OGG format, they can download and use that, I have also linked an online converter which converts MP3/WAV to OGG files.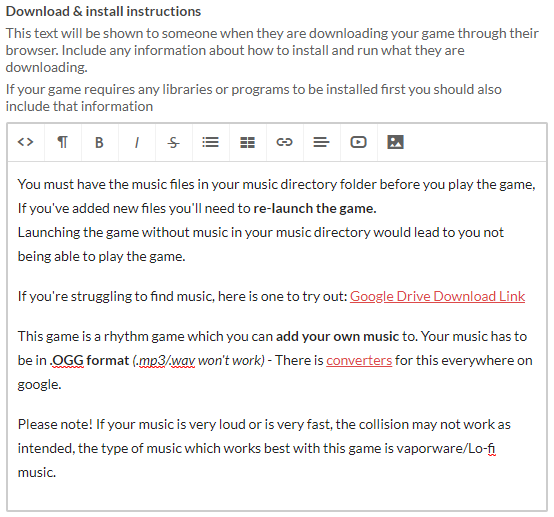
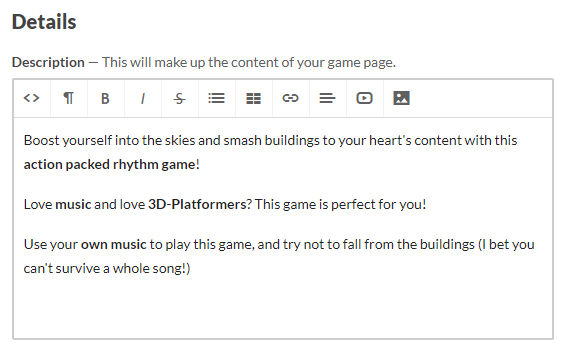
After I done that I began writing the description, I made the description short and sweet.
I realized I needed instructions somewhere on how to insert music into the game, so I added it to the install instructions.
I made everything on the itch page look nice by adding pictures and changing the colours, and I’m really proud with how it’s turned out.
https://amy-elliott.itch.io/beat-city
- What did I find difficult or easy?
I found it easy to upload my game to itch and make everything look nice and well presented, since I made the screenshots, and I feel they made the game look much more complete. I was struggling with how I wanted the background of my game to look, and I feel like I could’ve done a better job at it.
Finding the perfect build for my game wasn’t hard, but it was a tedious task, I had to make sure everything was perfect in the build, it only took 2 separate builds to get one which is okay for publishing.
I did find the save data difficult to do, even though the initial task is rather easy to do, I was having trouble because I named my variables weird and I got confused. I found putting sound effects into my game easy, and I had great fun with it.
- What tasks didn’t I complete from this week?
I’ve got everything completed!
